
WWW.SKULLFORGESCENICS.ETSY.COM

Showing posts with label Graveyard. Show all posts
Showing posts with label Graveyard. Show all posts
Wednesday, September 16, 2020


Friday, March 30, 2018
New Ruined Crypt and Painting Tutorial

The new ruined crypt is available from Skull Forge Scenics! This piece is perfect for enhancing the base of a large monster, or for representing the gravesites in a Legions of Nagash army. Below is a tutorial for painting the crypt.

Monday, October 30, 2017
Skull Forge Scenics Halloween Sale
To celebrate Halloween, I'm having a sale in my Skull Forge Scenics shop– A perfect opportunity to pick up some graveyard scenery for your battlefield! I've added a new item in the shop as well–a handy combat gauge.


Tuesday, April 18, 2017
Wrath of Kings Game Board
CMON commissioned me to make a few tables for them. If you're following Wrath of Kings on Facebook, you'll have seen some shots of this bard I made for them. The setting is the foothills outside a ruined fortress. They asked me to use some of 4Ground's MDF scenery for the woodsman's house and the ruins themselves.

Wednesday, January 25, 2017
Skull Forge Scenics Update
Since I began my scenery company last year, things have been growing slowly but steadily. My resolution for this year is to produce at least one new item every month, and continue to branch out beyond the "Land of the Dead" range. I always post updates about new kits on my Skull Forge Scenics Facebook page, so be sure to like and follow the page so you don't miss any updates.
I've got a new product for sale in the shop. A pack of tree stumps that are perfect for adding detail to your Sylvaneth or Circle Orboros bases and scenery. They would be great for building cut-down forests The set comes with six tree stumps and two smaller logs, available at: skullforgescenics.etsy.com

Monday, October 31, 2016
Terrain Tutorial: Graveyard Hills
For Halloween this year, I've put together a tutorial about building some graveyard-themed hills and crypts. The scenery also incorporates some of my Skull Forge Scenics walls and tombstones, which add a lot of detail without having to do a lot of extra work.

Friday, September 23, 2016
Skull Forge Scenics: Graveyard Entrance
My newest product from Skull Forge Scenics is now for sale in my online shop.


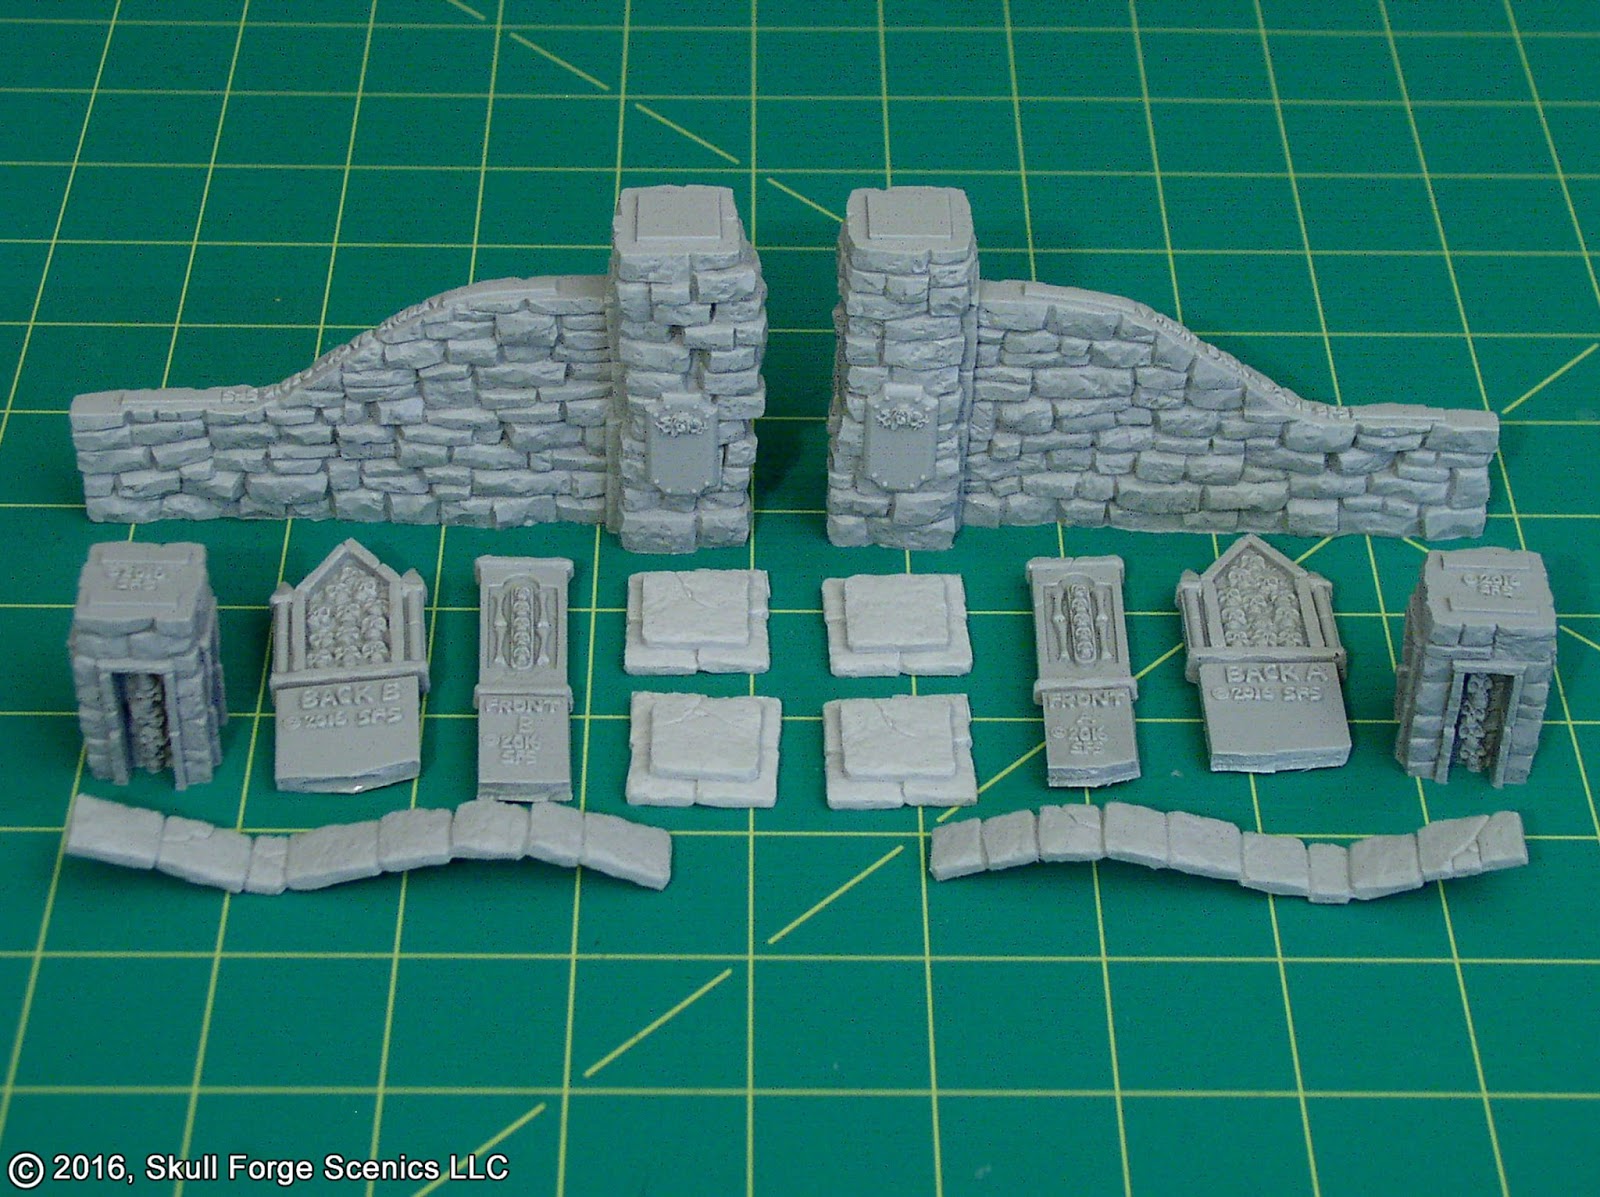
The graveyard entrance connects with my other wall sections to allow more variety in your terrain setup. Here's a full display with all the walls, shrines, and tombstones that are currently available:

When designing the entrance walls, I made the decorative embellishments separate parts for anyone who doesn't like skulls all over everything, so the walls can be used for "normal" settings as well as gothic undead landscapes.


Sculpting the Walls
Some people have asked me about the materials I'm sculpting with, so here's a look behind the scenes. The stones are sculpted with Aves® Apoxie Sculpt. It's a two-part epoxy putty that cures rock-hard.

Any deep gaps between the stones are filled with Brown Stuff modeling putty.

All of the graveyard walls are designed to look old and weathered, with stones that are shifting out of place. The stones on one tower are cracked and separating.


The top stones are sculpted using layered PVC card and styrene plastic. The PVC is soft enough to press rough stone texture into it and "draw" cracks with a sharp tool.

Each of the embellishments are also made with a combination of PVC and styrene, with sculpted details and bits from my tombstone set and skull pack.

To fit them on the walls, I covered the backs with putty and pressed them into the stone texture. The result is a perfect fit that maintains the stone texture underneath, allowing the wall to be built with or without the embellishments.

Check out everything I have in my Skull Forge Scenics shop, which now ships worldwide.
www.skullforgescenics.etsy.com
'Til next time!
Wednesday, August 3, 2016
Skull Forge Scenics: Ruined Graveyard Walls
Ruined graveyard walls are available now in my Skull Forge Scenics shop: https://www.etsy.com/shop/skullforgescenics Pick up your set today!
Earlier in the week I painted up some of the ruins for my personal graveyard collection:


The ruined walls fit perfectly with my other graveyard wall sets, so you can put together different configurations of ruined and intact walls.


I'm currently working on an entryway for the walls; parts that will line up to form a gateway. Watch for that in the coming weeks.
In other hobby news, I finally got my hands on the General's Handbook for Age of Sigmar. I've only taken a brief glance through it, but the book looks like it has a lot of great information for narrative scenarios, campaigns, and warband leagues, as well as the matched play point system. There's a really great map-themed campaign in there as well. I'll post a more thorough review of the book once I've looked it over in more detail.
'Til next time!
Monday, July 25, 2016
New Resin Terrain and More Dreadfleet
Skull Forge Scenics: Ruined Graveyard Walls
I've added a new set to the Skull Forge Scenics online store:

These are ruined walls, designed in the same style as my other graveyard walls. The set includes three crumbling wall sections and two wall posts.

The posts work as corners or ends that the walls insert into.


I hope to have my own set painted soon, and I'll definitely post some pictures.

Dreadfleet Final Assembly
The end is finally in sight for this project. Painting is underway on the three sea monsters...

And with only four ships remaining, I decided to assemble the hulls and get them primed and ready to go. The Heldenhammer and Flaming Scimitar went together very easily. I was concerned about getting at the detail on the Heldenhammer, but it's really accessible as a single part. For the Scimitar, I left the tower with the djinn and efreet separate. It will be primed white for the brighter colors.

The Shadewraith was kept in a few parts so I can paint the insides and outsides of the hull halves, since the interior will be visible through the ship's skeletal framework. These are getting primed grey with a white zenith spray.

And then we come to the Bloody Reaver. I'm saving the most complicated ship for last, and I don't know how this is going to work. The join between the ship halves will need to be puttied...

...but there's a sail that needs to be inserted in between the two halves before they are glued together, meaning that the parts should be painted separately.

The outer layer of the hull has detail in the inside that will be difficult to reach once assembled.

But the outer half also includes a portion of the castle that will need to be puttied, so it's another situation of pieces that need to be painted separately. I might be able to separate the castle portion and attach it to the center, but I still don't know what to do with that front sail.

And to top it off, the masts all have ball-and-socket attachment points that need to be inserted before the halves are glued together and no locking key to make sure they're oriented in the right direction.

It may be an assembly nightmare, but this ship is huge– almost five inches long– and I can't wait to see it painted.

'Til next time!
Wednesday, June 1, 2016
Skull Forge Scenics Graveyard Walls
The new resin graveyard wall sets are finished and up are up for sale in my store:
https://www.etsy.com/shop/skullforgescenics
I painted up a set so I could show off some better detail pics. I'll also discuss some conversion work below, using models to add statues to the tops of the wall posts.
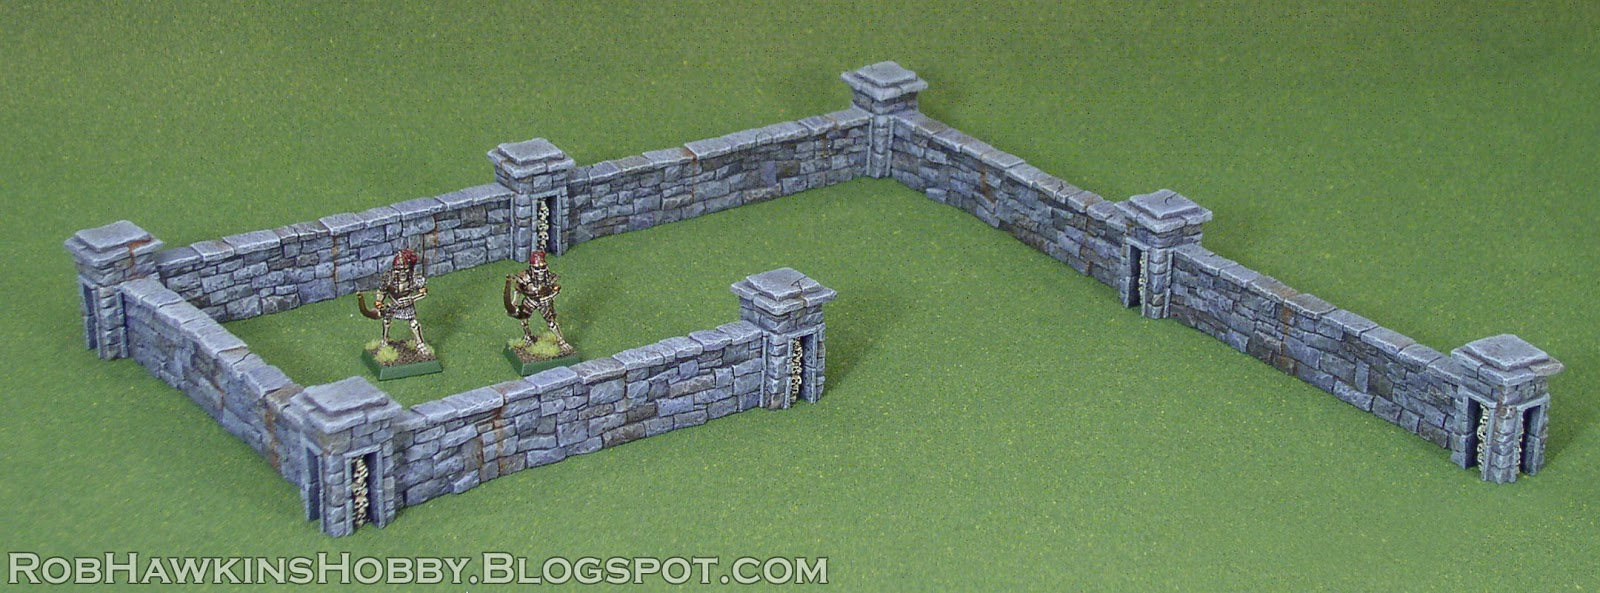

The walls themselves are 5-inches long. I designed them with game play in mind; many games establish linear obstacles in 6-inch increments, so each section of wall comes to about six inches with the end posts added.

The tops of the walls and posts are separate parts so there's a little variety possible by mixing and matching them. It also allowed me to ensure the overhanging tops would be bubble free, and I could make different designs farther down the road that would use the same wall base.


There are three unique sculpts of the posts and the walls.


My favorite bit is how the walls and posts work together. One of my pet peeves has always been wall sets that don't properly match up at the corners– Just two walls or fences that happen to terminate in the same spot, but don't really connect. I wanted my walls to interlock using the posts, so they could form straight joins or 90-degree corners that would have a seamless join. The walls insert into the skull columns and the top stones on the walls butt up to the framing stones around the skulls.


Converting Statues
The center stone atop the post is just about 20mm square, so it can accommodate most man-sized 28-35mm models. I have a cache of old metal tomb guards from Hero Quest that I've been hanging onto for just such an occasion.

To add a "statue" just remove the model's base tab and add a pin. (Brass rod or a length of paperclip will do.) Use a pin vise to drill a hole in the center of the wall post (or wherever the feet will be if the model you're using for a statue doesn't have a single block of skirt at its bottom).

Attach the model to a stick, cork, or spare base for painting. Prime it with black spray primer, and then give it a thorough drybrush of GW Hashut Copper.

Next, mix up a wash of P3 Arcane Blue and Thrall Flesh to create a green patina and wash this over the entire model. If the recesses are too light, you can apply a wash of GW Coelia Greenshade in some of the deeper areas. Once the wash is completely dry, drybrush a little more copper on the highest points of the model.

Finally, pin the model in place atop its perch.

Perfect for a stand-alone monument or as the entry posts forming an opening in the wall.


'Til next time!
Subscribe to:
Posts (Atom)