In addition to Plague Priest Scrabis-Tocsinous, I've put the lid on a few more of the projects in my Skaven queue:
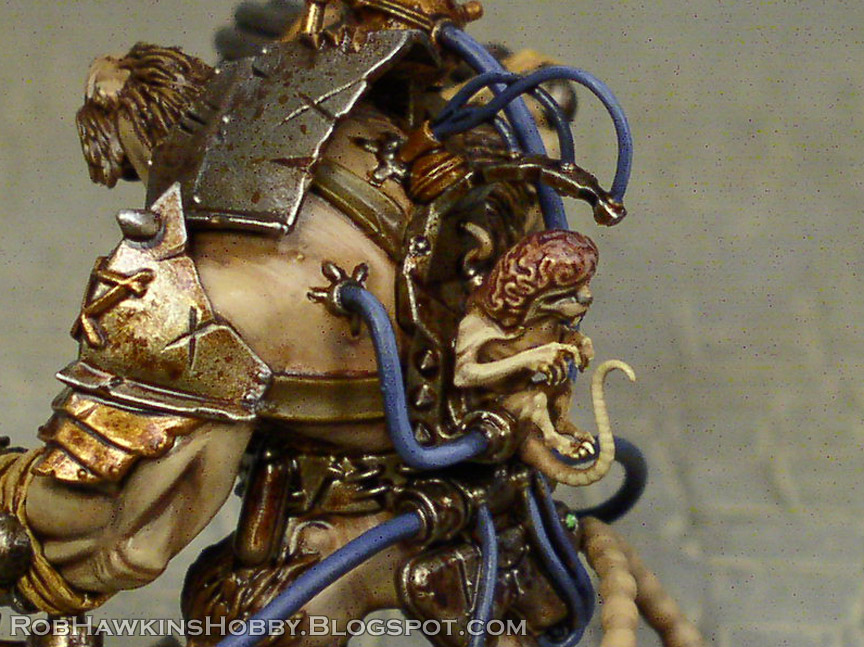
The first batch of Skaven Stormfiends is finished! These are the ones converted with rattling cannons. If you'd like to see the conversion process, check out these previous posts: Link
The two armored models are designed to have their weapons swapped for doom-flayer gauntlets. I'll have more on that when I finish the other armored Stormfiends.
The other models have the "core" rattling cannon arms and can accommodate a variety of weapons.
The models have the option of wielding grinderfists, which allow the unit to tunnel onto the battlefield.
The other weapons and the poses with melee gauntlets and warpstone-laced armor are up next in my painting queue, once I get through the rest of my work, of course.
'Til next time!
Justin, Jason, and I are still plugging away at our campaign, but it's slow going. As you can see from my previous posts, I've been taking a big bite out of my Skaven project queue. I finished a second Doom-flayer, two of these should do nicely against the Orc hordes.


Now that the Plague Monks are finally ready, I also painted the remaining parts of the Screaming Bell/ Plague Furnace kit. The contraption can be fielded as either the furnace or the bell. I'm really happy with the smoke plume from the giant censor. I was a little trepidatious about the painting but it worked out rather well with a white undercoat, washed with light green up to the darker green at the warpstone core. The metal bands were painted over top of the green. I'll see if I can pull off a similar technique when I get around to painting my ethereal undead units.


The only models remaining in my Skaven painting queue are the Stormfiends. Here and there I've been working on little bits of them like the gauntlets and the grinderfist tunnel markers.


Once the the Stormfiends emerge, I'll be finished with the Skaven for a while. I've earmarked most of the models from the Island of Blood starter set as Skavenslaves, and I still have a box of Plague Monks that I need to build as Plague Censor Bearers, but they can wait. I'll jump back to my Vampire Counts and finish off Nagash and all the other projects that have been piling up. The next edition of Warhammer is also rumored to be coming in June (only a month away, and there's still not a single picture or official announcement about it), so we'll see how that shapes up.
'Til next time!
With the conversion work on my Stormfiends nearly complete, all that remained was to scratch build a few rattling cannons so I could equip four of my six Stormfiends with the deadly blasters.
Body Assembly
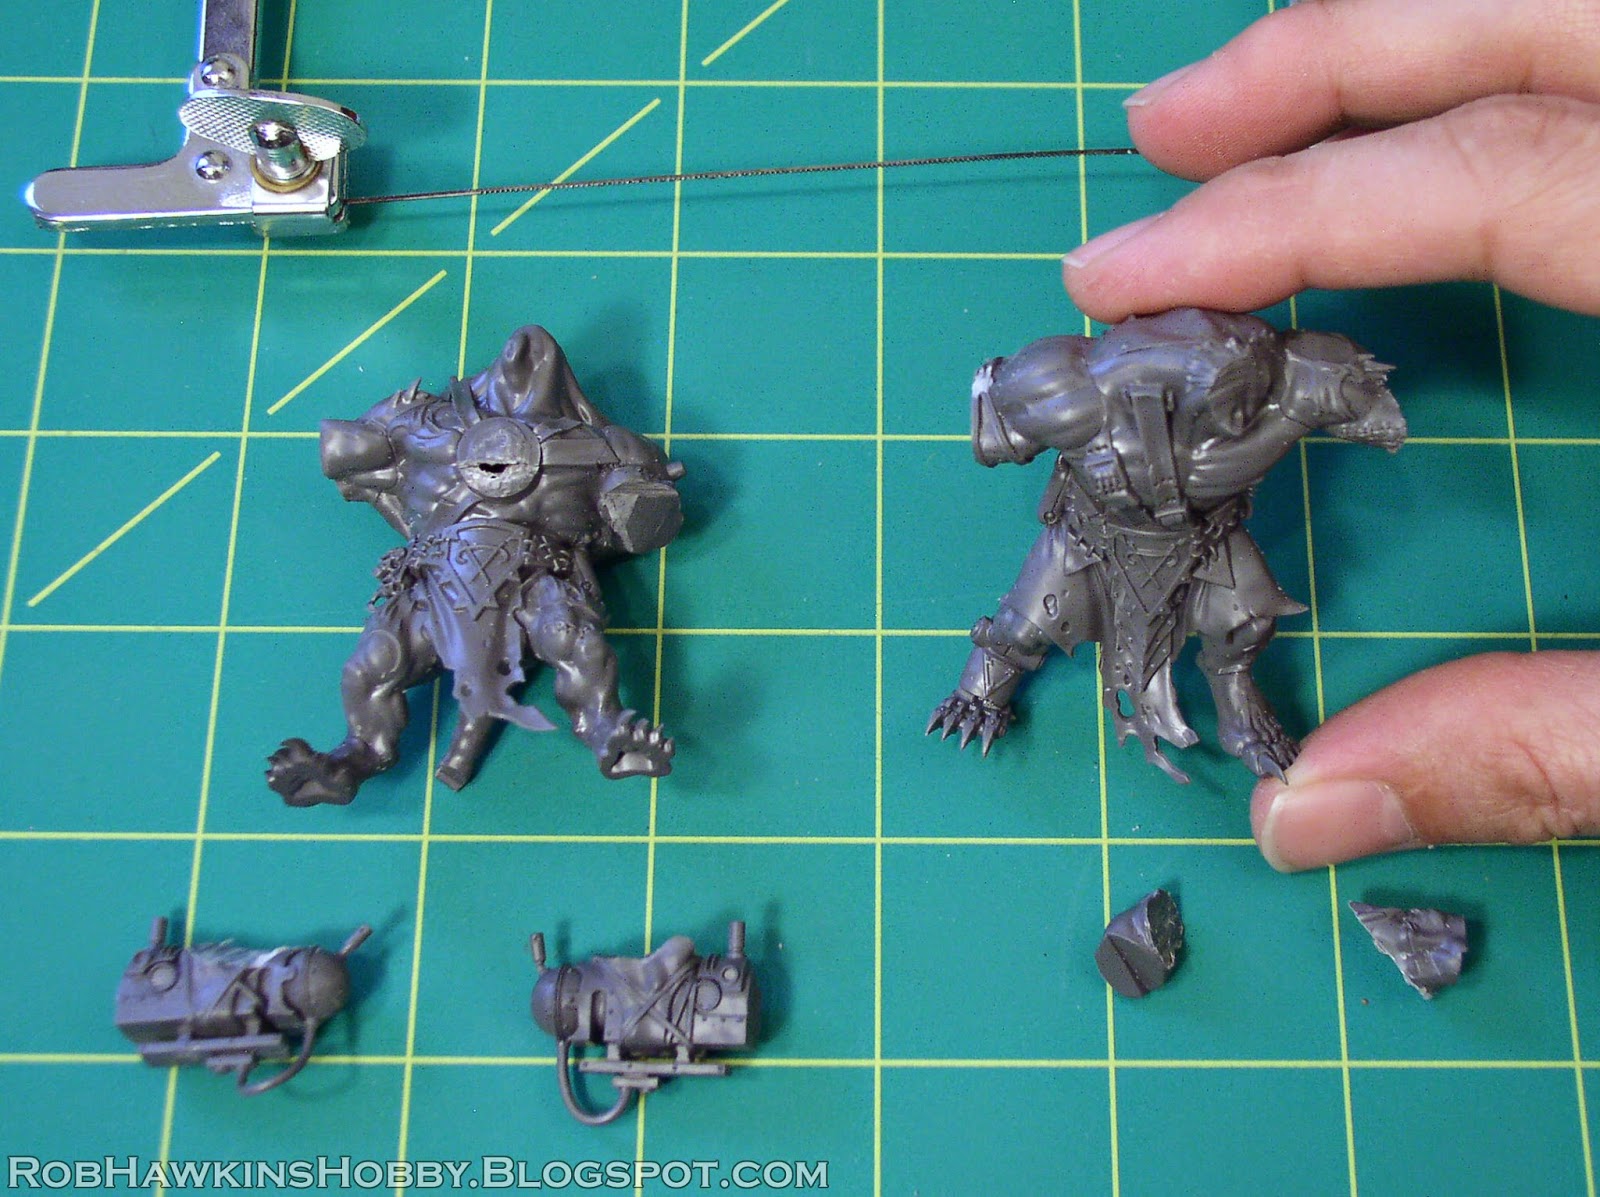
In the previous posts I mentioned how I cut the arms apart to place the "stock" rattling cannon mounts on the unarmored pose.
They were simply sawed apart and glued in place on the other model.
With some quick putty work, I added bandages to cover the joins where the cannons were grafted to the Stormfiend's arms and to patch up the fur. I also sculpted the missing shoulder strap in the area where the shoulder pad would have been.
Next the heads were added. To add variety to the helmets, I used one of the Skaven icons from the windlauncher to to replace the spikes on one head, and removed the hanging tassels from the other one.
Attaching the Grinderfists
These were straightforward; magnets were added so the grinderfists could be removed and swapped for the other weapon options.
Since I wasn't using any of the chest mounts, I put the the two small grinders on flying stands with some putty to build up the earth piled around around them.
These would be my tunnel markers. Stormfiends with grinderfists can enter the battle through tunnels, and that is represented by a marker, placed when the army deploys. When they arrive, the marker scatters and the Stormfiends emerge at its final location.
Attaching the Weapon Hoses
The rattling cannons were assembled and magnetized like the other weapons.
This pose would also accommodate the warpfire projectors.
Since the hoses attach to the cannon mounts themselves, I didn't need to bother with making cables for each weapon.
But, since these are from the "rattling cannon" pose and are getting attached to the "windlauncher" pose, the hoses would need to be modified to reach their new attachment points. I cut them apart and pinned the pieces back together so they could be trimmed, twisted, and attached as necessary.
I added connecting collars using styrene tubing.
The hoses were then glued in place, and fit neatly into the collars.
Here are the final models, with their gauges, valve handles, and brain rats in place. They just need to go on their bases and they would be ready for priming.
Scratch-Building More Rattling Cannons
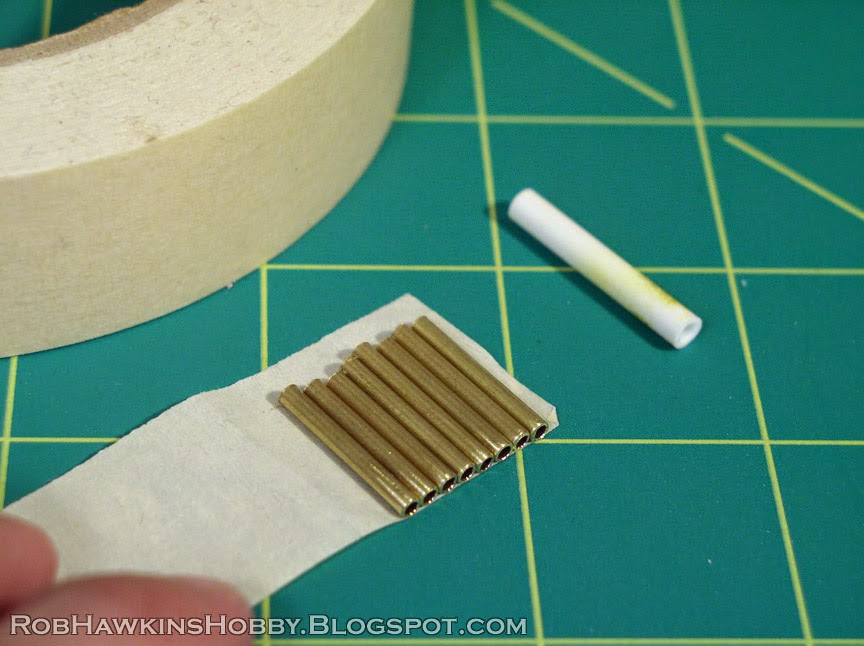
I had two more models that needed rattling cannons, so I needed to build them from scratch. I found some brass tube that was the same diameter as the plastic cannons. The Styrene tube matches the central core.
To start, I cut the brass tube into sections matching the length of the cannon.
Each gun has eight barrels, so I lined up the pieces of tube on a piece of masking tape. The tape kept the tubes from rolling around, and allowed me to keep the ends flush as I attached them to the core.
I wrapped the tape around the styrene core, and made sure the tubes were straight, and flush on the front end.
A few drops of Thin Zap-A-Gap were applied to affix the brass tubes to the styrene core. I took care not to let it run out to the tape.
Then, the tape was peeled away and I had a nice set of gattling barrels.
I added a flange of putty around the back end and, once that was cured, began adding the ring around the barrels. A thin strip of styrene was first glued around the barrels, then a square rod of styrene was glued over top of it. (When working with the thin styrene pieces, I use regular super glue rather than the Thin Zap-A-Gap, because the thin zap makes the styrene brittle, causing it to crack.)
For the bottom rail, I used a thicker square rod. It was trimmed at the end to sit flush with the beveled putty. I cut a space out of the ring and glued the rail in place.
A thin disk of plastic was glued to the front, along with a vertical piece of rod. The rod was then shaved down to create the swooping point.
The final touch was to add a few rivets around the ring and drill some rivet holes in the putty flange.
The cannon housing is made from parts scrounged from my 40K parts bin. I used Chaos vehicle flamers and pieces of the rocket launcher mount. There's a rod taken from a Warmaster Screaming Bell in there as well. These were magnetized to fit the Stormfiend's arms and I sculpted more bandages over the graft point.
The last bit was to glue the barrels in place and add a cable connecting to the power pack.
The finished Srormfiends with Rattling Cannons, ready for painting:
Let's see how Waaagh Blackfang likes these apples!
'Til next time!


 Part 1: The Stormfiends Have Arrived– A review of the model kits and planning out the conversions.
 Part 2: Armoring Up– Sculpting the fur and arms, converting the armor and magnetizing it.
 Part 3: Making More Gauntlets– Magnetizing the weapon options and scratch building more doom-flayer gauntlets.