
WWW.SKULLFORGESCENICS.ETSY.COM

Tuesday, September 27, 2016
Dreadfleet: Shadewtaith and the Flaming Scimitar


Only the two command ships remain, the Heldenhammer and Bloody Reaver, along with the smaller auxiliary boats.
Friday, September 23, 2016
Skull Forge Scenics: Graveyard Entrance
My newest product from Skull Forge Scenics is now for sale in my online shop.


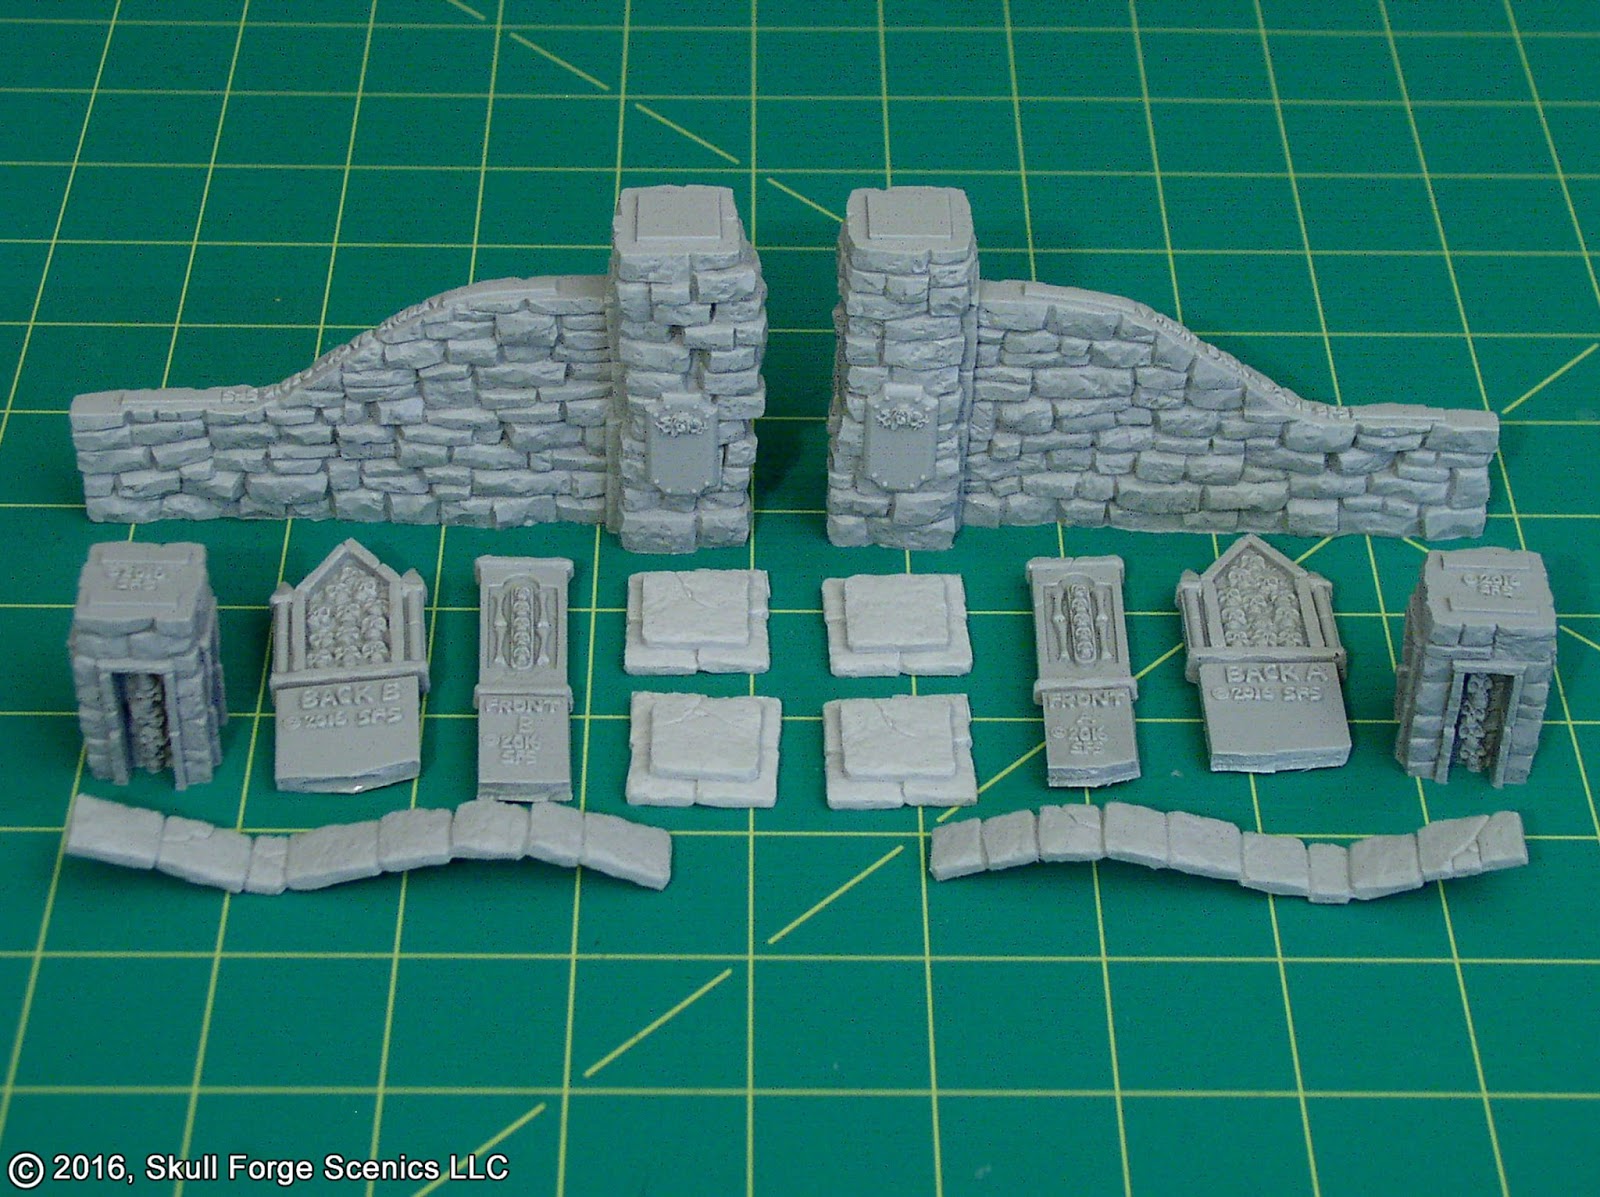
The graveyard entrance connects with my other wall sections to allow more variety in your terrain setup. Here's a full display with all the walls, shrines, and tombstones that are currently available:

When designing the entrance walls, I made the decorative embellishments separate parts for anyone who doesn't like skulls all over everything, so the walls can be used for "normal" settings as well as gothic undead landscapes.


Sculpting the Walls
Some people have asked me about the materials I'm sculpting with, so here's a look behind the scenes. The stones are sculpted with Aves® Apoxie Sculpt. It's a two-part epoxy putty that cures rock-hard.

Any deep gaps between the stones are filled with Brown Stuff modeling putty.

All of the graveyard walls are designed to look old and weathered, with stones that are shifting out of place. The stones on one tower are cracked and separating.


The top stones are sculpted using layered PVC card and styrene plastic. The PVC is soft enough to press rough stone texture into it and "draw" cracks with a sharp tool.

Each of the embellishments are also made with a combination of PVC and styrene, with sculpted details and bits from my tombstone set and skull pack.

To fit them on the walls, I covered the backs with putty and pressed them into the stone texture. The result is a perfect fit that maintains the stone texture underneath, allowing the wall to be built with or without the embellishments.

Check out everything I have in my Skull Forge Scenics shop, which now ships worldwide.
www.skullforgescenics.etsy.com
'Til next time!
Tuesday, September 20, 2016
Runewars Terrain, Part 4: Painting and the Finished Table
Here we are at the final installment of my project log covering the construction of the table I built for Fantasy Flight's Runewars miniatures game. To see the game, click here.
If you want to view the previous posts in this series, you can use these links:
Runewars Terrain, Part 1: Swamp Boards
Terrain Tutorial: Swamp Grass
Runewars Terrain, Part 2: Castle Ruins
Runewars Terrain, Part 3: Ruins and Arches
Okay– Last time, I had finished up the construction on the large component with the bridge and archways. I undercoated all of the stonework on the ruins with black latex paint, and then I sprayed them with greys to provide a solid base to drybrush over. I used a dark grey spray everywhere, and then used a lighter grey for a "zenith" highlight, basically spraying the piece from above to dust the tops and raised areas with the lighter color. The bottom edges of the stones remained dark, creating natural highlight and shaded areas.

When the spraying was finished, I painted the ground with a basecoat of dark brown latex paint to help seal the sand and provide the base color.

Then, I drybrushed the ground with Formula P3 colors Gun Corpse Brown, Moldy Ochre, and Menoth White Base (same as for the swamp boards).

The stonework was painted by drybrushing it with Formula P3 Greatcoat grey and patchy areas of Bastion Brey. A little Menoth White Base was mixed in with the grey for a slightly lighter drybrushing, and finally some white was added to the mix for the brightest highlights.

(I'm cheating the timeline a little because, as you can see, the table base was actually painted before I had even finished construction on the large ruin and arches.)

Weathering was added to the stonework by washing a bit of P3 Traitor Green around the bottom, and painting rust drips with P3 Bloodstone.

When the painting was finished, I glued flock and static grass onto the ground and on the tops of the ruined walkways. As with the swamp trees, hanging moss was made by dipping cotton balls in an thinned mix of P3 Traitor Green paint and wood glue. The moss was draped over the edges of the platforms, and under the archways.

Once the static grass and moss had set, and the excess dumped off, tall swamp grass and Envirotex Lite water effects were added. To see how this was done, check out my swamp grass tutorial here.

Here, you can see the finished board with its edges painted black.


All that remained was to finish painting the large component, and then attach it and the tower to the board along with their own bits of hanging moss and static grass.

Once completed, the centerpiece was ready to go! (These shots are taken from the second table I built, so there are a few subtle differences in the architecture.)


The small modular ruins got the same treatment as the larger piece.


The entire set can be fit together with the ruins in the middle with a small 3' x 3' demo board on either side...

...Or as a large 3' x 6' battlefield with the display ruins on either end.

I hope you enjoyed following along with this project. Here are the links again to the other parts:
Runewars Terrain, Part 1: Swamp Boards
Terrain Tutorial: Swamp Grass
Runewars Terrain, Part 2: Castle Ruins
Runewars Terrain, Part 3: Ruins and Arches
'Til next time!
Subscribe to:
Posts (Atom)