I've been adding to the Clan Pestilens contingent of my Skaven army, and the bulk of it comes in the form of plague monks. Two 40-man units should be sufficient. That's four 20-man boxes, and a fifth box of 20 can be combined with all of the spare censor flails to make 20 plague censor bearers. But they're waaay down on my to-do list.
This post, in two parts, will show the process I used for cranking out 80 models.
Assembly
I didn't do anything fancy when building the models– Just straight assembly, no conversions other than the command models. I built half of the models with staff and sword, and the other half with two swords so each unit would be visually distinct. But I can still combine them into a single mega-horde if I need to.
To speed up the assembly line painting, the models were glued on strips of foam core. Each strip has one body type so, as I go down the line, I can hit all the same colors and details where the tails and belts are concerned. The arms and heads are varied, but the staffs and swords are grouped together.
Building the Bases
I used as many regimental bases as I could, and planned out the units as 10-man wide horde formations.
The double bases were made by gluing two 20mm bases on a strip of thin styrene card and trimming around the edge.
Now for the speed basing– I attached the bases to a board with double-sided tape.
They were painted with wood glue, and covered with fine ballast.
Once the glue dried, I added a few dabs of thin Zap-A-Gap to seal down the sand.
Note: Normally, I just super glue the sand right to the base. Super glue ensures that the sand will stay on permanently; sand attached with white or wood glue tends to scrape off over time. But applying a huge swath of super glue agitates my sinuses. The wood glue does the job of holding the sand and then a couple drops of thin Zap will spread over the sand and add more permanence.
Painting the Bases
I sprayed the bases with black primer and then gave them a dusting of Model Masters Light Earth spray.
Over this, I drybrushed some P3 Gun Corps Brown and then GW Screaming Skull. Using a 1-inch brush, I was able to paint them in one large swath.
Finally, the edges of the bases were painted with GW Castellan Green.
Once all the paint was set, I glued some static grass to the tops.
That's 80 finished bases. Painting them in this way was much faster than trying to drybrush around the feet of all the plague monks.
All the monks are ready to go, I'll show you how I speed painted them in part two.
'Til next time!
It's been a while since I painted any undead models, so I took a moment to finish Selketta. Last year I showed the process for which I converted the model for use in my Undead Legions army. You can see that post here.
Painting the model was straightforward– The red and gold solor scheme of my Tomb Kings force is carried through on the miniature, with a black, fur-topped cloak to cover him up as he travels the lands of the Vampire Counts.
That's two of the projects in my Undead Legions queue out of the way! (Skeleton archers being the first.) One of these days I'll finish Nagash and convert my giant into a Necro Colossus.
'Til next time!
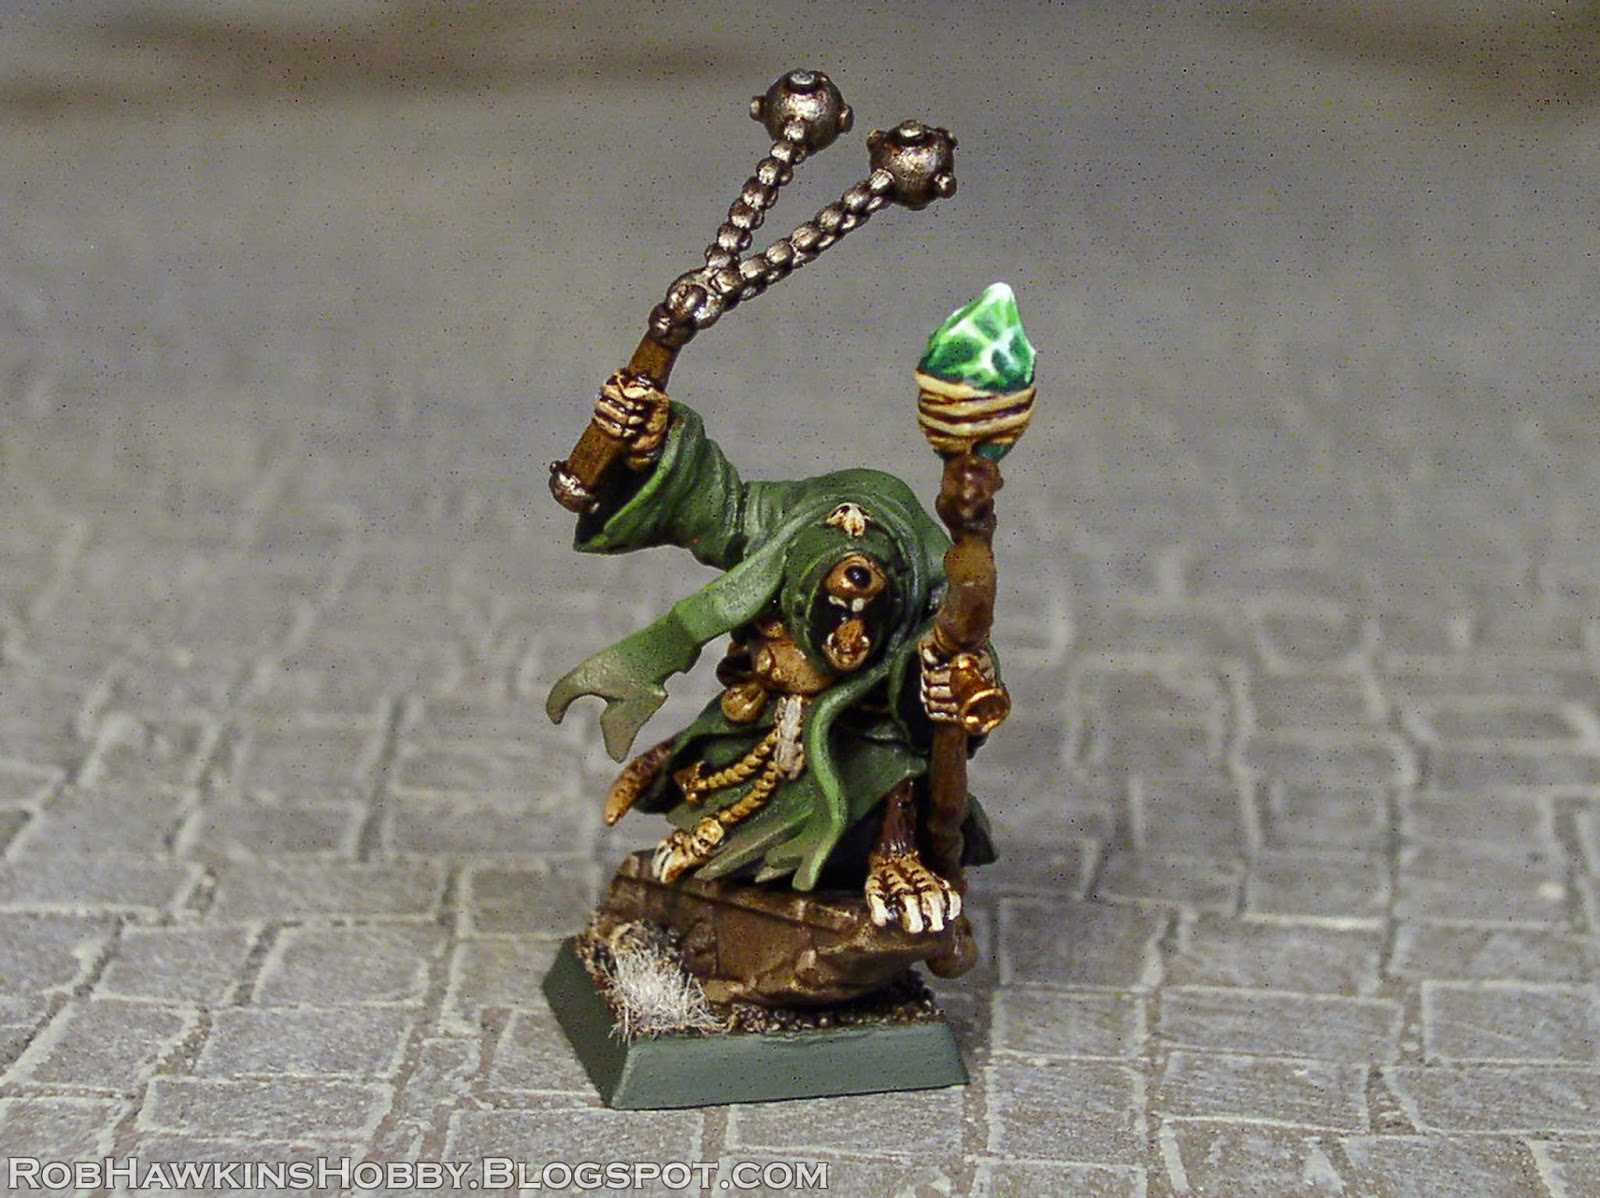
As my Skaven legion expands its Under-Empire, Clan Skryre and Clan Pestilens have joined forces. To lead the sea of plague monks that has been steadily growing around Warlord Skabsis, I've put together two plague priests: Skrolulous and Snagglecyst.
Plague Priest Skrolulous is converted from the classic screaming bell grey seer. The head and hands were removed, and replaces with parts from the plastic plague monk kit. I gave Scrolulous the warpstone-topped staff from the plague furnace priest and mounted him atop the rock from the Island of Blood Skaven warlord.
Plague Priest Snagglecyst is from the plague furnace. The only real conversion work on him is the flail, which is constructed out of flail parts taken from old plastic skeleton kit and chains from some spare plague monk banner tops. I decided to arm both of the priests with flails for that extra punch when they find themselves in combat.
'Til next time!
One of the projects I've completed recently is a war litter for my Skaven Warlord:
The litter is carried by clanrats from the Island of Blood set. They are holding a rack of spears, upon which the base of the platform is mounted. The main platform is constructed from basswood strips and covered with metal plates and shields. The back of the litter is part of an Empire cannon, topped with the Island of Blood warlord banners.
It was assembled in true Skaven fashion, because the entire construction came from spare parts scavenged from by parts bin.
The floor of the war litter is cut out so the model can stand in the recess. This allows me to use it for either of my two warlord models. (Of course, Lords Skreekits and Skabsis will now have to argue over which one of them gets to be carried into battle like a king!)
'Til next time!
One of the Skaven weapon teams is the dreaded doom-flayer, a cross between a push lawnmower and a miniature doom wheel. I've overlooked this contraption until recently, mainly because the only official version available is in Finecast, and metal ones are going for outrageous rates on the secondary market.
Without a model to field, I had largely ignored the rules for the machine. Looking over the stats for the doom-flayer team, I realized what a mistake it has been to neglect it for so long. The weapon team is only 55 points (the cheapest available) same as a rattling gun team, and can inflict a comparable amount of hits per attack. Furthermore, since it's a melee-oriented weapon, when the doom-flayer malfunctions (as Skaven weaponry is prone to do) it will be in combat, so it can still inflict a fair amount of damage on the enemy. Ranged weapon teams, on the other hand, are usually on their own when they misfire or run into friendly units before exploding spectacularly.

With this new-found interest in the doom-flayer, I decided to scratch build my own. After some searching, I found some items that I could use to make the chassis of the flayer: Round wooden discs, and a Steampunk medallion with a gear motif. One of the benefits of the current steampunk craze is that there are tons of accessories and gear parts to be found at craft stores!
The medallions were about $6.00 each, and I bought one with a half-off coupon. The discs were about $4.00 so I was able to get everything for under thirteen dollars. Those items, combined with spare parts, some plastic card, and modeling putty would make a suitable doom-flayer.
The gears were super glued to the large discs and then the excess wood on the disc was trimmed away. These parts formed the inside of the wheel halves.
Next I made the wheel's outer rings. This plastic wagon wheel was the prefect diameter, so I used it as the frame on which to build the ring. I cut some plastic strips and curled them to they would easily wrap around the edge of the wheel.
I wrapped two layers, gluing each layer together, but not to the wheel itself. Using a double layer gave the ring more stability and prevented it from flexing or losing its shape.
To make some gear sprockets around the inside of the ring, I used plastic card that's smooth on one side and ridged on the other. This was cut into thin strips, which were then glued around the inside of the ring.
The rings were then glued over top o the interior wheel section to create the recessed clockworks of the doom-flayer.
The black plastic rings were shaved down with a hobby knife to create a tapered edge.
Over this, I sculpted the metal plates with two-part brown stuff modeling putty. The basic shape was sculpted and smoothed first and then I pressed in lines with my sculpting tool to create the separations between the plates. I also added cuts, dents and some scratched Skaven runes.
The rivets were made by pressing the tip of a mechanical pencil with the lead removed. The putty was allowed to cure overnight.
The blades on the outside of the wheel were made from the excess parts I had left over from my Stormfiend conversions. These were drilled out so they could be pinned in place on a length of thick floral wire. I also added a Skaven shield icon as the blades' mount.
The gear medallion had a divot marking its center, so I drilled through this with my pin vise.
One of the small wooden discs was added in the center as a spacer between the two wheels, and the halves were glued together on the wire.
The blades were attached on the outside.
The small metal wheel is from the classic warp lightning cannon. I cut out a section so it fit around the central disc and super glued it in place.
To make the spikes on the wheel, I cut the spikes from some spare Warmachine Protectorate heavy warjack maces. Heating the parts under a heat lamp softened the PVC plastic and made cutting it much easier.
These spikes, and a few others I had laying around were pinned onto the doom-flayer.
I used a section of a plastic 40K Ork wheel to make the fender, and then wrapped a strip of plastic around the central wooden disc.
The Skaven pushing the doom-flayer is one of the crew from the classic warp lightning cannon. He's got a handle in his hands already. I added a length of wire along the fender and drilled a hole in the Skaven's handle so it fit over the wire. Once I had everything spaced correctly, I glued the flayer in place and added sand to the base. I decided to keep the crew separate for painting. It would make it easier to get at all the details, and one of them was already done.
To match the design of the actual doom-flayer model, I attached a pair of spear blades to the front of the wheel. A piece of plastic tube was fit over the spear shaft, and each one was pinned in place.
The second crewman was taken from the rattling cannon weapon team. I bent his legs so he could sit on the other rat's shoulders and pinned him in place. I further tweaked the model by modifying his right hand to work a second crank and replacing his tail with a plastic Skaven tail.
The final touch was to add the connection between the crewman's pedal crank and the machine itself. This was accomplished with some plastic Warp Lightning pieces, plastic card and a little bit cut from a Space Marine jump pack.
With the construction finished, it was time to start painting! Here is the finished result:
The doom-flayer has already seen action in one of my campaign games, and it performed exceptionally! I rolled maximum impact hits when charging and scored a ton of attacks in the following melee, which directly helped turn the tide of battle. But the Skaven are notorious for their unmaintained, malfunctioning equipment, so I'm certain that's all the luck I can expect and the machine will explode in every battle from here on out!
'Til next time!