Paintin' Zombies!
Here's a look at the first ten zombies of my (slowly) growing horde, and how I painted them:
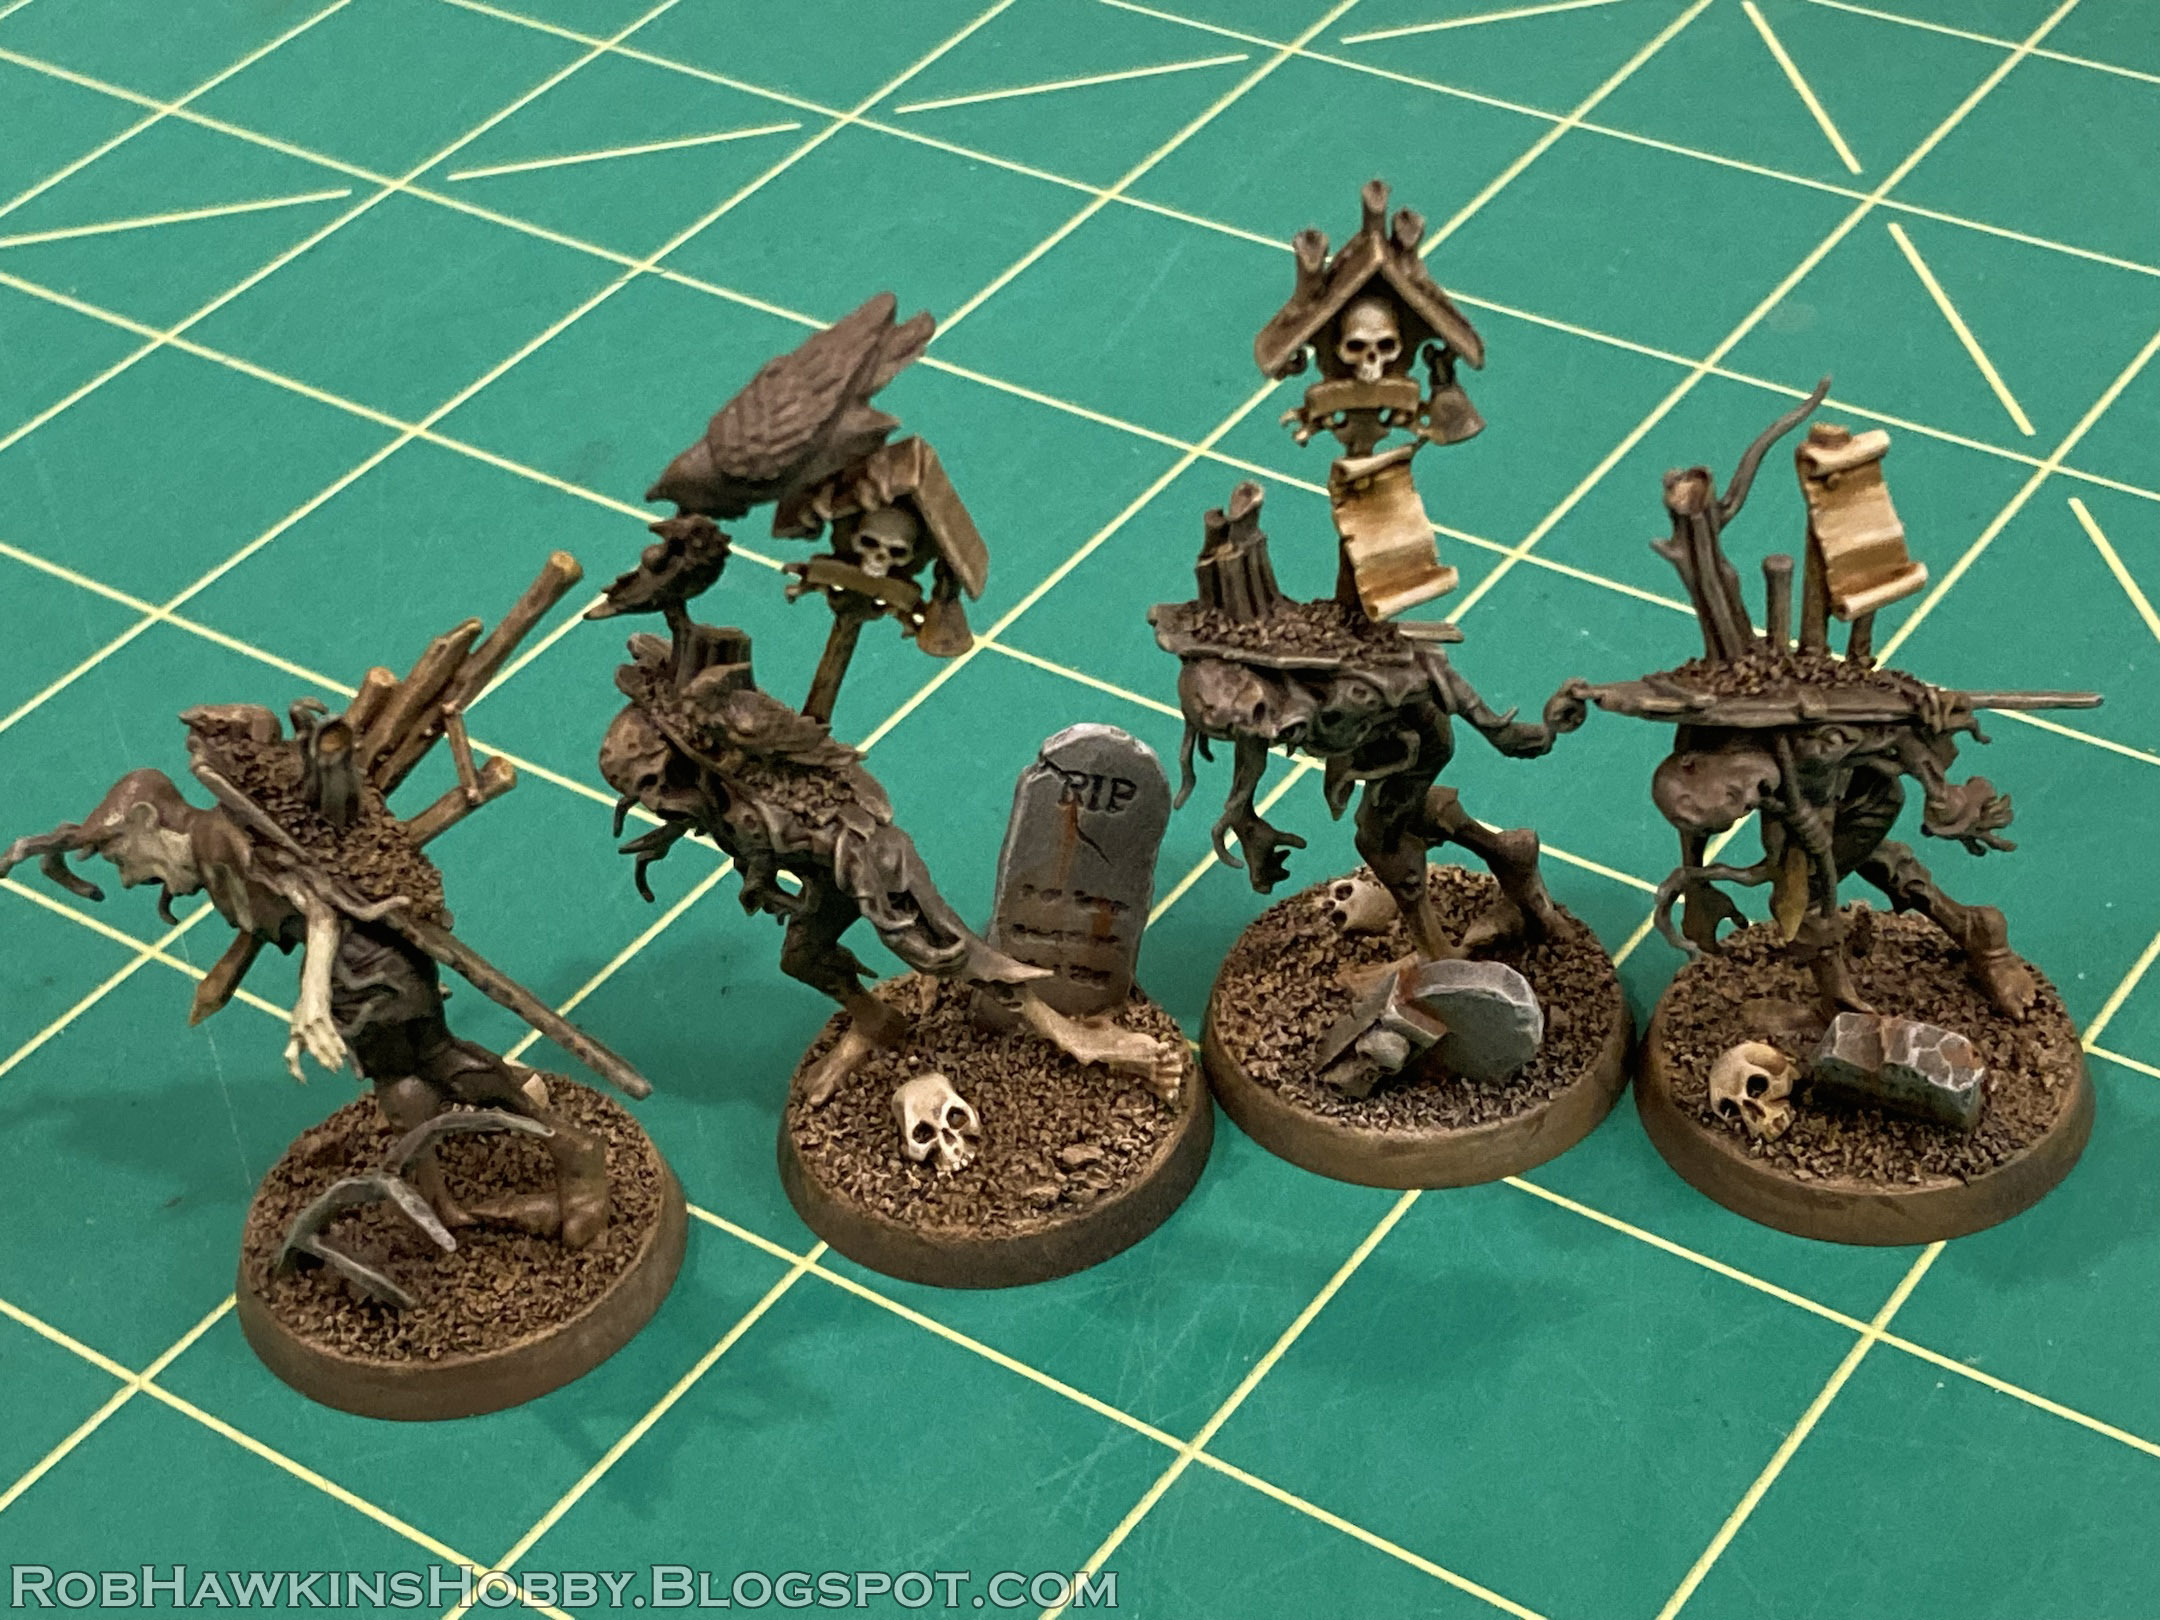
The Cursed City zombies are simply beautiful sculpts, and the way the two halves can mix-and-match to get ten unique poses out of the single set is quite clever. I took it a step further by adding some extra roots and mixing in a few other parts to replace the two models that I had used in other projects and to add a little more variety.
All the extra detail makes them take a little longer to paint, but the process wasn't more difficult, per se, it just had a few more steps, and required a little more care when painting around the roots. The extra work was definitely worth it in the end, and I kept things as simple as I could, mainly by letting Contrast paints do most of the work on the skin, and using a lot of drybrushing and washes. I discuss the painting in more detail below...
Painting the Zombies
As part of my #HobbyStreak last year, I spent between half an hour to an hour each day painting these ten zombies. This allowed me to break the project into manageable steps, and make consistent progress while painting them bit by bit over the course of a few weeks.
After assembly, including the basing material, the models were primed black and given a zenithal spray of brown (Tamiya AS-22 Dark Earth). I use a mix of paints from different ranges, so I identify them the first time they are mentioned:
Cit= Citadel
AP= Army Painter
P3= Formula P3
Val= Vallejo
Day 1, Time: 1 hour– The ground (including the dirt on their coffin lids) was drybrushed with P3 Umbral Umber, Cit XV-88 Brown, and AP Skeleton Bone. The skulls were then basecoated with Skeleton Bone, Washed with Skeleton Horde Contrast and left to dry.
Day 2, Time: 1/2 hour– I gave the skulls a quick drybrush of Skeleton Bone and AP Brainmatter Beige. Then, I basecoated all the branches, trees stumps, roots, and coffin lids with P3 Bastion Grey.
Day 3, Time: 1/2 hour– The tombstones were painted with a mix of black and AP Ash Grey, then drybrushed up with Ash Grey and a bit of white to catch the edges and details. I washed all of the branches and roots with GW Agrax Earthshade and left them to dry.
Day 4, Time: 1/2 hour– I drybrushed all the branches and the coffin lids with Skeleton Bone and a touch of Bastion grey. I then glazed a bit of Liquitex Transparent Burnt Umber Ink (brown ink) on the boards of the coffin lids to get them to stand out from the branches. I also weathered the tombstones by washing brown ink around their bottoms, and added rust streaks with P3 Bloodstone and a bit of Val Bright Orange.
Day 5, Time: 1/2 hour– I basecoated the wooden stakes with a mix of Umbral Umber and XV-88 brown, and painted the parchment with XV-88 brown and P3 Moldy Ochre. Those bits were then shaded with Agrax Earthshade.
Day 6, Time: 1/2 hour– I drybrushed the wooden bits with a mix of Skeleton Bone and a little XV-88 brown. Then I finished painting and highlighting the parchment with XV-88 brown, Moldy Ochre, and Skeleton Bone. I also some Ochre and bone color to pick out the brighter wood on the ends and points of the wooden stakes.
Day 7, Time: 1/2 hour– The candles were all painted with a mix of Skeleton Bone and Brainmatter Beige, shaded with a little Agrax Earthshade, and highlighted with white. The vegetation (the leaves and roses) was all basecoated with Val Medium Olive, and washed with Cit Nuln Oil. I didn't spend much time on the vegetation, because it would eventually be covered with actual Silflor leaf foliage.
Day 8, Time: 1/2 hour– For the text on the parchment, I used a mix of black India ink and Liquitex brown ink, thinned with a bit of water, and painted it on with a very fine brush. India ink stays wet longer than acrylic paint, so it's easier to get a clean flow from your brush for much longer, whereas acrylic paint (even when thinned) starts to dry in the brush before you can get it all onto the model. I also knocked out the rats, painting them with Umbral Umber, XV-88 brown, picking out the faces, ears and tails with Skeleton Bone, and washing them with Agrax Earthshade.
Day 9, Time: 1/2 hour– I painted the crows on the zombie's back. They are just black, drybrushed with a mix of black, Ash Grey, and a touch of Cit Fang Grey. I picked out the eyeball with Skeleton Bone, Brainmatter Beige, and some red. I put a tiny dot in each of the crows' eyes, and called it a day.
Here's the entire batch so far. Turns out I was only painting nine figures, because I had finished the first one as my test model. All that remains is the zombies themselves, mostly flesh and clothing.
Days 10 and 11, Time: 1 1/2 hours total– The flesh was basecoated with straight AP Necrotic Flesh. Each model took about ten minutes as I carefully negotiated around all the branches and painted bits.
Day 12, Time: 1 hour– To finish the flesh, I washed it all with Aggaros Dunes Contrast. Once that was dry, I carefully drybrushed with Necrotic Flesh and Skeleton Bone, and touched up the exposed bone and branches. The noose was painted with Moldy Ochre, highlighted with Skeleton Bone, and washed with Agrax Earthshade. (That's the same process for painting the rope belts in the subsequent steps.)
Day 13, Time: 1 hour– The mix I used for blood was AP Crusted Sore, AP Pure Red, and brown ink in various combinations to get a variety of darker and brighter blood. The blood was applied around the models' wounds and anywhere roots and stakes were puncturing them. To finish the zombies' faces, I put a dot of Brainmatter Beige in each eye and picked out their teeth. (The blood came in handy to cover up any mistakes on the faces.)
Day 14, Time: 1/2 hour– I painted the ropes, belts, and shoes. For the belts, I painted the strap with Umbral Umber, highlighted it with XV-88 Brown, and gave it a final drybrushing of Skeleton Bone to catch the edges. Then, I painted the red portion of their pants with a mix of black and Crusted Sore, highlighted with a mix of Pure Red and Crusted Sore.
Day 15, Time: 1/2 hour– I basecoated the black portion of the pants with black, and then overbrushed it with a mix of black and Fang Grey. The clothing was then drybrushed with XV-88 brown and a bit of Skeleton Bone to dirty it up.
Day 16, Time: 1 hour– Using the same process, I finished off the clothing on three more zombies.
Day 17, Time: 1 hour– The funerary dresses on these three models were painted the same as the black pants, and dirtied up with some drybrushing.
Day 18, Time: 1/2 hour– I painted the red bits of clothing, and the hair. Her hair was basecoated with Umbral Umber, and then drybrushed with P3 Gun Corps Brown and Skeleton bone.
Day 19, Time: 2 hours– After painting the base rims, I added static grass and tufts. I also glued some Silflor foliage over the roses and drybrushed it with a bit of Medium Olive and Skeleton Bone.
Day 20 and 21, Time: 3 hours total– The final steps were spraying the models with matte spray (Tamiya TS-80 Flat Clear), and painting the metal. (I save metal for after the matte spray so it stays shiny rather than getting dulled out by the spray.) For the wrought iron fencing, I based the metal parts with a mix of black and a bit of AP Gun Metal. Items like the shield were based with straight Gun Metal. The rust was a mix of Bloodstone, Bright Orange, and a bit of brown ink. I applied it in patches over the metal areas and used a fine brush to paint some streaks. The brass items like the bells and jewelry were painted with P3 Rhulic Gold, washed with GW Coelia Greenshade, and then drybrushed with the gold again to recapture the shine.

And that's it! A total of about 17 hours, spread over 21 days (three weeks) to finish up this batch of zombies. I have about 50 more in boxes, and I'm hoping to paint them in larger batches and get through them more quickly. When using an assembly line process, adding more models doesn't usually add that much more time to each step, and if I can manage a longer painting session each day, that will cut down on the "calendar time" if not the actual hours involved. I'll document my progress and time on Twitter and Instagram and see how it goes.
First, I have to paint the Necromantic Witch that will be animating all these zombies!
'Til next time!


I love it when you are able to put the finished models on some great looking scenerey and a narrative just emerges.
ReplyDeleteThank you!
DeleteThanks, really great painting tutorial.
ReplyDeleteThanks! I'm glad you enjoyed it!
Delete