Star Wars Outer Rim Scenery: The Board
Here's a scenery project that I've had under wraps for more than a year– A board depicting a desert planet in the Outer Rim.
This board was commissioned for Atomic Mass Games for their Star Wars Legion and Shatterpoint miniatures games. If you've seen their recent Shatterpoint trailer, You'll have caught a glimpse of the desert buildings and shipwrecks. The scenery was finished way back in April of 2021, and now that it's been unveiled publicly, I can finally show photos of it and talk about how I made it. (This was finished before I got my new phone, so the photos from my old, grainy camera. I apologize for all the dead pixels!)
The board itself was constructed from a 30" x 30" wooden frame, and the backdrop was formed out of pink extruded polystyrene insulation foam. I smoothed it over with Elmer's Wood Filler putty, and blended it into the "floor" of the board so it would provide a seamless transition to a horizon line in the background.
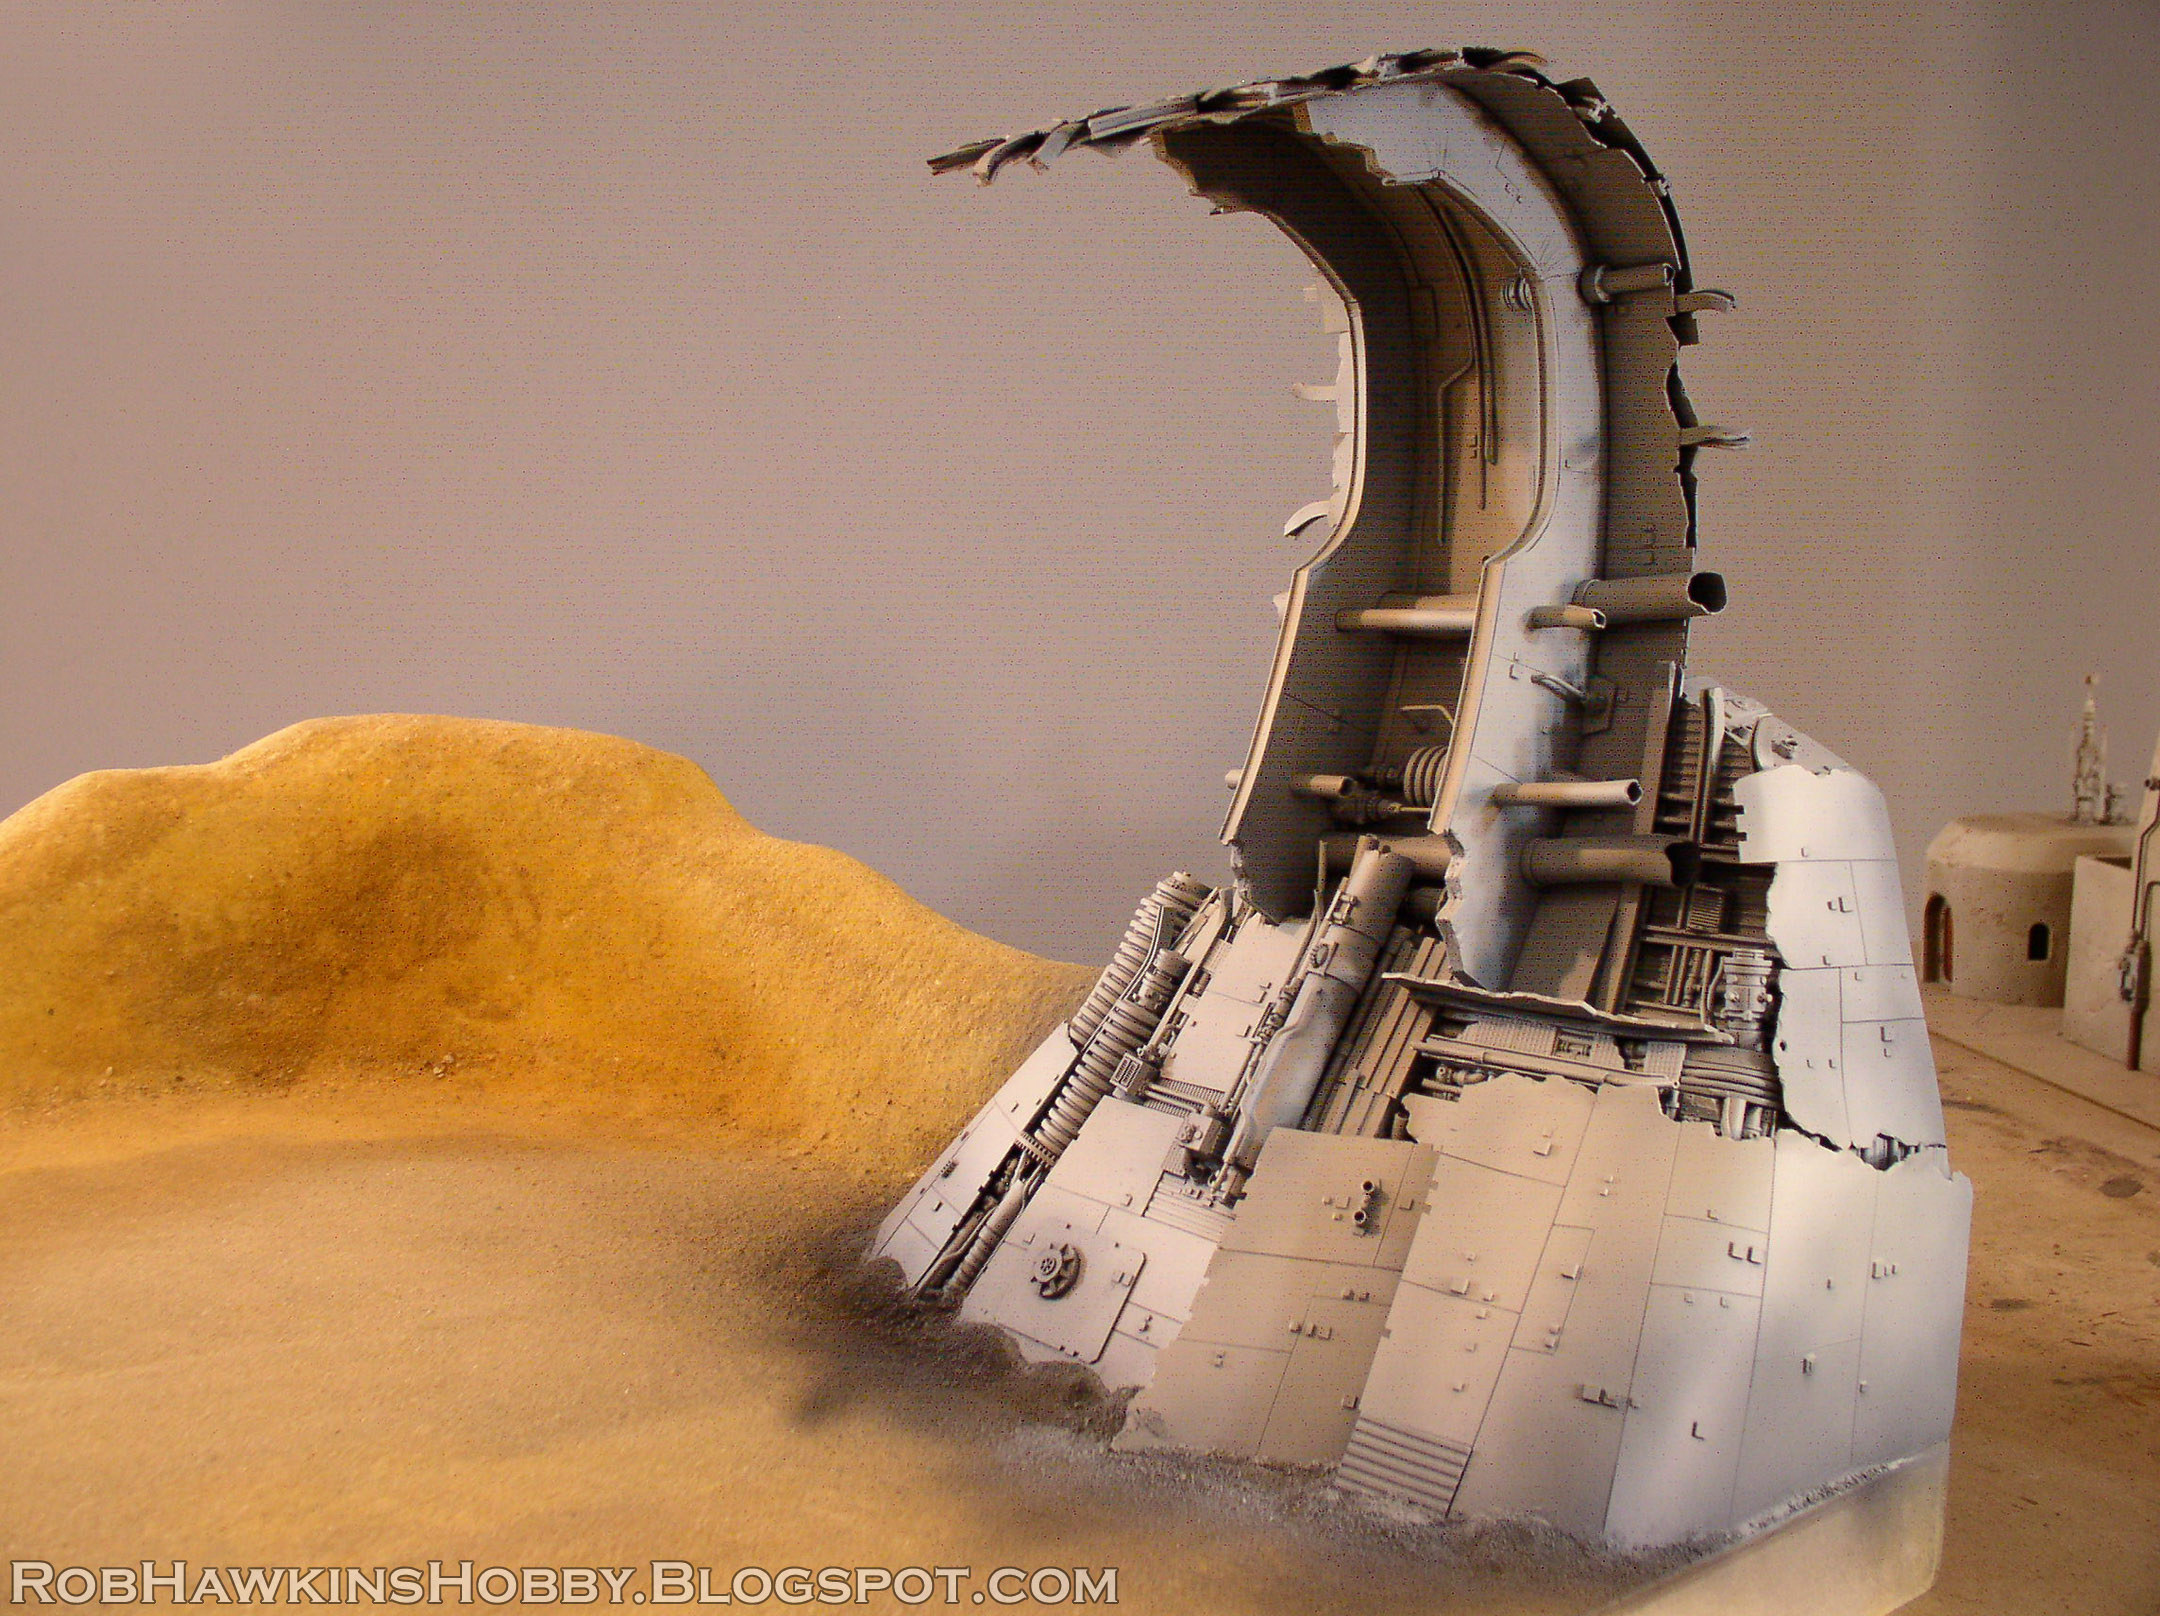
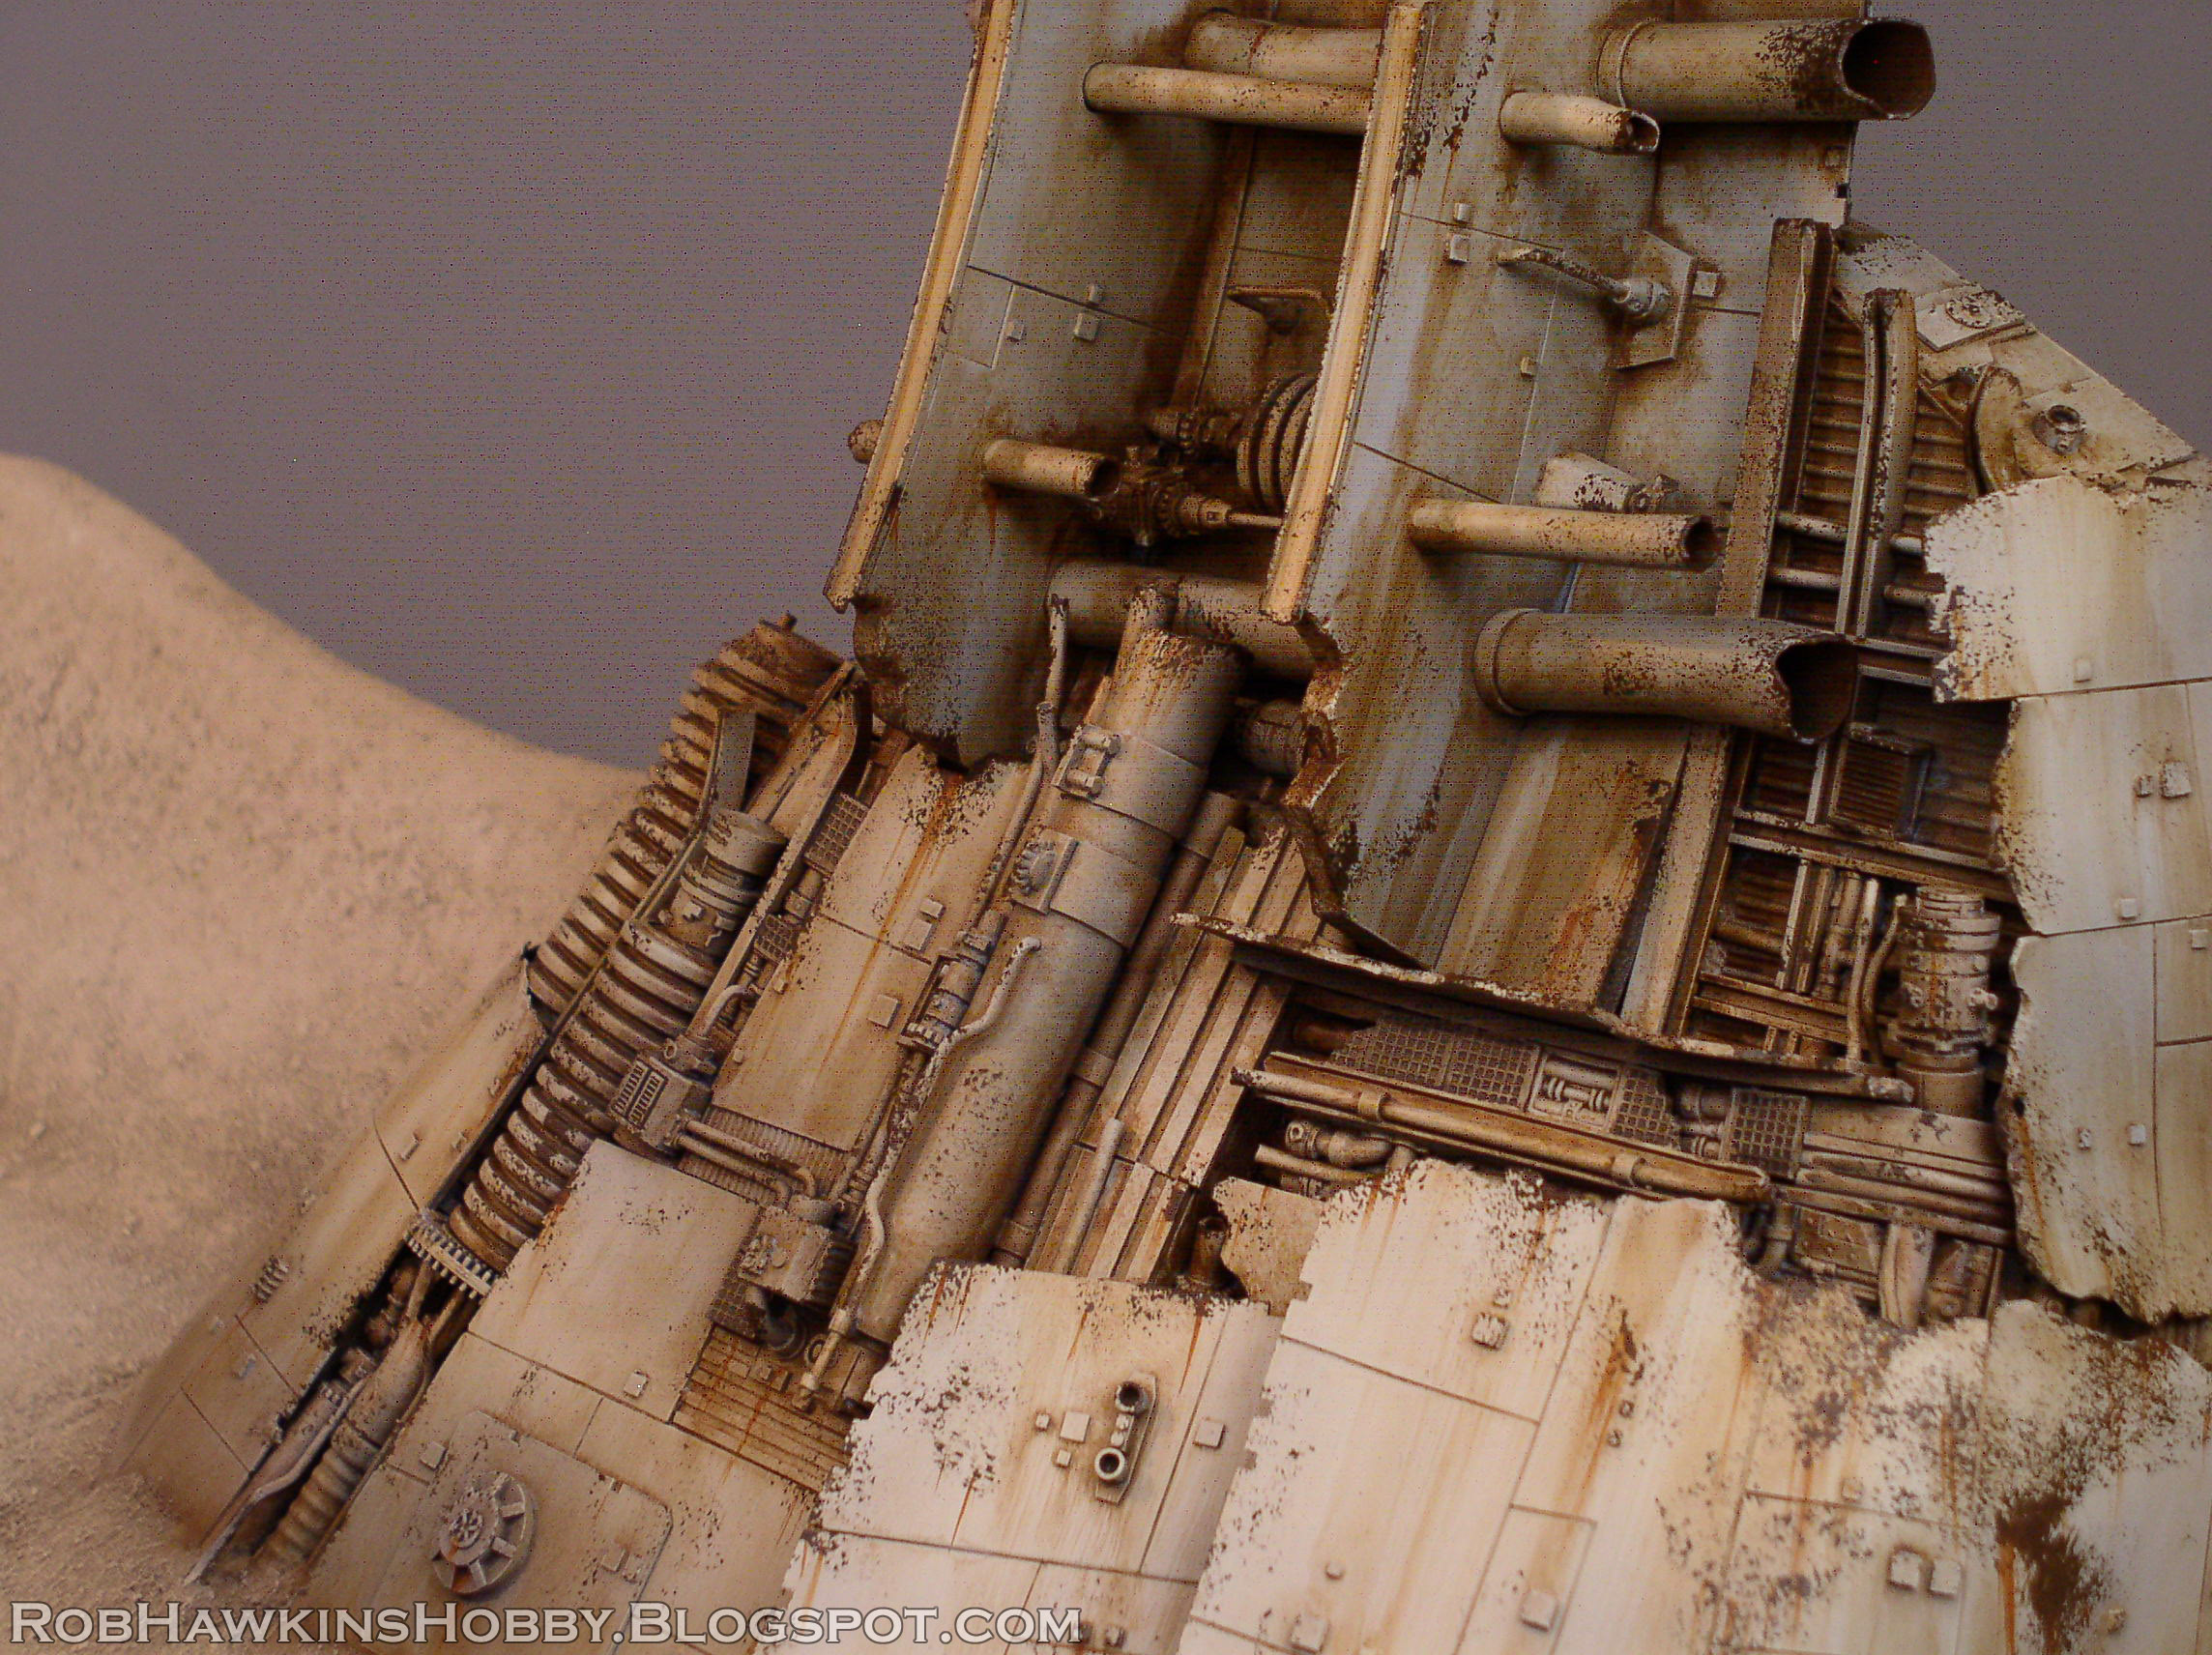
The board also has a large shipwreck built onto the backdrop. I formed the basic shapes out of blocks of insulation foam, and then coated the foam with a lauer of Liquid Nails construction adhesive so I could super glue styrene plastic details over it.
Play sand was affixed to the desert with waterproof wood glue.
The wreck was covered with paneling made from sheets of styrene. Each sheet was etched with panel lines, and detailed with little squares of styrene and notches cut out of the edges.
My inspiration for the design aesthetics comes from the actual models used for the films:
The greeblies in the recesses are a mix of styrene rods, tubes, and I-beams, metal floral wire, bits of moisture vaporators from my other terrain builds, ridge-textured styrene, and corrugated plastic electrical conduit tubing.
Because the top arch was so tall, I magnetized it so it could be removed for transport and storage. It could also be used as a stand-alone piece of wreckage.
I primed everything black, and then sprayed it with a warm grey basecoat. From there, I weathered it with a mix of Liquitex Burnt Umber Transparent Ink (aka Brown Ink) and Formula P3 Bloodstone. I thinned it and painted it on like a wash, and then used a paper towel sprayed with isopropyl alcohol to wipe it off the surface. The alcohol takes the paint off the surface pretty cleanly, and helps it flow into the recesses. The technique is similar to an oil pin wash, just without the oil paint. This was the first time I tried anything like this, and I was very happy with the results. I also painted on some specific rust streaks of P3 Bloodstone, and used a sponge to apply chips on all the corners with a mix of Brown Ink, Bloodstone, and a bit of Army Painter Shining Silver.
The setting is supposed to be generic enough so it can pass for any Outer Rim desert planet like Tatooine or Jakku, both of which have sandstone buildings and starship wreckage dotting the landscape.
In coming posts I'll get into how I build the other wrecks and buildings. For now, here's a look around town:
'Til next time!


Absolutely amazing work once again!
ReplyDeleteThank you!
DeleteLove all the small detail work you have made for the sides of the buildings and the crashed hull.
ReplyDeleteBeautiful work!
Thanks a lot! :)
DeleteYour terrain always bleeds atmosphere. Well done on the table and congrats on being commissioned!
ReplyDeleteThanks Tom!
DeleteNice! Really nailed the Star Wars aesthetic, both on the buildings and the greebling on the wreck!
ReplyDeleteThank you! I've had an interest in Star Wars games and minis since the old West End days, long before I got into Warhammer.
DeleteFantastic - this is really brilliant. The wreckage looks great, and I'm looking forward to seeing how you did the buildings!
ReplyDeleteThank you so much!
DeleteFantastic work! Was so looking forward to seeing what you have done for the new game after you posted on twitter.
ReplyDeleteThanks! Glad you like it!
DeleteThis is awesome beyond any measure :O
ReplyDeleteThank you!
DeleteAmazing terrain!
ReplyDeleteThanks!
DeleteHey Rob - this is amazing work as always. Just wanted to say, I really appreciate what you're doing with this hobby (and keeping hobby blog sites alive!) your work is super inspiring and the behind the scenes photos are always appreciated. Keep up the fantastic work!
ReplyDelete- Samantha
Thank you so much, Samantha! Feels good to know that others are inspired by my work! Thanks for following along! :)
DeleteHi Rob, this is an amazing table, it looks great. Would you happen to have any more photos to post on your building process (before things are painted), especially when it comes to the terrain pieces, just to get a better look/idea of their construction.
ReplyDeleteThanks
Thank you! I have two more posts about this board, covering the shipwrecks and the buildings: Click the "Star Wars" label on the right sidebar, or here's a direct link:
Deletehttps://robhawkinshobby.blogspot.com/search/label/Star%20Wars