Project Log: Wild West Exodus Harbor, Part 9
This project log focuses on a Wild West Exodus themed harbor that I am building for Warcradle Studios– This is the final installment before I show the finished board. This time, I finish off the buildings and a few other odds and ends, and talk about painting them.

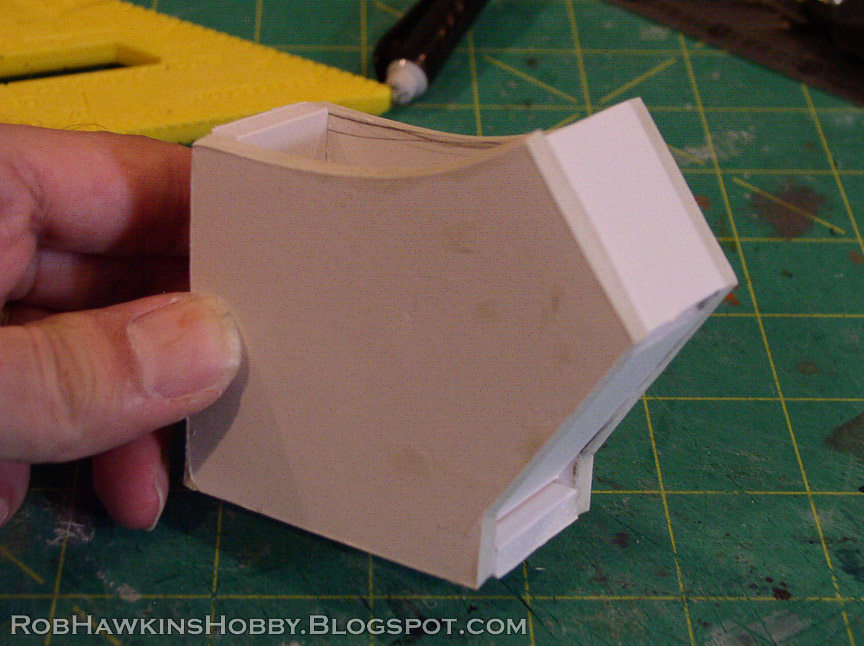
The final building I needed to make was the general store and storage facility. Like the other structures, it was made out of foam core board and covered with basswood panels engraved with individual boards. Flat styrene strips and L-strips were used for the metal framework, and they were punched with my trusty rotary hand sewing punch to make the rivets. The decorative metal plates were cut from styrene sheets.
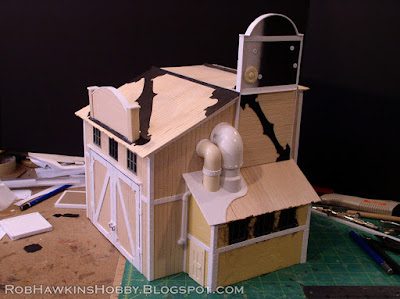
Small PVC pipe fittings were used to make the pipes. The concrete building was made by applying wood filler putty over the foam core frame. Once the putty had dried, it was sanded, leaving a mostly smooth, but beautifully pock-marked surface. The putty was sealed with wood glue and all of the plastic bits were super glued over top of that.


One sign would have lettering painted on, and the other would be a neon sign. The neon sign needed a power source, so I used resin parts to make a power cell and generator, with thigh gauge floral wire for the cables. The neon letters themselves were added later and painted separately. Check out my neon sign tutorial to see how I made the letters.

Another prominent fixture in the concept art for the table was a rail-mounted loading crane. I built the framework out of foam core board, and added a resin cowcatcher from a WWX vehicle. The wheels were taken from a plastic toy tank that I had in my parts box. I spaced out the wheels so they would fit on the tracks, and added plastic card behind them to hold them in place and serve as a guide on the rails. The grey cowling is made from tread armor on the Imperial Guard tank accessory sprue.


To keep the crane from tipping, I added a rail with piston supports. This added some width to the base of the crane, making it much more stable. In real life, rail-operated work vehicles always have stabilizing brackets, so it lends a bit of authenticity to the build while also being practical for the model.

The body of the crane was built up with more foam core and plastic card. The top of a resin power cell was added to each side, mounted on a WWX base.


The crane mount was made out of a series of foam core discs. Each was cut to the appropriate size and then Liquid Nails construction adhesive was applied to the exposed foam edges.

Once the Liquid Nails dried, I could super glue plastic strips around the edge of each disc. The "middle gear" ring was made into a giant gear by adding evenly-spaced styrene rods to create the teeth of the gear.

The "top deck" layer had a gear box added to its back. The idea is that the box houses the machinery that rotates the crane. Gears in there would rotate, spinning the top of the crane around the fixed central gear. The vent on the gear box was taken from the same tank toy as the wheels.

The operator's booth was cut from foam core board...

and covered with rivet-punched styrene sheets. Tiny U-strips were used to cover all the corner seams, and details like the door, steps, and window frames were added.

The crane arm was made in a similar fashion to the crane mount– Each piece was cut from foam core board, the edges coated with Liquid Nails, and then styrene strips glued around the edges. Details like bolts and framing strips were added.

Here's the whole thing shaping up with a coat of black primer and metallic spray. There's a winch spool that has yet to be added to the back of the operator booth.

The cargo is lifted by steel cable (made from floral wire braided together using a power drill). The straps holding it were made by softening plastic strips with a heat gun to get them to wrap around the crate. The hooks were cannibalized from a Chaos tank accessory sprue. There's a metal pin running through the center of the hook to keep everything secure. I embedded three magnets into the crane arm, and the steel floral wire bends over the top and sticks to the magnet, so the cargo can be removed for storage.

The last few pieces are the tug boat and the watch tower. The boat is essentially a miniature-scale version of the other boat– A pink insulation foam shape, coated with Liquid Nails, with plastic card and bits super glued over top of that. A dollar store "ninja blow gun" mouthpiece was the perfect shape for the smokestack.


While the watchtower hut was a simple matter of building a foam core frame and covering it with basswood and styrene, the tower legs were more of a challenge.

The legs were made out of large L-strips, attached to the MDF base and the top and center levels of the tower. Here you can see the whole thing primed for painting. I spray primed it black, and then grey on the hut. Then I masked it off and sprayed the roof and legs with a dark metallic silver. The general store was sprayed black and then dusted with grey and brown sprays to give a base for drybrushing the wood.

The tug boat was also sprayed with a dark metallic color, and that's a great segue into the painting...

All of the stand-along metal parts were primed black and then dusted with Rustoleum Satin Metallics Aged Bronze and then with Rustoleum Metallic Brilliant Metal Finish. This gives them a quick metallic look, which I then wash with a rust colored latex paint (similar to Formula P3 Bloodstone). Then I apply specific rusty spots by dabbing actual P3 Bloodstone and orange onto the pieces with a sponge. Finally, a few streaks and drips are added by painting Bloodstone and Orange with a fine brush.

The pieces above are the framework for this refinery. I painted them separate so I could paint the metal quickly, and to make it easier to paint the brick face. For the bricks, I basecoat the wall with Bloodstone and a bit of P3 Skorne Red. To get the lighter mortar in between the bricks, I paint on some thinned P3 Hammerfall Khaki and wipe it off the surface with my fingers. This clears it off the bricks while leaving it in the recesses (I use my hand and not a paper towel or rag because that would suck the paint out of the recesses as well). It's difficult to do this in the corners and nooks and crannies, so not having the metal lattice over top of the brick makes it much easier. Once the Khaki wash dries, I can drybrush the Bloodstone color back over the surface bricks, and pick out individual bricks with P3 Battlefield Brown.

When I was building the large warehouse, I wasn't sure if it would be faster to drybrush the wood, and then individually paint all of the metal framework, or to do a messy wash on the metal and then carefully pick out the wood sections in between them. I decided to do the latter, so I sprayed the entire building with the metallic mix mentioned above, and then added the rust wash and drips to all the framing.
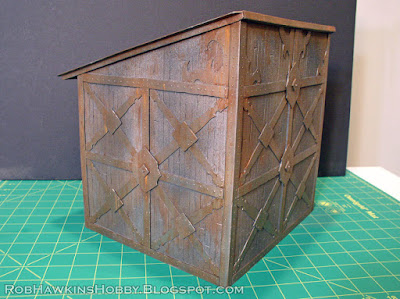
Next, I basecoated all of the wooden areas with Formula P3 Gun Corps Brown.
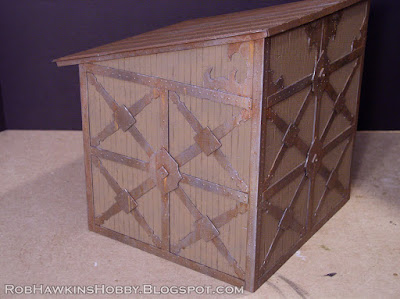
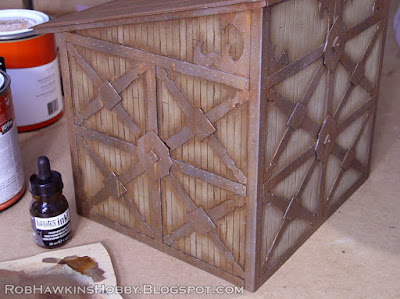
The final step was to wash the wooden panels with Transparent Burnt Umber Liquitex Professional Ink! (I'm not screaming at you, the name of the ink literally ends with an exclamation point.) I painted the ink over the each section of wood and blotted it out of the center with a paper towel. Once the ink was dry, I carefully drybrushed some GW Screaming Skull to catch the edges of the wooden planks, taking care not to hit the metal parts.
For the copper roofs, I painted them with Bloodstone-colored latex paint. Then, I mixed a wash using P3 Thrall Flesh and P3 Arcane Blue. The wash was painted over the entire roof, and blotted up in a few places. After the wash dries, some of the copper color can be enhanced by drybrushing GW Hashut Copper over the surface. Lighter weathering streaks can be applied using P3 Menoth White Highlight, and some variation in the patina can be added by adding streaks made from mixing different ratios of Thrall Flesh and Arcane Blue.

The finished board is packed up and on its way to Gencon. If you're at the show, make sure you stop by the Wild West Exodus booth and check it out in person! I'll post a gallery of photos after the show.
'Til next time!


These WIP posts are fascinating, watching your terrain boards come together never fails to insire me.
ReplyDeleteThank you!
DeleteThis awesome!
ReplyDeleteI've been working on some paddle boats for another game. Any tips on how to craft / attach a rear paddle to a boat (a la your tug)?
Yeah, I totally glossed over its paddle wheel... It's made from a length of 3/4" tube taken from the dollar store ninja blow gun. I glued WWX bases on each end cut the bottoms flat, flush with the bottom of the tube to look like it was submerged into the water.
DeleteNext, I used 1/2" styrene strips to make the paddle fins. They were notched so they could glue to the tube and fit over the lips of the bases.
To attach it, I made 2 brackets with thick card and L-strips and glued them to the outside of the bases on either end. I painted the paddle wheel separately, and attached it to the back of the finished boat.
It's fantastic and very inspiring. I particularly like the tugboat. Please do keep these project logs coming: I've learned a lot from them.
ReplyDeleteThis is some nice modeling work!
ReplyDeleteThis whole piece made me stop in my tracks at GenCon. I had no idea what the game was but I did know that the terrain was amazingly beautiful. Excellent job.
ReplyDelete