Project Log: Wild West Exodus Harbor, Part 8
This project log focuses on a Wild West Exodus themed harbor that I am building for Warcradle Studios– The board is a harbor featuring a large ship pulled into its berth. In this installment, I'll be finishing up the ship's construction.

The paddle wheel cowling was probably the most complex component to build. With that out of the way it was a matter of attaching the hull plating and a few remaining details.

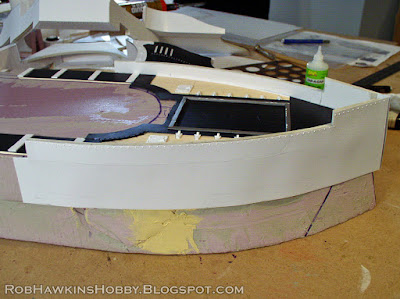
I added foam core walls along the bow...

...and some plates to connect the prow to the hull. There is a bow turret, and I was planning to use a piece of PVC pipe as its base.

I glued long sheets of styrene card over the hull and deck wall. The card was first punched with rivets.
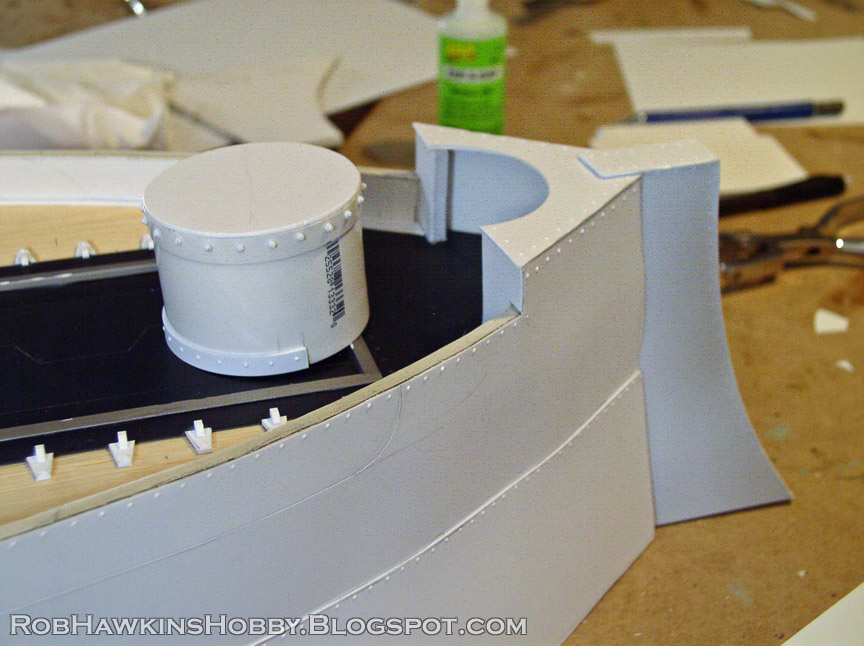
Then, I overlapped a second layer of styrene on the bottom half. I ended up going with a larger diameter of PVC for the turret. I covered the top and added styrene strips and bolts around the perimeter. I covered the prow with styrene and made a plate with a cutout for the turret's base.

The turet itself was scratch-built using styrene and layers of plastic tube for the barrel, and a Wild West Exodus base for the cupola hatch.


The final touch for the bow was to cover the foam core of the connecting plates with styrene card and strips, and glue them in place.

The stern required a little more work because I had to deal with the curved hull, but the principle was the same.

L-strips were used to cover the gap where the wheel cowling connects to the hull.

One final touch was adding some guns to the top deck. These were made from resin gun barrels, attached to thick styrene rod and overlapping tube to create the gun body and cowling, and the mounting brackets. The handles were cannibalized from other guns, and the top rails were added with paperclips.


Here's the completed construction of the ship. The parts were sprayed with shades of Tamiya greys to get a base layer and highlighting, over which I can drybrush sharper highlights, add weathering, and paint the other details.


The models need a way to get aboard, so I made some gangway ramps using basswood and styrene L-strips.
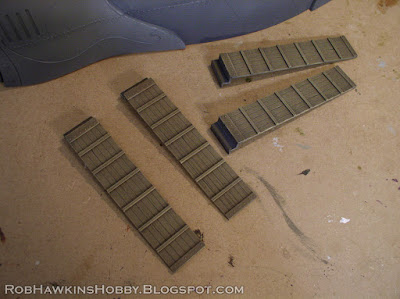
The L-strip steps hook over the wall and "step down" onto the deck.

Here are all the components broken down for painting (the engine is already finished). Phew!

'Til next time!


master of the scratch! Hope that cut heals fast
ReplyDeleteThank you! That's from the bottom of the X-Acto blade digging into my thumb as I carve stuff. Someone needs to invent a hobby thumb thimble! :D
DeleteWow!
ReplyDeleteThis is brilliant!
ReplyDeleteLovely design and implementation! Well done!
ReplyDeletePhenomenal build, man - I really dig it!
ReplyDeleteWhat a marvelous scratch build ship.
ReplyDeleteHow did you plan this out? Was it on the go or or was there a big masterplan?
Thanks! Warcradle Studios provided concept art for the board layout and the "Ironclad" ship design, so I based everything on that.
DeleteThanks for the comments and kind words, everyone! I'm glad your enjoying watching the build come together!
ReplyDeleteJust fantastic!!!!
ReplyDeleteSpectacular. I'm always open-mouthed! Congratulations indeed!
ReplyDelete