Project Log: Warscryer Citadel, Part 4
The Warscryer Citadel's construction is nearly finished. This week, I tackle the watchtower and the walkways around it, finishing up the work on the main structure.

As with the other components, I am removing all of the comet imagery. For these skull boxes, it's a simple matter of scraping off the comets and chipping up the stone texture with a knife.

The skull boxes are a neat touch– Since the tower is made from repeated sections, the boxes are for covering the spare doors so the tower doesn't have doors that open to nowhere.

On the tower top, I sculpt over the twin-tailed comet iconography with flaming skull images.

Others have had difficulty getting the pieces of the tower together, since there are no pegs or "keys" to lock the parts in place. To avoid issues, I flipped the top upside down and glued the wall sections into it two at a time. The tower top helps keep the walls in line, and I add in the bottom (without glue) to make sure everything stays square– er, octagonal. The walkway is also fit in place without glue to help keep the shape, and I rubber band it all to hold the tower together while it dries.

I assemble the tower battlements the same way and, once the glue is dry, I fill the seams with modeling putty. The putty goes on a little rough, and then I carve it into a better shape to match the stones.


For the skeleton on the rock face, I scrape off the detail on the shield and smooth out the surface.

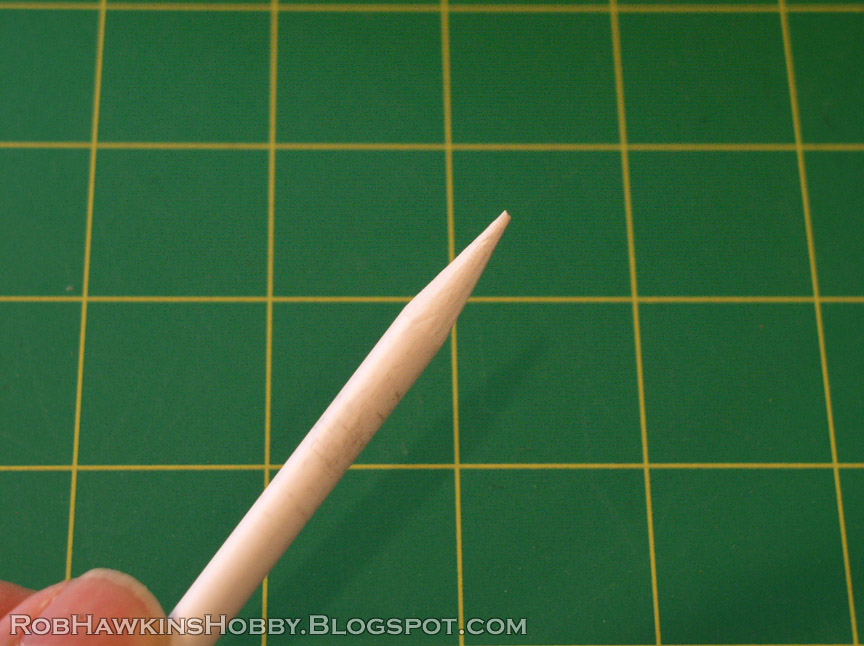
I settle on turning his weapon into a spear. To make the spear tip, I place a piece of thick plastic rod into an electric pencil sharpener to bring it to a point.

Then, I carve it into more of a "spear" shape by shaving the sides square and adding layers of round bits below it.

For the shield, I sculpt a flaming skull. With some left over putty, I add a bit of rock behind the spear tip.

The supports below the tower don't seem sufficient to hold its weight, so I decide to beef them up a little by adding more beams. I use a length of square basswood with a wood grain texture scored into it. (These are brown because they were left over from another project). I fit the wood beams in place, then cut a piece of flat plastic card for the support brackets, and finally attach some bolts and rivets.

The bolts and rivets are made with round and hex rods, using the same technique explained in Part 1.

Here's a shot of the tower with all of the extra support beams:

The walkways also look like they could use a little more support, so I add some beams underneath them. For these, I used square styrene rod that's thinner than the basswood. The walkways are all kept separate so I can paint everything more easily.


The walkway inserts into a recess that runs all the way around the tower. I fill it in with some putty and match the stone texture. At this point, I also glue the skull boxes in place and putty the seams.


The citadel can be built two ways– with the observatory or with the tower ramparts. I'm planning on making the two interchangeable. The ramparts fit in place fairly well, but I need to add some sort of attachment. There's not enough surface contact to use a pin or magnet, but I after a little consideration, I settle on this: I cut a bit of sprue and glue it at the base. That provides enough area to insert a pin that can fit into a hole drilled into the tower top. The sprue looks like a random stone and the hole will vanish into the darker crack once everything is painted.


The last step is to add some sand and gravel around the tower and on the bridge.


And that takes care of the construction! The final step will be finishing the observatory and making a base for the piece.


'Til next time!


Waiting for the painting. As always excited by your projects!
ReplyDeleteLooks great!
ReplyDeleteIt's always joy to see how you tackle your conversions.
ReplyDeleteLooks brilliant!
ReplyDeleteCan't wait to see it finished.
Thanks guys!
ReplyDeleteHi Rob, this is a terrific set of blog posts. I had been thinking of getting this but had been a bit put off by all the skulls and had been planning to de-skull it a bit. Could you please tell me if you think this idea is feasible based on your hands on knowledge of the kit?
ReplyDeleteI was planning to cut away the middle section of the octagonal tower - the level containing the skulls - so that the parapets sit down onto the level with the door. This would mean moving (or removing) the walkway. I suppose if removing the middle layer of the tower isn't practical I could dremel away the skulls and resculpt the stonework but I thought this was easier. I also think the tower looks a bit unbalanced and making it shorter in this way would balance it out a bit.
Secondly, I was planning to carve away the gigantic skull on the rock on the back of the piece and fill it in a bit to look more like regular rock. I would probably leave the skeleton statue with the shield though.
Any comments on this idea would be gratefully received!
Thanks Jonathan! Removing the skulls would definitely be a chore. I don't know if dremmeling away the large skulls on the tower would work, because they are hollowed out underneath. So, if you dremmel them off, you won't be left with a smooth surface, you'll have a hole in the wall.
DeleteSame with the giant skull on the base-- The rocks are hollow, so cutting it off would leave a hole. You're probably better off sculpting rock over top of it with putty.
As for removing the skull tier of the tower. I think that could work-- The walkway's stairs would still reach up to the recess in the center of the tower, which would be the new top of the tower. You'll need to do a little work to attach the tower top, since it's designed to "key" into the top of the walls, but I think it's possible.
Just so you know, the kit *can* be build without the tower at all by placing the observatory dome right on the flat base of the tower. They include a little strip so the walkway lines up correctly, and it's outlined in the instructions.
Thanks, that's really helpful advice. Good luck with the rest of the build!
Delete