
WWW.SKULLFORGESCENICS.ETSY.COM

Wednesday, June 1, 2016


Thursday, May 19, 2016
Skulls and Graveyard Walls
A couple new items are coming up for Skull Forge Scenics. The first is a pack of skulls. Here are the master casts set up for molding and I'll have these up for sale soon.
Edit: The skulls are up for sale now in my store:
https://www.etsy.com/shop/skullforgescenics

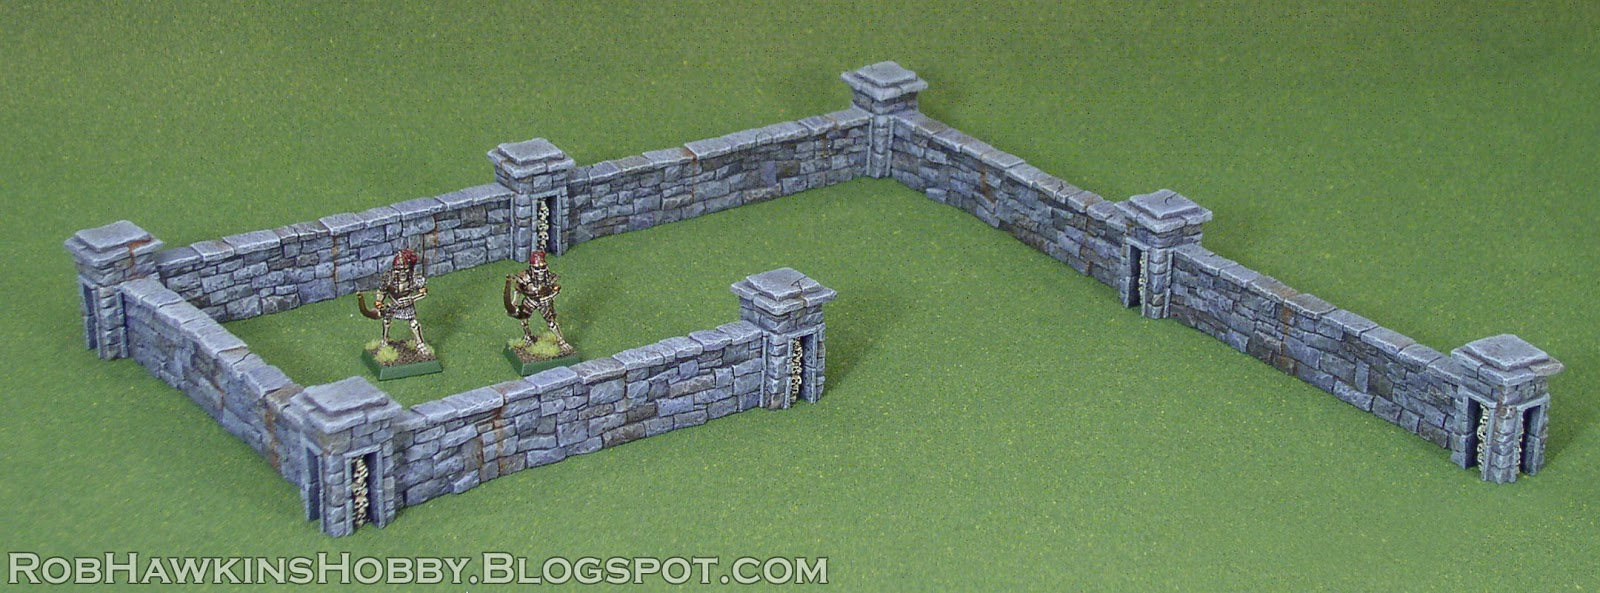
The wall set I had been sculpting was taken back to square one. These earlier pieces (the ones I posted pictures of a couple weeks ago) weren't working for me. Since they were sculpted from a relatively flat section of putty over the MDF core, the stonework wasn't giving me the difference in depth and angle in the stones that I was hoping for, and the placement of the stones didn't match on the reverse side.

These new walls were made by placing and sculpting individual blocks of putty, and I'm much more satisfied with the result.

The stones are sculpted from Aves Apoxie® Sculpt, and any deep gaps between them are filled with Brown Stuff modeling putty.

Here are the two side-by-side:

The wall posts use the "skull shrines" I previewed on Facebook.

One of my pet peeves when it comes to wargaming terrain is wall sections that don't properly line up or "join" at the corners, or that don't have proper "ends." I've designed these so the inset skull shrines are recessed enough that the walls will insert into them and link the segments together or form corner posts. The wall posts can also be used as stand-alone elements for the bases of a statues or monuments.

I'm working on the tops now. I've kept them as a separate part for ease of molding. Any significant "lip" would be difficult to pull out of the mold, or might have bubbles, ruining the whole wall. I can also make different wall toppers (flat stones; spiked fencing, etc.) to provide more variety in the future.
'Til next time!
Wednesday, May 11, 2016
Korak's Mortis Engine
This week, I finally finished up the Mortis Engine.


I don't usually paint source lighting on my miniatures, but as I was painting the chassis and assembling it, I decided to add some yellow to the green of the spirits where they pass near the flames. I also added a little green hue to the bottom of the bone framework to help to blend the different elements of the model and give it a more unified color scheme, rather than distinct areas of "green" "bone" and "flame."
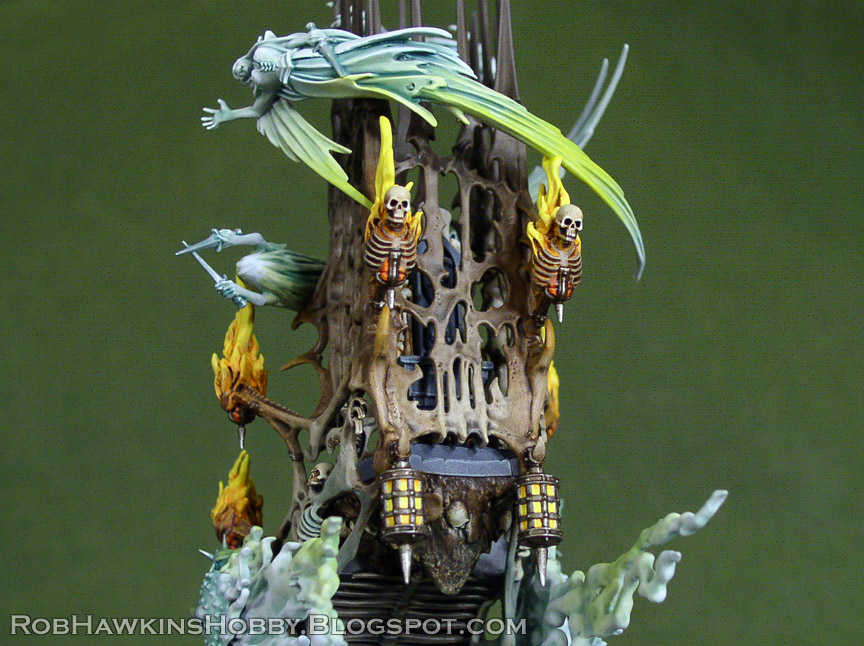

The corpsemaster can toggle between the "regular" attendant and the wraith Korak the Grim.


Other than repainting my Banshees so they match my new ethereal color scheme, and putting together the remaining wraiths that I have in my parts box, this wraps up the "Spectral" wing of the Legion of the Infernal Skull– all the ethereal elements, led by the Korak. Now to tear them all off their bases and put them on rounds! (No, not really.)
*Edit: Just remembered that I also have 10 Hexwraiths in a box somewhere. I guess it never ends...

Coming Soon: Skull Forge Scenics Skulls and Walls
The molds are finished for the skulls and I'm finishing up the wall segments. I'll be posting some pictures soon and hope to have them up for sale by the end of the month (hopefully sooner), but here's a peek at the skulls as I've incorporated them into the end posts for the walls:

'Til next time!
Thursday, April 28, 2016
Things and Stuff
Okay, I've been neglected my blog long enough. Most of my time has gone into Skull Forge Scenics business, so I haven't had much time to work on any models. The Etsy shop has been updated with international shipping options, so those of you abroad can place orders.
I've begun work on more pieces to produce, including some stone walls and skulls:


The walls will go nicely with the graveyard terrain or any medieval fantasy setting. I'm planning on having interchangeable tops and end posts to expand the set with more variety as time allows. I'll be able to use the skulls as assets on my terrain sculpts and also sell them as individual packs.
The Dreadfleet Challenge
Ugh. I haven't touched my Dreadfleet ships in weeks, so that's how the challenge is going. I think Chris has finished all of his Genestealers and only has the marines and the basing left. I've practically put the ships back in the box since I'm focused on making terrain now. Maybe I'll find some time to squeeze in a ship here or there.
Age of Sigmar
I haven't played a game (of anything) at all since the last time Chris was out to visit and we played that game of Age of Sigmar. That was in November, so it's been about five months!
GW looks like they're going to be putting together a points system for building armies, so that might be cool. Seems like it's too little too late, though. I think most people have already moved on to a different fantasy system, or developed their own tournament packs. I thought I heard a rumor that the new "competitive" tournament system was developed in coordination with guys who run the South Coast Grand Tournament, so maybe it won't be a total upset for the existing tournament scene. We'll see how it turns out. Whether it's necessary or not, most people want structure for their miniature gaming. I don't know if it will sway my group out of its current Warhammr malaise...
I think new orcs look fine. Different, but not so different that they don't match. The anatomy is slightly altered; they seem to have lost their "pot-bellied-derpy-butt" posture, but the faces look the same. The armor on the models is much more rough-hewn, which is appropriate for orcs. The yellow armor, while not the best color choice for orcs, is beautifully painted. The the shading, edge highlighting, and rusty chipped corners looked good enough to eat! I think I spent about an hour looking at close-ups of the rotations on the GW site.
One final note– Skull Forge Scenics on Facebook
I have started a Facebook page dedicated to SFS, where I can post progress shots of upcoming projects and whatnot. I'm thinking of putting together a poll to see what kinds of terrain kits people would be most interested in, sort of a way to influence which of the many projects on my to-do list I should prioritize first. You can follow it here: https://www.facebook.com/skullforgescenics/
'Til next time!
Wednesday, April 13, 2016
Announcing: Skull Forge Scenics!
*UPDATE: For everyone who has been asking, I've added international shipping options to my Skull Forge Scenics Etsy shop.
https://www.etsy.com/shop/skullforgescenics
This has been a long time in the making. You don't appreciate how much work goes into setting up a business, making products to sell, figuring out packaging, etc. until you sit down and do it. But Skull Forge Scenics LLC is finally a go! My goal is to produce high quality resin scenery kits, battlefield accessories, and all manner of scenic elements for tabletop wargaming and model building. All the kits are designed, sculpted, and cast by me, and sold as Skull Forge Scenics.
In the interim, while I work on getting a proper webstore up and running, I have set up an Etsy store to sell my kits. You can check it out at: www.skullforgescenics.etsy.com
To start out, I've stayed close to my wheelhouse of all things dead and buried (or soon to be un-buried). I teased these a few weeks back, but here are my first products in all their glory:
Roadside Shrines
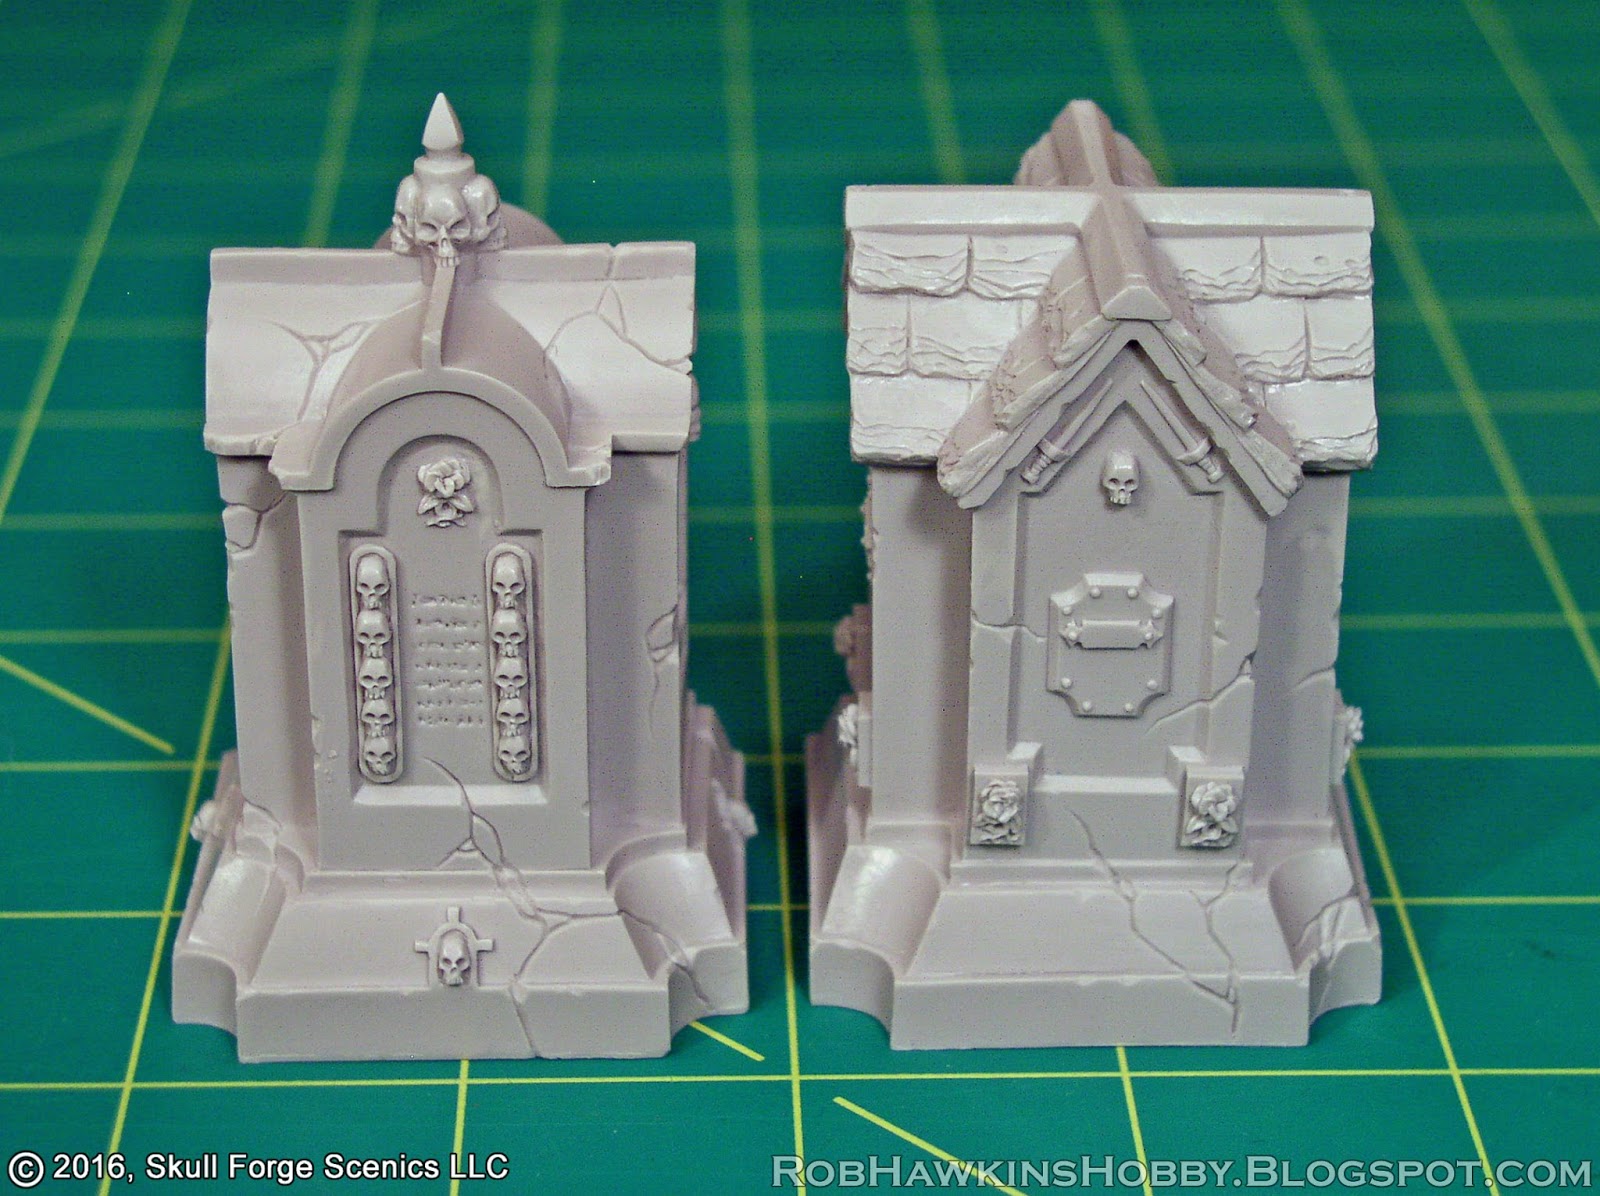
There are two different shrines, sold as a pair. The spikes on the top of the second shrine are a separate part for easier casting. The shrines have areas of engraved "text," (really just dots and dashes to create a faux lettering that could represent any language, real or fictional) and there are blank areas and banners for ambitious painters who want to freehand names and whatnot.

Here are some detail shots of the naked resin parts themselves. The scenery is sold unpainted and unassembled. One of my goals with my kits is to minimize mold lines, or at least make sure they are in places where they are easy to clean and won't interfere with any detail.




Tombstones
There are 15 different styles and sizes, and there are two of each for a total of 30 in the pack. I incorporated some of the design elements used in the shrines so the two sets will have a unified appearance. I call this my "Land of the Dead" series, and other elements I add in the future will be similarly designed.

And here are the bare resin parts as you would receive them. Astute viewers might notice that each of the tombstone "twins" has a different pattern of cracks and chips, so technically there are 30 unique casts in the set. Some (but not all) of the tombstones have mold lines on the sides where they are easy to scrape off.


Thanks to all of my readers for your support and feedback. I know a lot of you have been fans of my terrain work for many years, and now I hope to give you the opportunity to enjoy it on your own gaming tables. These graveyard sets are just the first in a series of terrain kits that will expand to include a wide range of genres and environments brought to you by Skull Forge Scenics. I hope to have your continued support as I move forward in this bold new endeavor!
'Til next time!
Saturday, April 2, 2016
Dreadfleet: More Progress
The Dreadfleet progress has been slow, but steady. I have finished all of the shipwreck scenery bits:


I have also assembled the next batch of ships: On the Dreadfleet side is the Curse of Zandri, and Skabrus. These should be straightforward– no sails to paint, just the ship and a single top bit. They are open enough that I could assemble them and paint them as (mostly) one piece.


On the Grand Alliance side, we have the Seadrake and the Swordfysh. These will be the first of the sailed ships. I chose them because of their easy-to-assemble hulls and because the sails look like the simplest to paint– a black background for the Swordfysh sails, and solid blue sails without any elaborate designs for the Seadrake. This will allow me to see how fiddly the design work on the sails will be to paint.


Once I get these ships finished, I'll have three per side, including some sail ships so the wind gauge will have a definite effect. That will allow me to play a more involved test game.
I tried a little one-on-one fight with Grimnir's Thunder and the Black Kraken. I used a small portion of the map and it was a quick affair. Two turns worth of volleys was enough to sink a ship. I wasn't using the wind marker and I disregarded any Fate cards that referred to things I didn't have available, like the sea monsters. As the ships closed to firing range, the first few turns were spent building up game effects like fog that incurred command penalties, random attacks on ships, etc, all generated by drawing Fate cards. I have read some reviews of the game that said the random Fate events ruin the game. I can definitely see how that could be the case. It seems that a simple solution would be to draw fewer Fate cards (or no cards at all). We'll see once I put together a larger skirmish.
In other news, I'm nearly finished with the graveyard terrain that I teased a couple weeks ago. I have a big announcement to drop in the coming days.
'Til next time!
Subscribe to:
Posts (Atom)