Blimps. Zeppelins. Rigid airships. Whatever you call them, they're all just flying hydrogen bombs.
"Some woman gets on there with a staticky sweater, and BOOM!"
–Archer, Skytanic (still my favorite Archer episode.)
I've been working on a Rivet Wars diorama for CoolMiniOrNot, the main feature being a giant blimp with the Rivet Wars logo stenciled on the side. Here's how it came together:
It started with layers of 2-inch thick insulation foam. They were cut to differently-sized circles to approximate the shape. I glued them together with hot glue and Liquid Nails® and then sanded them into the smooth, form you see here. A little wood filler putty was applied to fill in the gaps. At this point it looked like a giant, pink beehive.
The blimp has a framework all the way around, so I drew out guide lines, using the 2" sections for the vertical supports, and a straight edge for the lines running from nose-to-tail.
The fins are cut from foamcore (these are just rough shapes here) and inserted into slots that I cut along the top, bottom, and sides.
To achieve the canvas texture, I cut strips of fabric to "skin" the blimp. Each section needed to fit together without overlapping, folding, or creasing. Quite a task on the curved surface. All the seams are aligned with the framing guide lines.
Once the strips were cut, I soaked them in wood glue and laid them on, sort of like paper mache.
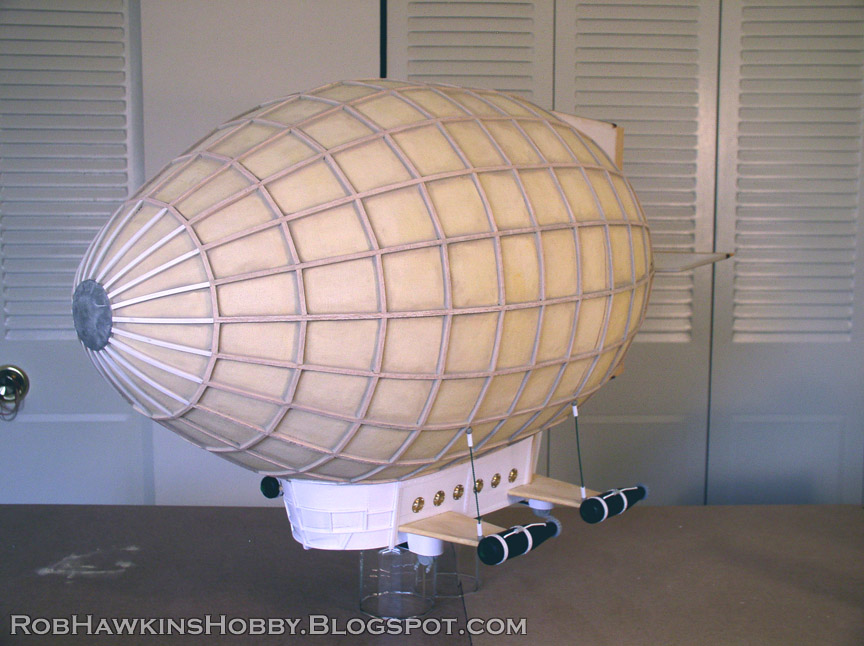
Here's the final, skinned blimp. The guide lines are still visible through the fabric.
For the framing, I used balsa strips, super glued along the lines, covering the seams between the sections of fabric. I started with long strips for the horizontal beams.
Next, I added the vertical rings using small lengths of wood, fit between the longer strips.
Here you can see how the framing fits around the slots for the fins.
On the nose and tail, I sculpted end caps using Aves Apoxie® Sculpt. Once dry, it was sanded smooth to match the taper of the wood struts.
The wood didn't have as much flex as I had hoped, and kept snapping at the nose. Instead I used styrene rods, which could easily bend around the curve and form the nose framing.
In this close-up, you can see the texture of the fabric. A few of the seams are still visible.
Liquid Nails was "caulked" into all of the seams. This had the benefit of adhering the wood more securely, and covering any exposed edges of the fabric.
The final, skinned and framed blimp:
From there, I built the control module, and finished off the fins.
The fins were cut to shape, and their edges rounded off with Aves and modeling putty. Tapered basswood was used for the rudders.
The cockpit was built using a core of insulation foam with styrene sheets laid overtop. This was all framed out with rivet-punched styrene strips and more balsa wood where it joins with the blimp.
For the hatch pistons, I used parts from the Allied artillery piece, metal rod, and a combination of styrene tubes, rods, and L-strips.
The ball turrets came from the underside of the Allied "Ostrich" tank walker. The housing was carefully cut from styrene, and fit overtop of a PVC tube.
The cockpit windows were made from layers of rivet-punched styrene sheets and hex rod for the window framing.
The hobby shop's model boat section had some brass portholes that fit the bill (and the scale) nicely.
The wings were made from wood panels, cut and sanded to a "wing" shape. For the support cables, I twisted wire and added styrene tubes and balls of Aves putty for the attachment point. The assembly was pinned together.
The engines were built from toys that I found (I think they used to be plastic baseball bats). More parts from the Allied artillery, along with styrene strips and rod, were used to add the surface detail. The artillery wheels have a nice swirl pattern that's evocative of a fan. I have some propellers that will be added after painting.
I'll leave you with a few rotation shots of the finished blimp. Watch for the painted blimp and see how the rest of the diorama came together in upcoming posts.
"Whoopie, a zeppelin!"
–Randy, A Christmas Story
'Til next time!
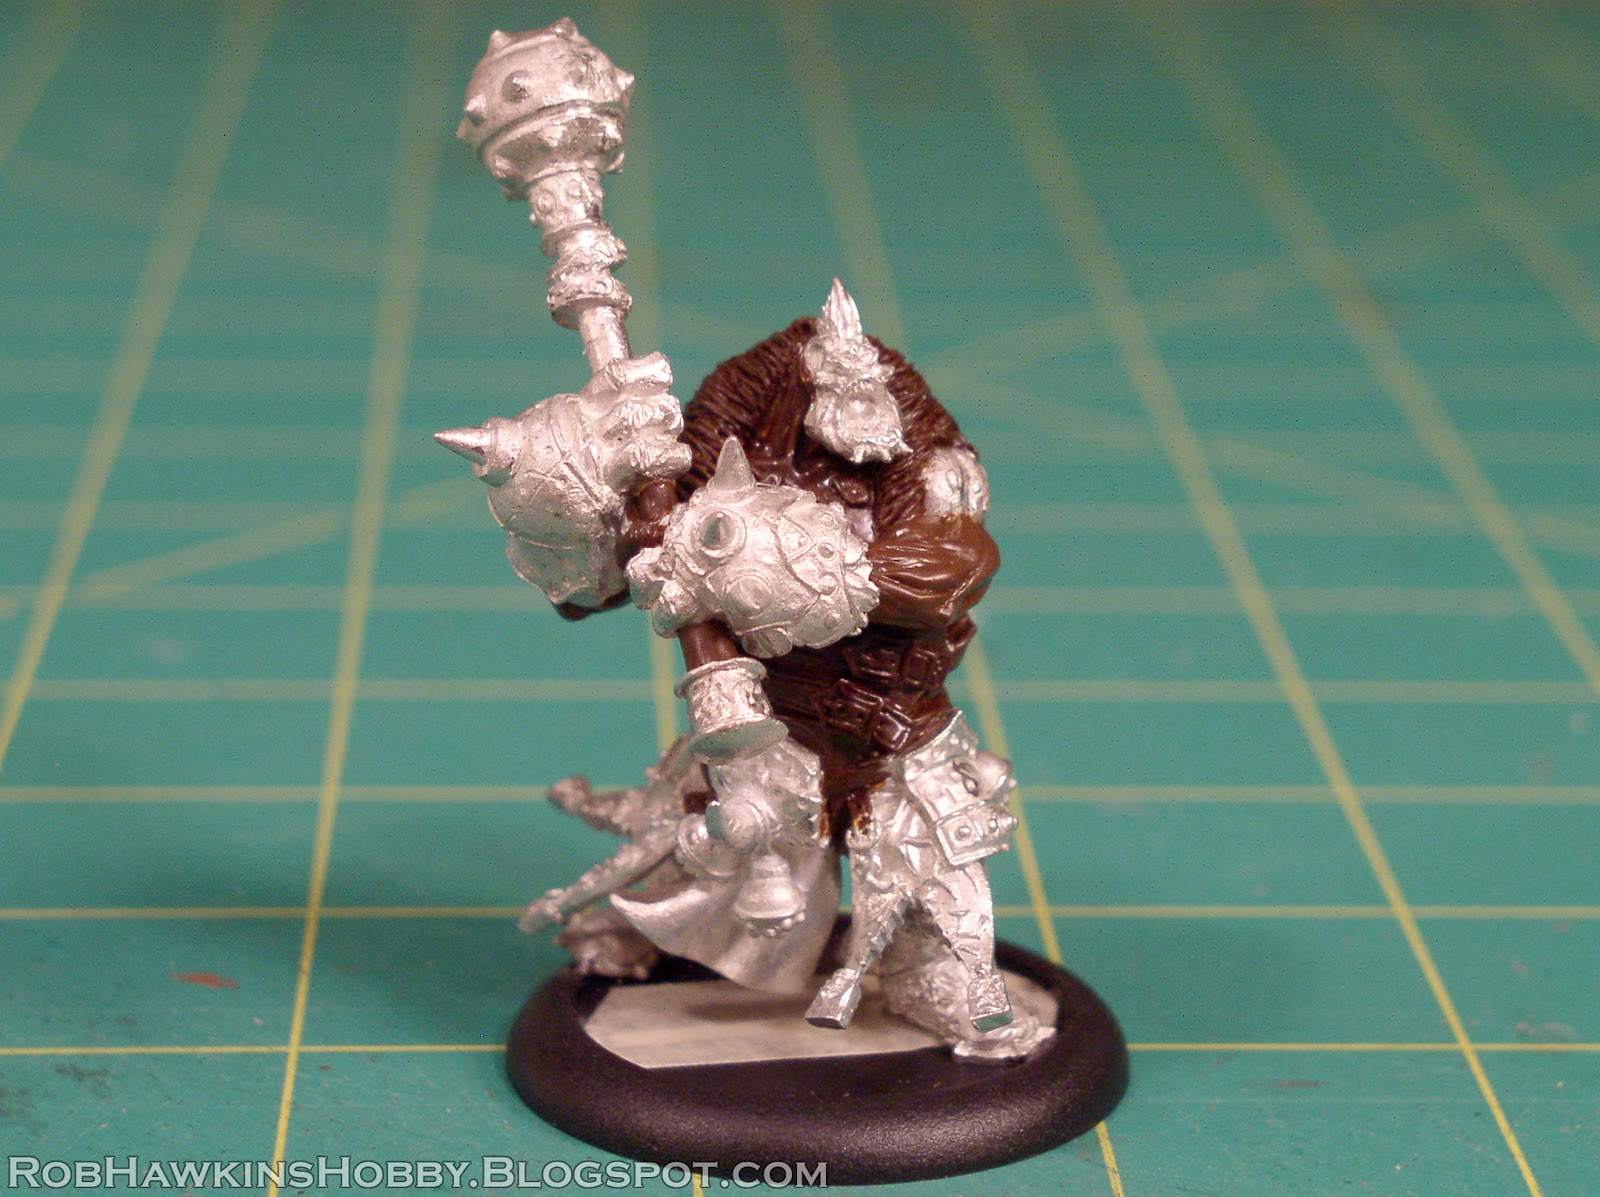
One of my recent commissions was to recreate Borka Kegslayer's "two-handed swing" as seen in the fantastic Andrea Uderzo illustration.
Other modelers have done this using the Trollblood Axer torso to replace Borka's, so I went the same route. My goal was to recreate all of the detail and clothing as it appears on the "regular" Borka, so there was a fair bit of sculpting involved.
The parts list for this conversion:
Borka Kegslayer (the complete model)
Troll Axer Body
Parts Preparation
I began by sawing Borka in half at the waist and cutting the arm off of the Axer's torso right above the armored gauntlet. I useed clippers to cut away the armored gorget on the Axer's neck, and to flatten out his chest.
The torso and legs were pinned together with a bit of putty to fill in the gap. Holes were also drilled in the arms to accommodate the armature pins later.
The Chest
With the armor removed from the Axer's neck, I could sculpt some anatomy. Not an entire torso, just the exposed chest area and the neck. The armor on the back of the neck would be covered by Borka's high fur collar.
Once the putty on the chest was dry, I added a small roll of putty to create the necklace "string." When this was also dry, I placed 3 balls of putty where the stones would go, and used my sculpting tool to flatten and shape them. The runes were pressed in with the tip of my hobby knife.
The Jacket
First, the leather jacket was laid in. A few folds were pressed in with my smoothing tool. and the arm holes were shaped into a ragged, tattered edge.
To sculpt the lacing on the back, I cut a few horizontal lines, and then the vertical seam between them.
Before working on the fur collar, I attached Borka's head and touched up the join. The fur was made by pulling lines along the surface of the putty.
When sculpting fur, I work from top to bottom in rows, so it's easy to have "layer lines" in the pattern. The trick to making fur look convincing, is to eliminate these as much as possible, creating a uniformly random appearance.
Finally, a few deep recesses were made with a pointer tool.
Here, you can see the front of the collar, and the attached head.
The Belts
I glued on the parts of Borka's kilt (the bottom of the jacket neded to be trimmed in a few places so the kilt fit properly). The kilt wrapping was built up a bit with some putty.
The belts were added as strips of putty which were then shaped. The seam along the edge was pressed in with the bladed edge of my sculpting tool. The round impressions were made with differently sized tubes, including a mechanical pencil with the lead removed for the smallest rivets. Using a pointer tool, I pressed in some holes on the end of the belt.
After this putty cured, I added the buckles. They started as squares and were pressed into shape. using the same technique as the rest of the belt.
Hands and Arms
The bottom of Borka's mace was carefully separated from the hand. The hands were then drilled out to fit a 1.90mm brass rod. On Borks'a left hand, his pointing index finger was cut off...
...and resculpted around the mace handle. You can see where I wrapped a little putty around the brass rod to match the thickness of the handle.
Here are the parts just before I trimmed the brass rod to length, and attached it to the other hand.
More brass rod was used to create the armature and pose.
Over the armature, I added a layer of bulking putty.
When the bulking layer was dry, I removed the hands and sculpted the final musculature overtop.
The Finished Model
On the final model, the mace was left separate for painting convenience.
This commission posed a lot of sculpting challenges, but was a lot of fun to work on. I'm really happy with the way he turned out. For now, I'll leave you with some rotation shots of the final miniature:
'Til next time!