Making Old World Movement Trays
In this post, I'll show you how I made some spacer trays for my cavalry.
My Hexwraiths needed to be swapped from oval bases, so I put them on the correct 30x60mm cavalry bases. For my 40 Black Knights, however, I'm opting to build spacer trays rather than re-base the whole batch.
The tray will represent the new "footprint" of the larger bases (increasing from 25x50mm to 30x60mm) so I need to add 10mm to the length and 5mm to the width. Split in half, that's 5mm in front and back, and 2.5mm on each side. The height of the bases is about 3mm, so that's the height I want to make the "walls" of the tray.
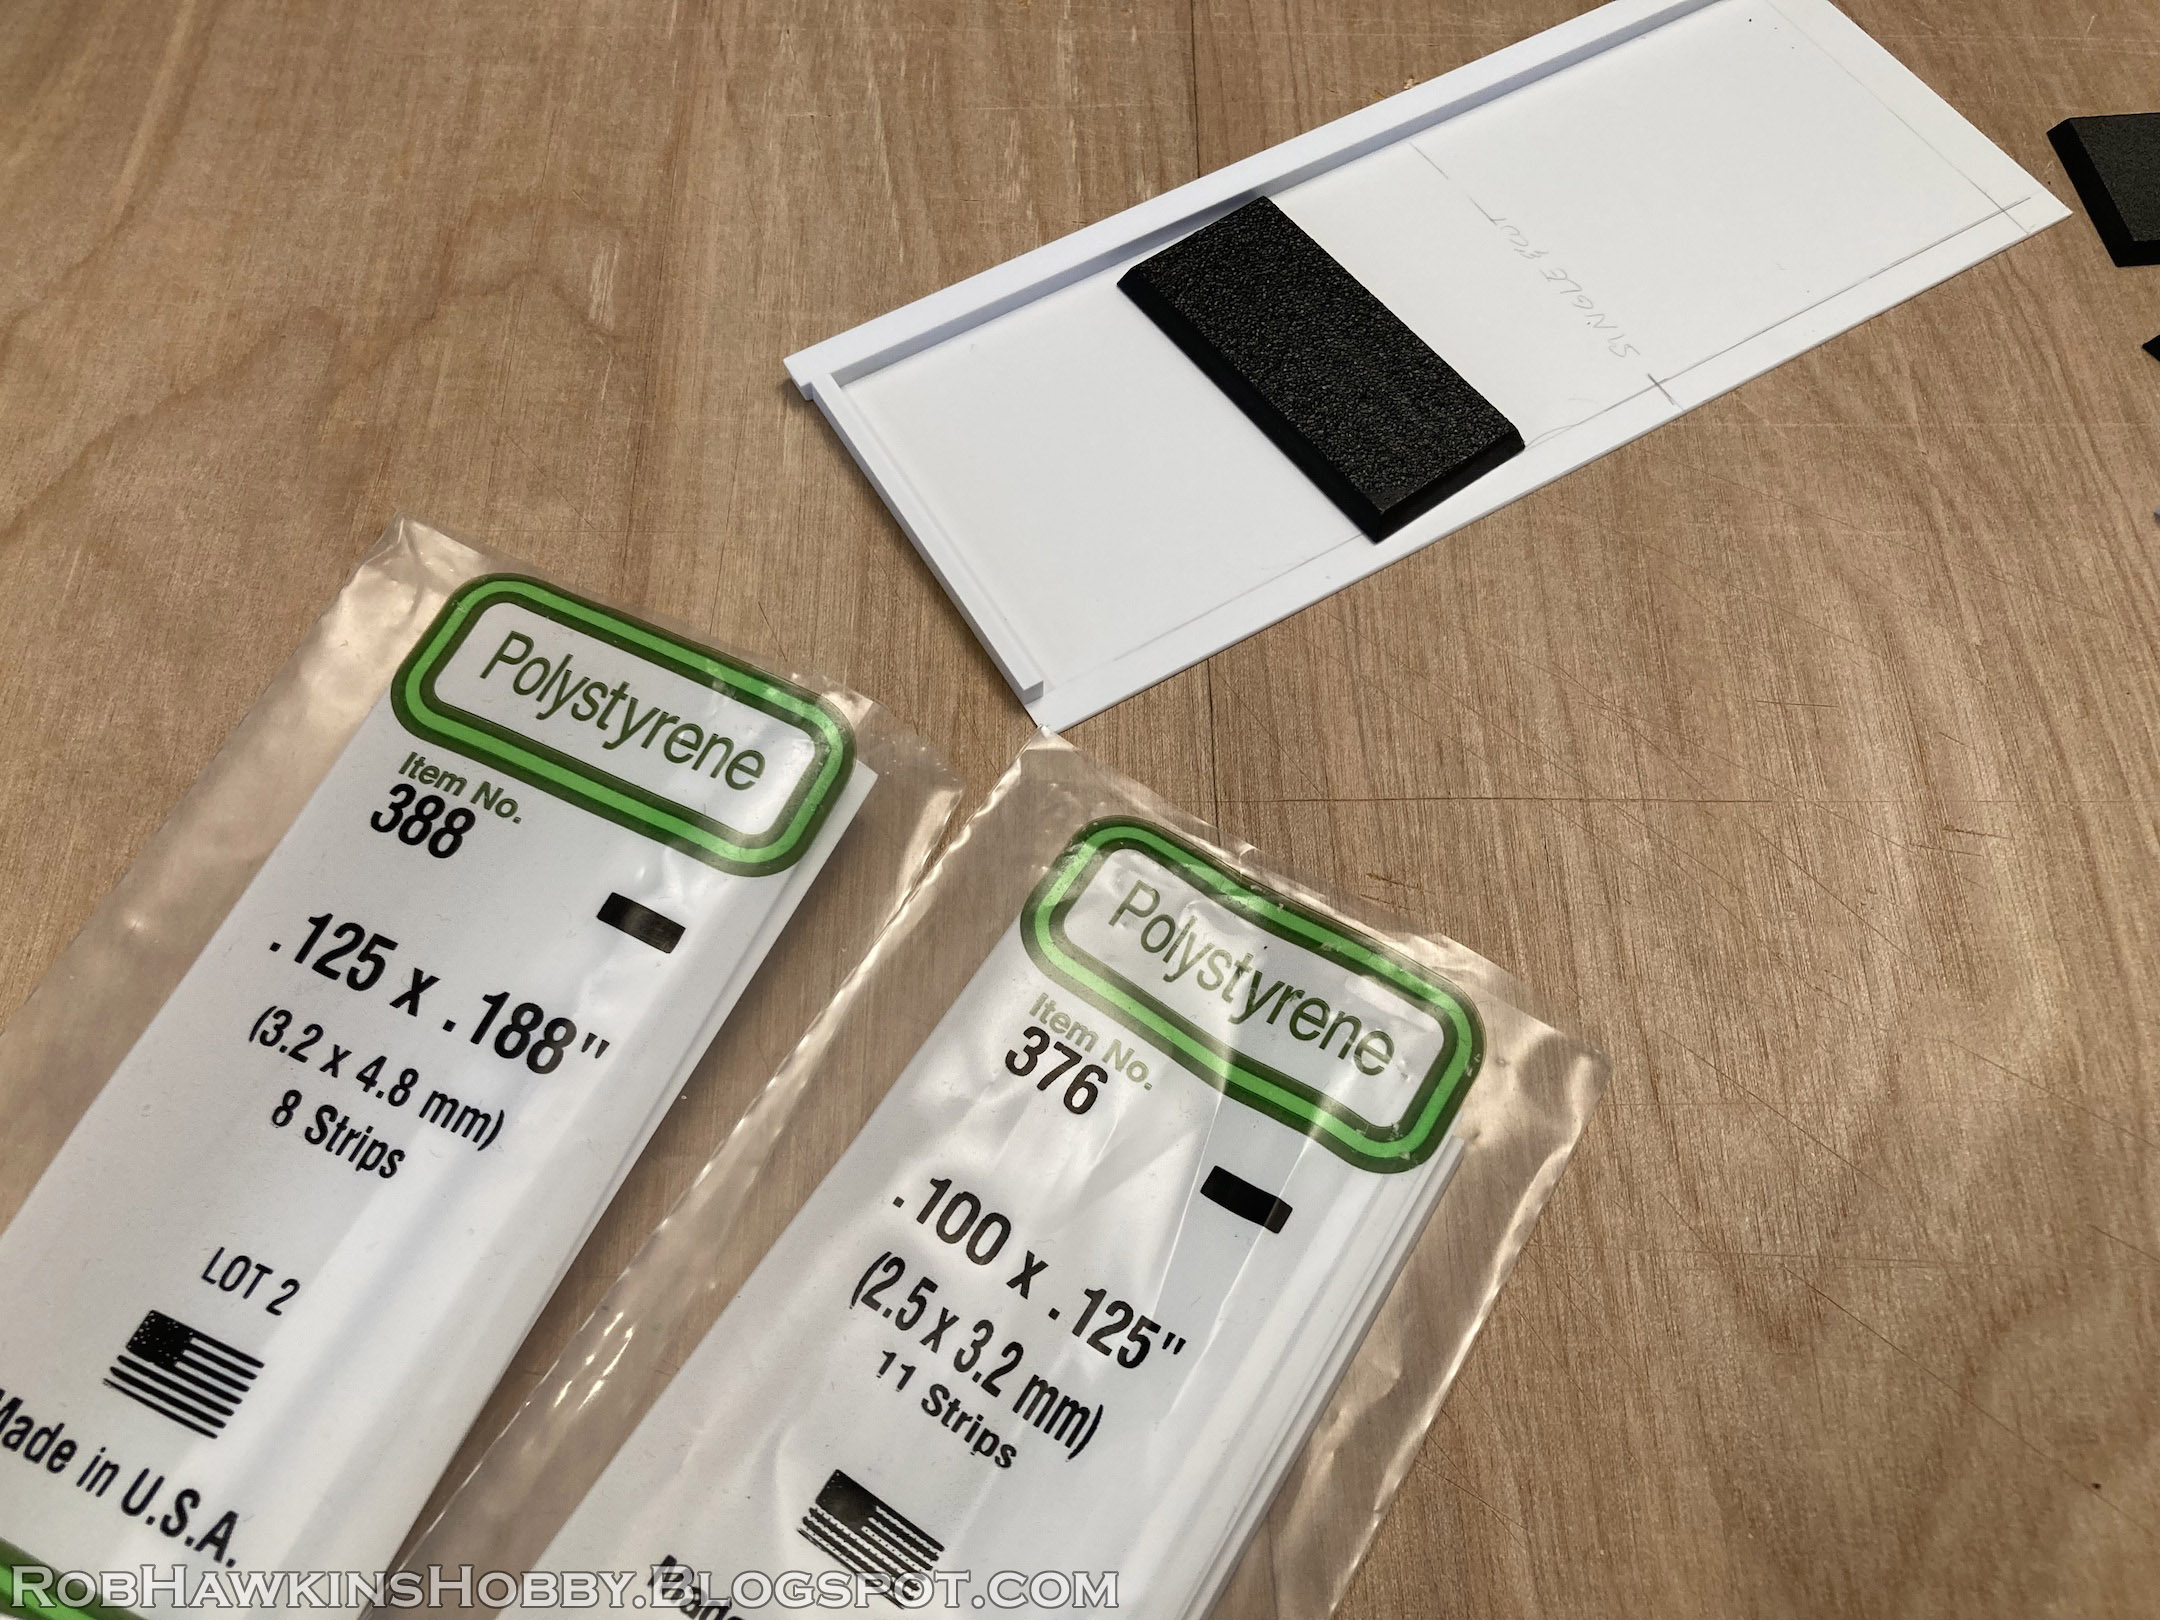
I couldn't find any styrene strips with the exact measurements, so I settled on 4.8x3.2mm and 2.5x3.2mm. (I need to leave some wiggle room in the cavities, so the smaller measurements will be fine. For the base of the tray, I'm going with .38mm thick styrene sheets so the trays don't become too thick.
Another detail to consider, is that the 25x50mm cavalry bases are not 25mm wide, they are 24mm wide:
When building the tray, I use two 25mm square bases (instead of a cavalry base) to space apart the walls of the tray. I begin by cutting the base of the tray to the appropriate footprint. In this case, it is for a single row of three cavalry bases, so that's 60mm deep and 90mm wide.
I attach a 4.8mm strip along the front, making sure it is precisely lined up with the edge of the card. On the back edge of the card, I mark the width of a 4.8mm strip.
For the side walls, I use the 2.5mm strips– a single for the outer edges, and two glued together for the wall between each base. Using the line at the back of the base as a guide, I trim them all to the same length (it ends up being just over 50mm).
Then, I attach a single 2.5mm strip aligned with the left edge, making sure it's nice and square. Next, I butt the 25mm bases into that corner, and glue in a doubled 2.5mm strip (now 5mm).
I repeat that process all the way across the tray, aligning a single 2.5mm strip along the right edge. Each slot is evenly spaced, and the cavities allow for about a millimeter of wiggle room around the smaller cavalry base.
The final step is to glue a 4.8mm strip along the back edge, and trim off any overhang on the corners.
To make a tray with multiple ranks, I use the same process, running the vertical (side) strips all the way back, and then add the horizontal wall between the front and rear rank. That wall is made from two 4.8mm strips, glued together and trimmed to fit between the vertical strips. The center of that double strip should sit at the 60mm mark (measured from the front edge and rear edge of the tray).
My goal with these trays is to model the sides like the edges of a cavalry base, so I bevel the sides to match the angle of the GW bases. To do this, I make a diagonal cut from the top of the tray's edge, and then use my hobby knife and a sanding stick to shave away some excess material on the sides and smooth the surface, taking care not to reduce the bottom edge of the tray at all so it retains its proper measurement.
To indicate the space between the bases, I make a V-cut in the side:
With the construction of the tray finished, I super glue sand on top of the walls, taking care to remove any bits of sand that overhang the edges or that get stuck in the corners of the cavities.
Then, I spray prime the whole tray with black, and then spray it a base color of green (in this case Tamiya TS-28 Olive Drab 2).
I paint the sand on top with thinned Formula P3 Umbral Umber.
Then, I drybrush it with GW XV-88 brown and Army Painter Skeleton Bone. (If you are using this as a guide to make your own trays, you could obviously use a spray and ground colors to match your own basing and battlefield scheme.)
I finish off the surface with some static grass and tufts:
Here is my first batch of trays for a unit of 15 models. The smaller trays are designed so I can set them up as a third rank, or add them to the side to make a front rank of eight, and a second rank of seven.
I don't care what anyone says– The larger base size is fine, and I'm so happy that my knights can finally rank up without banging into each other and without the rear lances stabbing into the model in front, and without the horses' heads clashing with the tails of the horses in front.
For the models that don't need spacer trays, I'm using .33mm thick tin-coated steel sheets that I picked up at the hobby shop. I cut them with tin shears and sand off the sharp edges to make a simple tray that I can magnetize the models to.
I prime and spray the metal sheet with the same colors as my other tray (but they don't need any basing or static grass).
The sheet is cut just slightly smaller than the unit's bases so it will be completely hidden under the models. Two rare earth magnets in each model's base is enough to secure them to the tray.
Here are the two units side by side– The Black Knights with their spacer tray, and the Hexwraiths with their magnetized tray. My goal with The Old World is to have "invisible" movement trays that don't add any excess width around the perimeter of the unit. Once I add some magnets to my Dire Wolves, I'll have the cavalry sorted. Then, it's on to the infantry blocks!
'Til next time!


Looks great to me (although a lot of work if you have to make them for an army as large as yours!).
ReplyDeleteI particularly appreciate how you made the v-cuts to indicate where the bases WOULD be if they were on single 30mm wide bases!
Thanks! Fortunately, most of the VC range kept the same base sizes, so I only have to do these for my infantry and Black Knights (which is still a lot!) :D
DeleteThis comment has been removed by a blog administrator.
ReplyDelete