Skaven Warp-Skryre Tower Painting Journal, Part 3
I've been making a big dent in this scenery project. Here's how things have been shaping up...
As I entered the second week of the scenery challenge, I was falling a bit behind schedule, requiring a re-evaluation of the schedule.
Sunday, June 16th, Day 9–
I wasn't able to get all of the metal painted on the collector and platform, but I did jump ahead and finish the pipes and hoses. That gave me two open days, so I rescheduled the collector and platform to be worked on over the course of Sunday, Monday, and Tuesday (the blue-shaded days on the calendar).
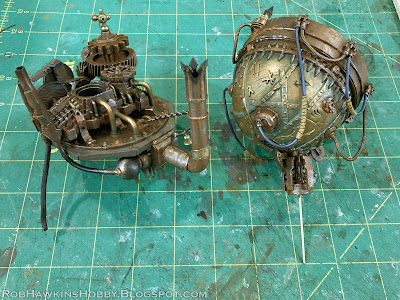
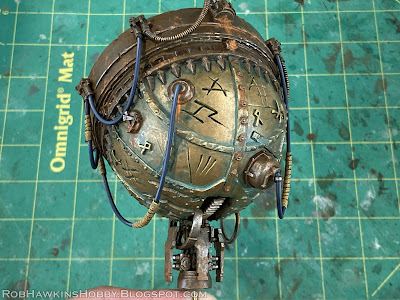
Then, I finished basecoating all the metal and applied a rust wash and the green patina on the brass dome and copper pipes. For the patina, I used a mix of GW Nihilakh Oxide and Coelia Greenshade. The rust was a mix of Formula P3 Bloodstone, orange, and brown ink. There was still a bit of metal detail left to paint, and the orange of the rust needed to be punched up in a few spots, but I was still on track with the schedule.
Monday, June 17th, Day 10–
Continuing on from the day before, I picked out the remaining metal details, and then I painted the cables on the collector.
At this point, the collector was finished except for the glowing swirl on the front. (And that little bit of warpstone at the top.)
The metal on the platform was also touched up a bit, and I got a head start on the remaining details by painting the wooden bits with P3 Bastion Grey.
Tuesday, June 18th, Day 11–
The pile of unpainted parts is getting smaller and smaller! Before getting back to the platform, I took a moment to prime the loose gears.
Once all the wood on the platform was drybrushed and washed, I went around and touched up the metal bolts and trim on the wheels. The leather belts were basecoated with browns and drybrushed. I also picked out the ropes and leather hoses. And with that, the largest remaining component was finished.
Wednesday, June 19th, Day 12–
Well... almost finished. I had overlooked the glowing orb under the platform. So the first order of business on Wednesday was to take care of that. I don't normally paint source lighting, but I figured this piece would benefit from it, and I'm going to attempt to make the warpstone and lens array really pop with some glow effects, so I decided to add some here.
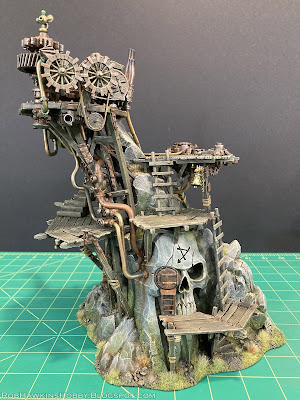
After that, it was on to the assembly! My experience when painting things in sub-assemblies is that the paint adds just enough thickness that elements which fit perfectly before suddenly become much tighter. So, I made sure to meticulously dry-fit each part, and build everything up piece by piece. I actually had to break some of the pipes in the front to get them into position, and then reattach them and touch up the joints. I also took care not to chip any of the pieces I had spent the last week-and-a-half painting!
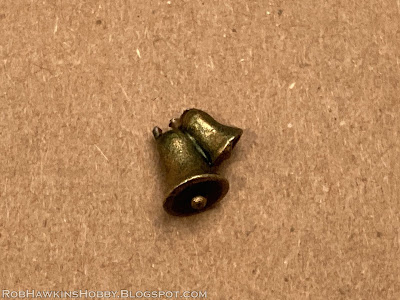
Unfortunately, after surviving for nearly a year of the assembly and painting process, these bells broke off underneath the stairs. It was getting late, so I just left them for the next day.
Thursday, June 20th, Day 13–
I didn't have much spare time to work on this project, so (after pinning those pesky bells back in place) I painted the remaining gears.
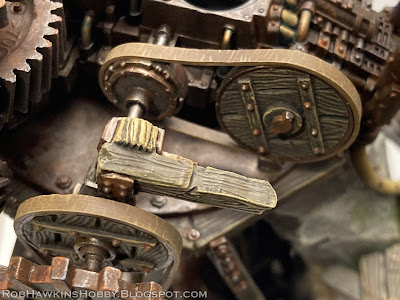
Before attaching them, I painted some fine cracks in the leather belts of the engine...
...and promptly covered them up when I attached the giant gear.
Man, I had forgotten how much of the engine is obscured by this piece. I probably could have skipped a bunch of details on the engine and they wouldn't be missed.
With all of the remaining gears and cables securely glued in place, only the collector's lens array, the telescope, the orrery, and the three little smokey bits remain! I have about a weekend to finish them all. I'm planning to tackle the telescope on Friday, the orrery on Saturday, and the lens array on Sunday. Will I make it?
'Til next time!









Bimey, this is good. I love the faded look of the metal and wood. It really looks bleached by the sun.
ReplyDeleteThank you! I've been using a more realistic approach to the metal, rust, and wood than I used on my older scenery, so the rust is more orange, rather than simply a wash with brown ink, and I try to keep the wood more grey than just brown.
Delete