Converting Tomb King Skeletons
In this post, I'll show you how I converted some more thematic Khemri armored skeletons:
A few posts back, I had hinted at my plan to build more thematic Khemri skeletons using the guardians from the Casket of Souls. I have a bunch of these from the days when you could purchase bits by weight at the Glen Burnie GW headquarters. Since there are only two unique guardian modelds (which are essentially the same pose), I decided to add some variety by mixing in plastic components from the chariot crew and regular plastic skeletons.
Skeleton Bodies
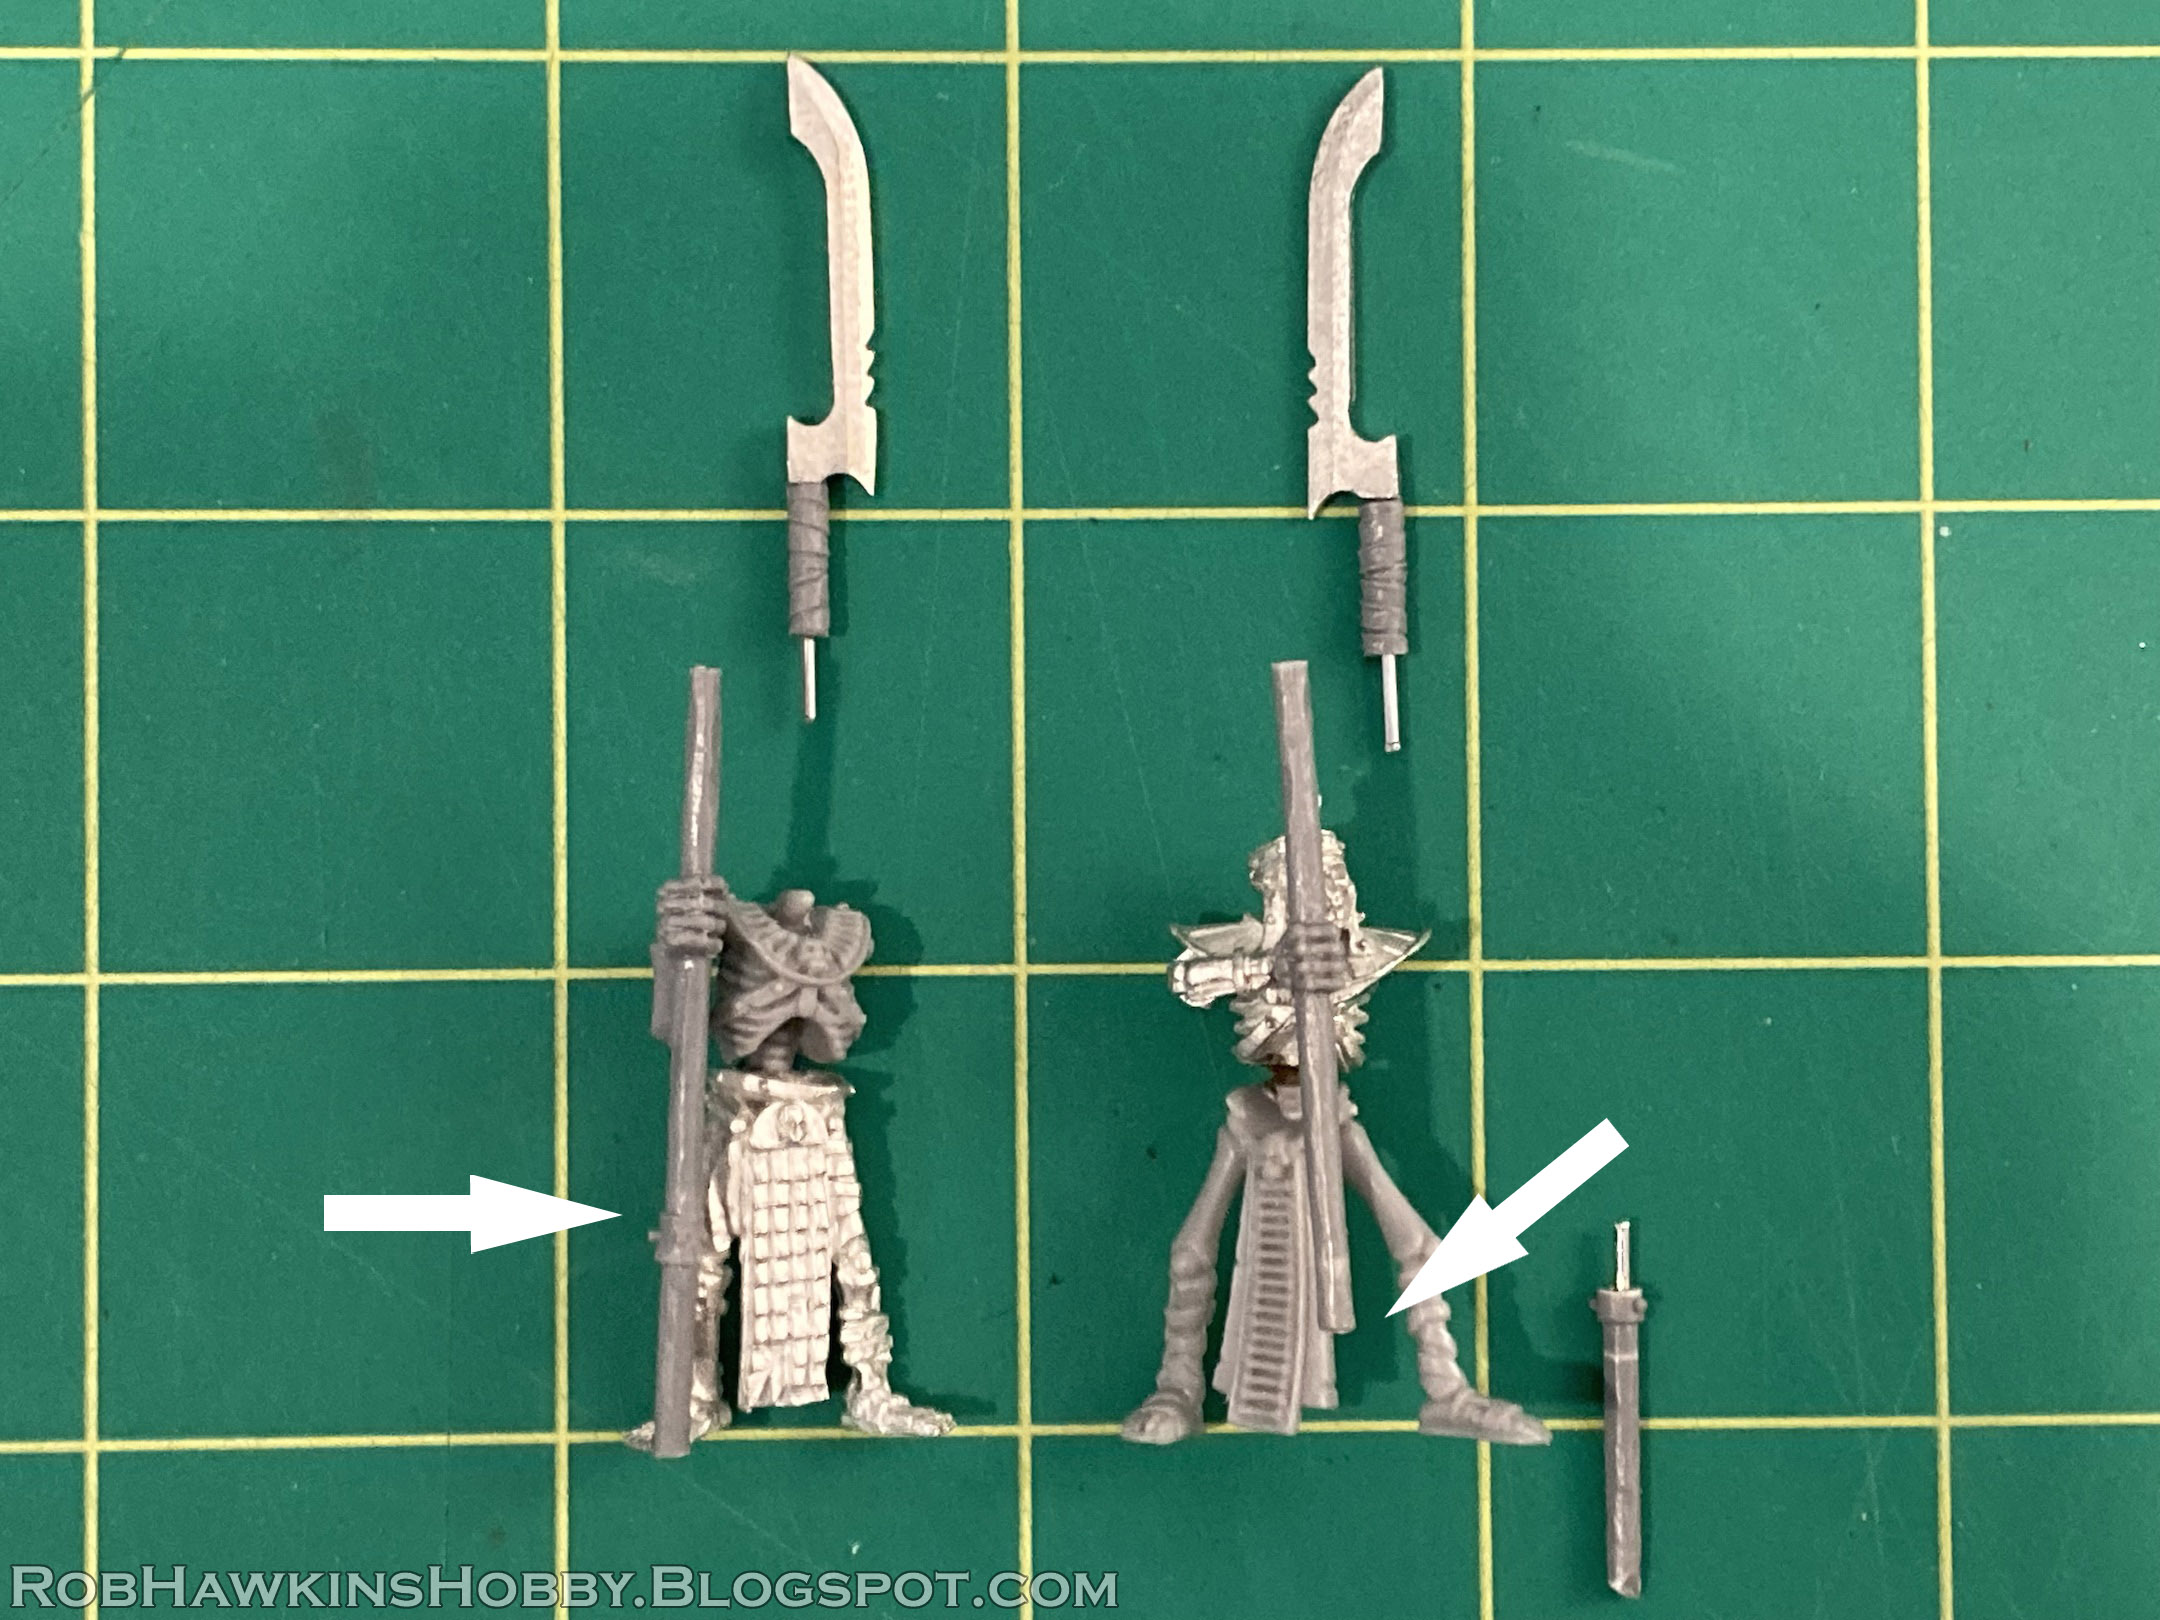
The first step was to cut the metal model in half. Easy enough by pressing with a sharp blade on each side and then snapping the piece. I was able to get a clean cut just above the belt line, leaving me with the legs and a torso.
By putting the plastic body on the metal legs, and the metal torso on the plastic legs, I could get two unique models and some varied poses.
The attachment points were pretty small, so I pinned the halves together.
The metal torso didn't have much spine left, so I left a bit of separation between the halves, and sculpted the spine over the exposed pin. I didn't go crazy with the detail because this model will be surrounded by his buddies, and minor defects on individual models won't be noticed in the overall regiment.
I also cut away his left arm so I could replace it with a proper shield arm.
Cobra Icons
The metal guardians have bird icons on their headdresses. In my Warmaster Tomb Kings army, I had established Skull, Serpent, and Scorpion brigades, but no "bird" motif. After some contemplation, I decided to turn the birds into cobra heads and establish these models as part of the Serpent brigade.
I began by clipping off the front and back of the bird.
Then, I used a pair of smooth needle-nosed pliers to squeeze the bird into a flat circle. Easy enough, with the soft white metal. I first squished it flat, and then crimped the sides vertically to leave a slight rise in the center. You can see the cobra hood starting to take shape:
Next, I used a hobby knife to trim the edges and clean things up. I scraped the back of the hood to round it off a bit, and scraped some horizontal cuts in the front of the snake.
To build the cobra's head, I cut a tiny bit of thin styrene rod and glued it on the hood, the same as adding a rivet to a model.
To finish it up, I used my knife to slice the styrene into a more rectangular shape, and I filed the top and back to get a rounded curve to the cobra's head and hood. As with the sculpting of the skeleton's spine, I wasn't too concerned about getting the details perfect– There are no eyes or mouth on the head, but the icon will still be read as a cobra from a distance.
Spears
I used the guardians' swords to replace the Gothic spear tips. After cutting off the handle, and removing the spear tip, I drilled through the wrappings on the spear shaft and pinned the sword onto it. The red line shows how the pin runs all the way through the piece.
The wrapped spears could stay intact, but I removed some of the wrappings so I could transfer them onto the other spears, so all the different spear arms have uniform blades and wrappings.
For the metal torso, I drilled into the right arm and attached a paperclip pin to the spear hand to ensure a secure attachment.
Here is how the models went together. Because the bottoms of the spears didn't reach the ground, I added an extension by pinning another bit of spear to the end, using the metal cuff to conceal the join.
The final step was attaching a shield arm and basing the model. (The shields will be painted separately in a batch, and attached afterward.)
I'm not entirely happy with the skeleton on the right– Using the existing metal arm puts the spear in an awkward position, nearly obscuring his face, and he looks a little squat in the torso, making his legs look a bit too long. This guy will be buried in the unit, so I'm not going to re-do him, but I'll make some adjustments on the next batch, and definitely replace both of their arms.
I've been slowly building more of the robed skeleton archers, and Selketta is primed and ready for paint, so my little Tomb Kings force is starting to take shape.
'Til next time!


They look great!
ReplyDeleteThese are very promising, can't wait to see the whole unit!
ReplyDeleteThanks guys! I'm really trying to make my TK army unique and not just "stock" skeletons out of the box. It's slow going, though! :)
DeleteGreat work! These conversions will make the army a real labour of love!
ReplyDeleteThank you! Trying to make every unit unique for this army.
Delete