Project Log: The Emperor's Champion, Part 5
Here's a look at how I scaled up the detail from my little Emperor's Champion to the Inquisitor Scale marine.
The 54mm marine was coming along, but there was a fair bit of work to do on the arms. Since the Artemis model was a Deathwatch marine, the entire left arm was covered with inlaid script that would need to be covered.
I started by cutting apart the left arm and removing the raised detail on the shoulder pad and the flange. The right arm just had the cable cut away and the control pad clipped off. (That cable was a nice bit, so I kept it for use in another project.)
On the left shoulder pad, I mixed up a batch of mostly brown putty and smoothed it over the detail. I also filled in the cutout at the bottom.
When the putty had cured rock hard, I filed and sanded the surface into a smooth "naked" shoulder pad.
Next, I built up the trim with brown putty.
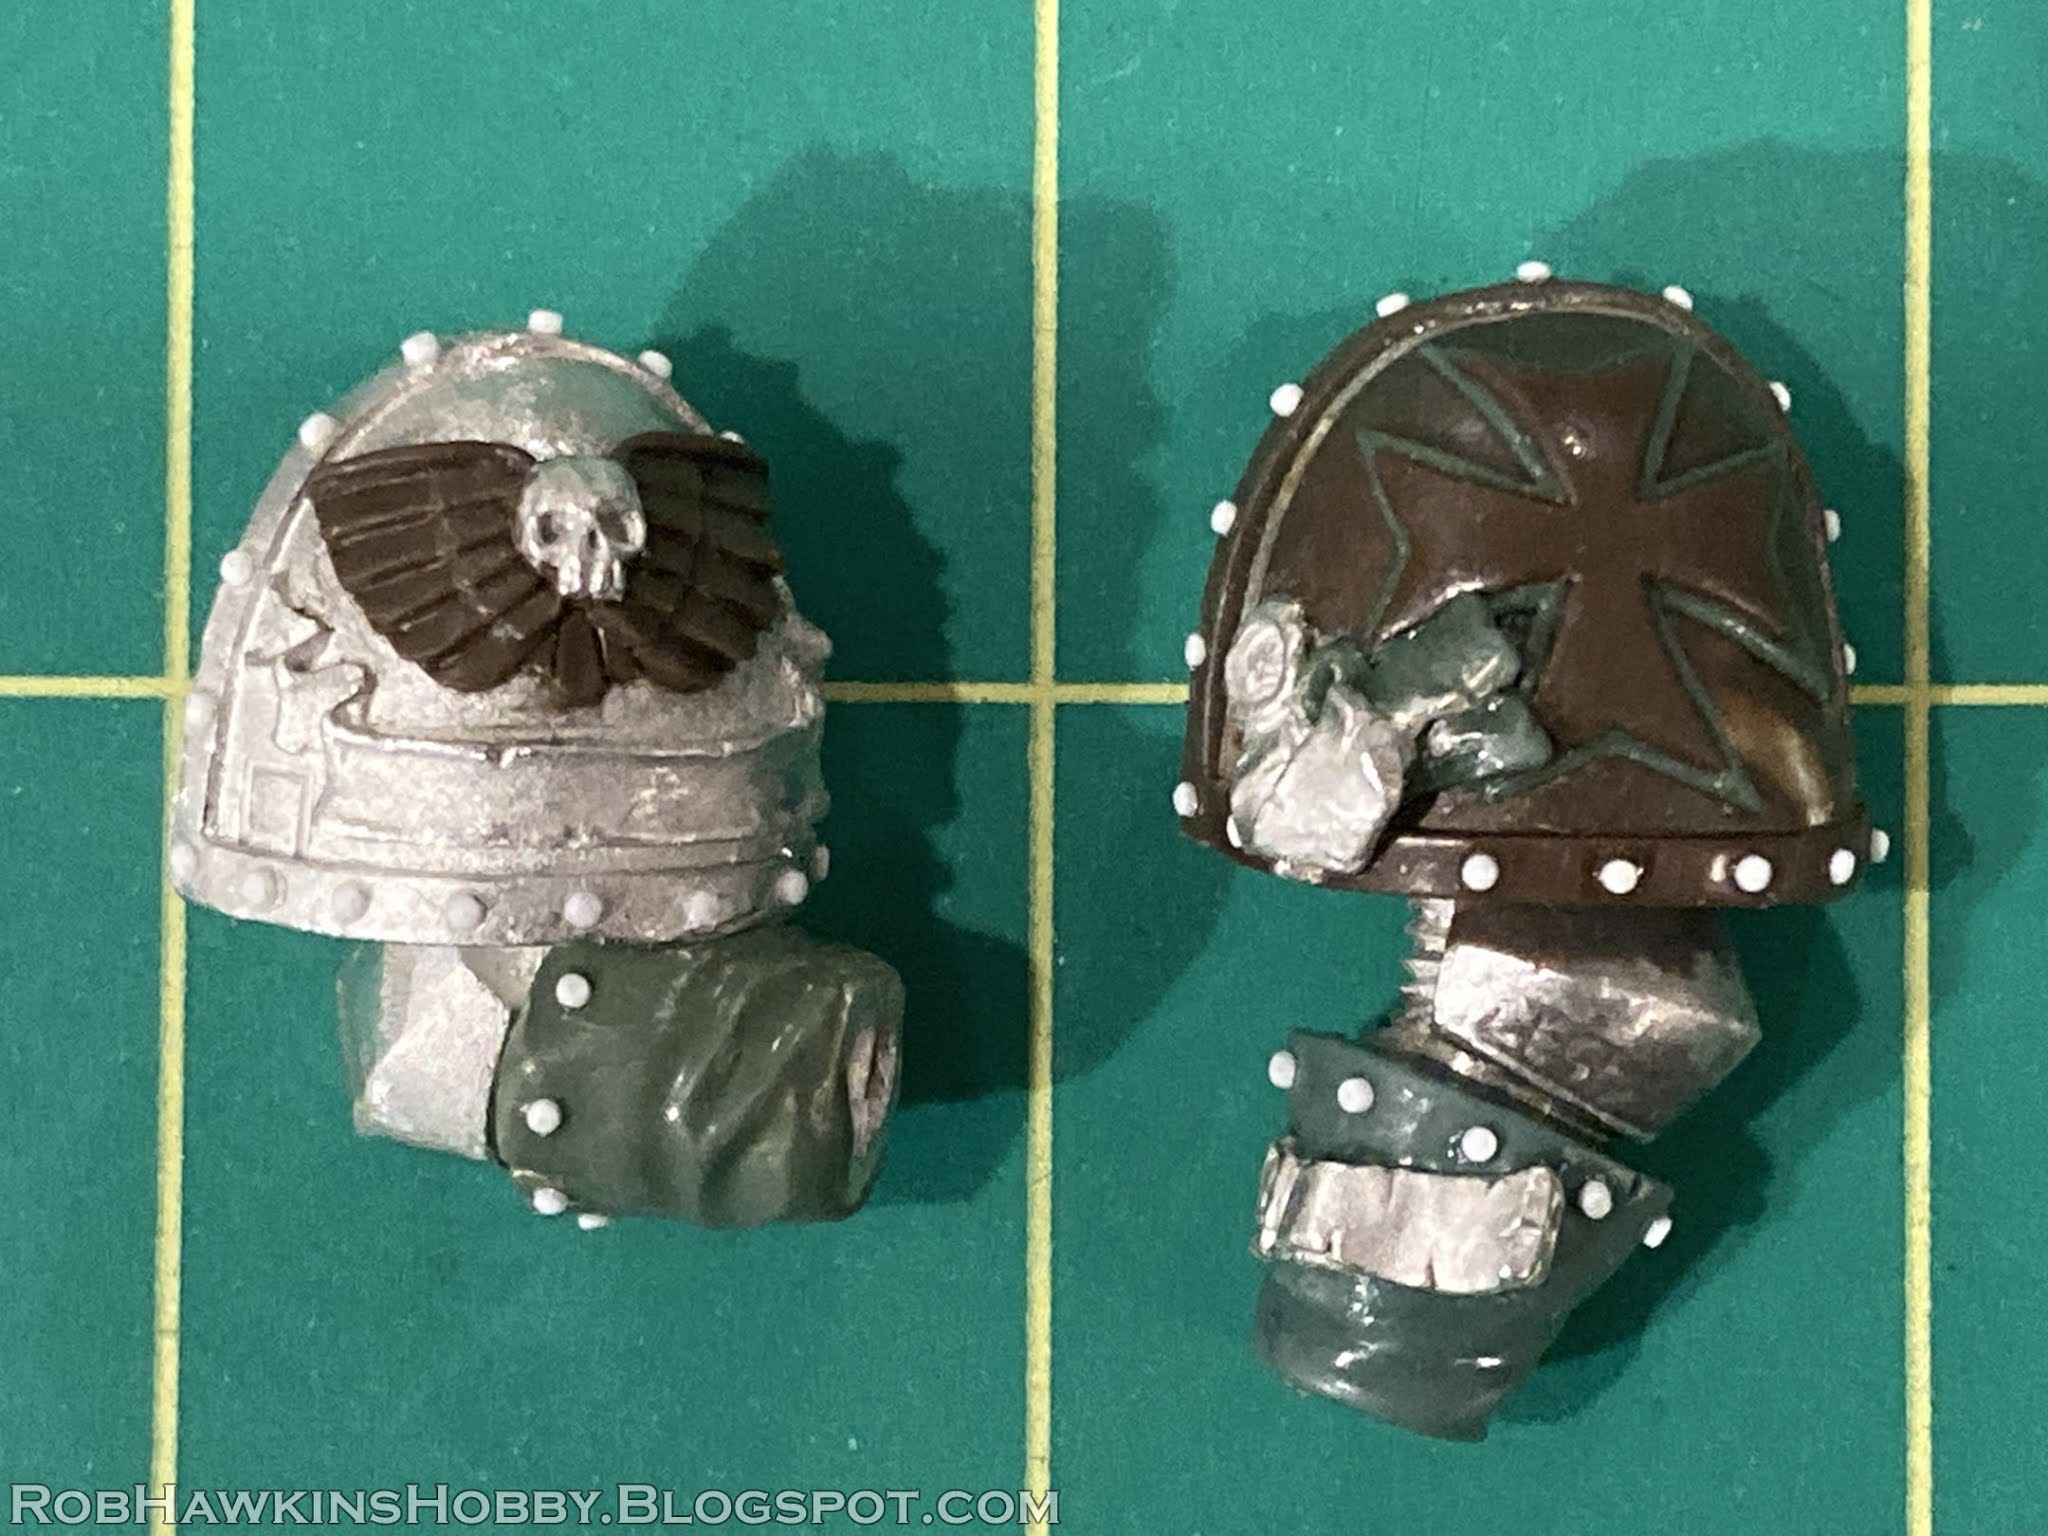
On the new, plain shoulder pad, I sculpted a raised templar cross.
Once the brown putty had hardened, I used green stuff to add a layer of trim around the cross. Because the surface of the shoulder pad had been slightly raised with the added putty, the purity seals had become a little buried. I built up the parchment so the seals would again look like they were sitting on top of the shoulder pad detail.
The right arm was a little easier because it already had a name banner with an open area above it. I did my best to match the winged skull on the little champion's shoulder pad. The skull that I used is the one that I had cut off of Artemis' chest.
With the shoulder pads finished, I sculpted the glove cuffs over the forearms.
The last step was to add rivets around the gloves and shoulder pad trim. As with the leg greaves, I cut small bits of styrene rod and attached them with super glue. Once dry, I rounded the tops of the rivets with a fine grit sanding stick. The left arm has been pinned back together, but not glued yet, so I can adjust the pose once the tabard is sculpted on the torso.
Speaking of the tabard, I shaped the lower portions by melting some thin styrene card with a heat gun.
I was able to get a rough shape that fit in place and had a nice flow to it.
I used more card than I needed so I had plenty of surface area to hold. Once I was happy with the shapes, I drew the outline of the cloth, and then trimmed them down to a reasonable size.
It was difficult to get tight folds at the top, so I just concerned myself with the overall form, and then shaved down the top so it would fit under the belt. In an upcoming post, I'll sculpt tighter detail at the top and blend the putty out into the folds of the styrene card. It should work out fine.
'Til next time!


Those shoulder pads look awesome! I especially like the one with Maltese cross.
ReplyDeleteWhat kind of modeling putty is that? Is it better then green stuff? I see you are using both.
Thanks! I'm really happy with how everything is turning out.
DeleteThe brown stuff is similar to green stuff (made by the same company). Green stuff is a little rubbery/ plasticy when cured, but the brown cures rock hard so it can be carved with a knife or sanded and filed.
I find that the brown sticks a little better and is a little easier to sculpt into sharp corners and fine detail.
You can find it at Green Stuff World. I believe it's called "Brown/ Aluminum." Aluminum refers to the color of the lighter half of the putty, which is silver-grey in color. There's also a "Brown/Neutral(white)" but I don't think they make that anymore.
By mixing the two putties (mix a batch of brown stuff and a batch of green stuff, and then mix the two together, you can get something in the middle that's a little firmer than straight green.
DeleteI've mainly been doing that to stretch my brown putty because I was down to my last pack.
Thanks Rob for this useful info! I'll definitely go get some and give it a try. 🍻
ReplyDeleteGreat sculpting. Plastic card with a heat gun is always a great technique, although usually too large for a figure... helps when you have an 80mm figure to work with!
ReplyDelete