The monstrous Vengorian Lord's assembly is finished! Here's a look at the process I used to convert him:
The first few images have already appeared in previous posts, but I'm including them here to show the entire project in one place. To create this guy, I ditched the top half of the vampire-centaur and replaced it with the head from Mannfred von Carstein's dread abyssal.
I built up the neck with Aves Apoxie Sculpt and then sculpted some musculature over it with brown modeling putty. I trimmed the jawbone a little to allow more clearance at the shoulder, and filled in the hollow underside of the jaw and added a tongue.
To bulk up his shoulders, I made shoulder pads out of the barding from the Black Knight kit. I clipped off the rear end of the armor, trimmed away the rider's skirt, and cleaned up the edges.
The armor gives him a little more mass and keeps his head from looking oversized. I'm imagining this character as an intelligent spell caster– a vampire lord in his ultimate monstrous form, not simply a monster– so wearing proper armor and clothes gives him a little more agency and befits his status.
For the back, I used this piece from the Blood Knight kit. It's the front of one of the horses, but it looks like it's forming a collar and has a nice flare at the bottom. It fits perfectly between the shoulder armor, as well.
I used putty to fill out his shoulders and add more surface area to keep the shoulder armor in place. The arms were only tacked in place with a tiny dot of super glue. Once the putty had cured, I cracked off the entire arm and added thin super glue under the shoulder armor to secure it to the putty. The arm, with its shoulder armor will be painted as separate pieces, and glued on afterward. The armor will hide the joins pretty well, so I won't have to do much touch-up work on the seams.
Since this guy was turning into a bit of a fancy-pants, I decided to give him appropriately fancy "pants." I cut off the ratty scrap of fabric that he was using as a loincloth, and smoothed over the stomach with some putty. I replaced the loincloth with the vampire's stomach plate and tabbard from the kit.
As I was trying to work out how all the armor would connect and be held in place, I settled on the pattern of straps, and coverings. He also needed something for his chest, which was a challenge since whatever I chose would need to fit in a tight space where his left arm cuts across the chest. I went back to the Black knight barding, and cut two pieces from the front.
I tacked them in place, imagining how they would sit over the straps and form rib protectors while still looking like they are open and flexible enough to allow movement of his wings when flying.
I marked all the armor positions with a fine Sharpie and then sculpted straps using a mix of brown and green putty. (The brown cures really hard, and the green cures more rubbery; by combining the two, I can get something in the middle. And I can extend the life of my brown putty since I'm on my last few packs, and I don't know if it's manufactured anymore!)
Before the the straps had cured, I pressed the armor bits into place so they would be securely seated on the model. After everything was cured, I popped off the plastic armor and carefully scraped the marker lines off of the surface. Marker tends to show through primer and paint, and I don't want black lines bleeding through all over the place.
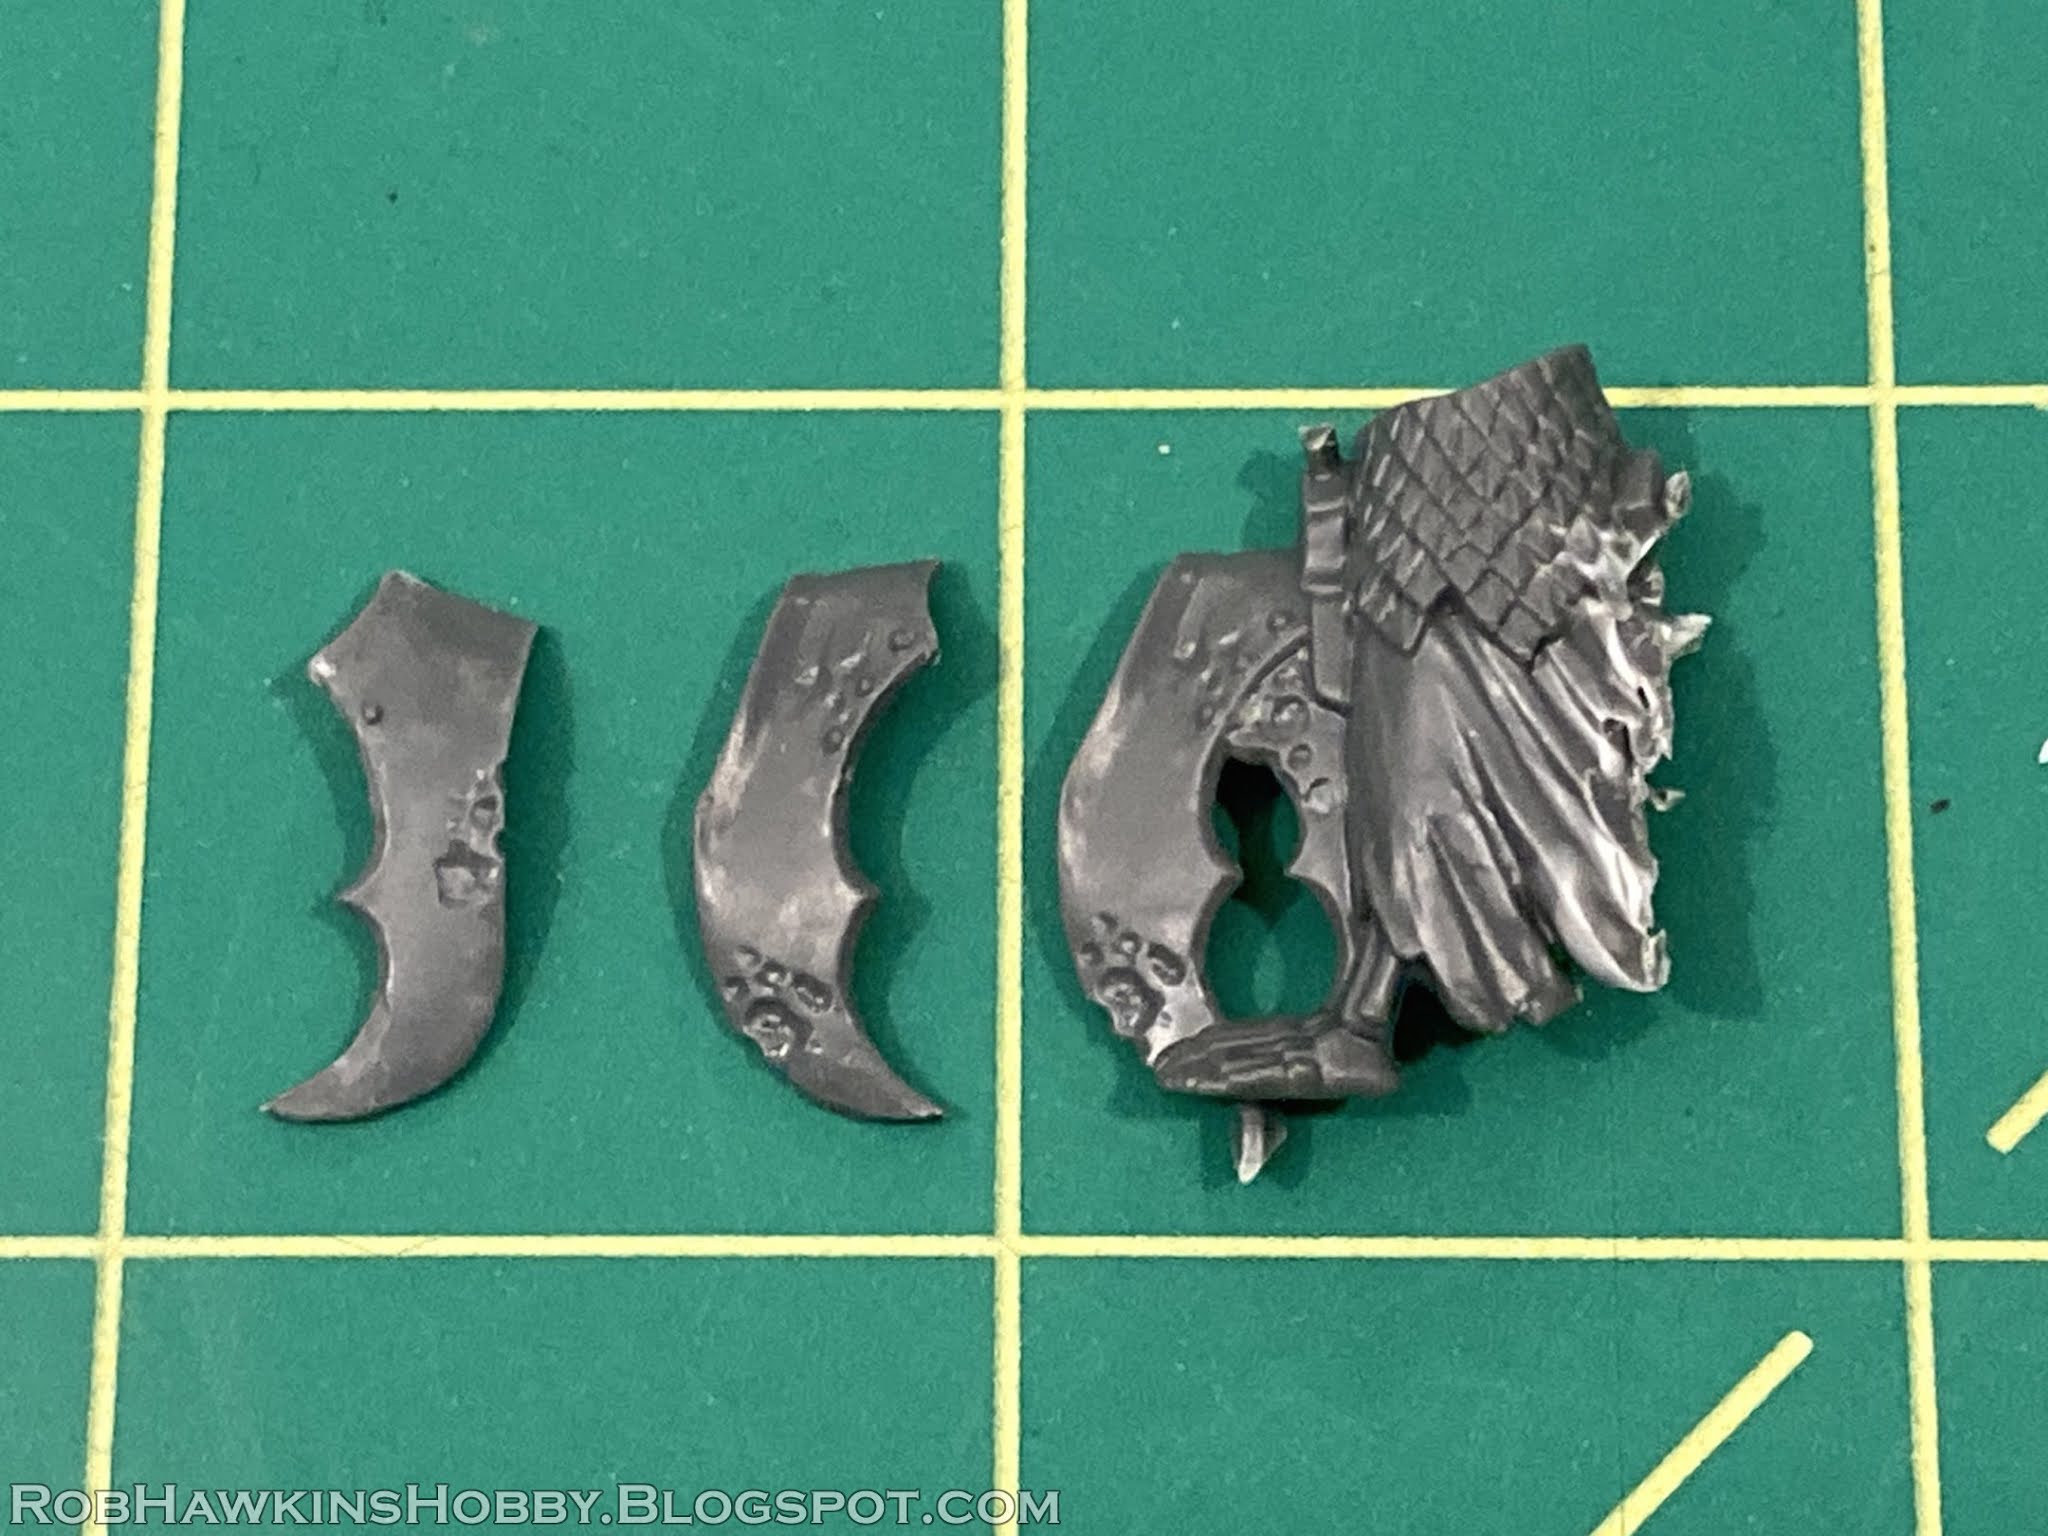
After trying out some different bits, I settled on one of the Blood Knight shields for the breastplate. I kept the bottom, and the skull, but trimmed away all the "wings" on either side of the skull, leaving only the hooks at the top. The result is a sternum plate that fits between the compressed shoulder pads and provides a little neck protection. The style of the skull on the shield matches the one on the back plate too.
Finally, I added a belt buckle, and super glued the rib and chest armor in place. (The stomach armor will come off for painting.)
Next, it was time to tackle the hair. I sculpted a nice, flowing mane on the back of his head and neck and fit the back plate in position while the putty was wet.
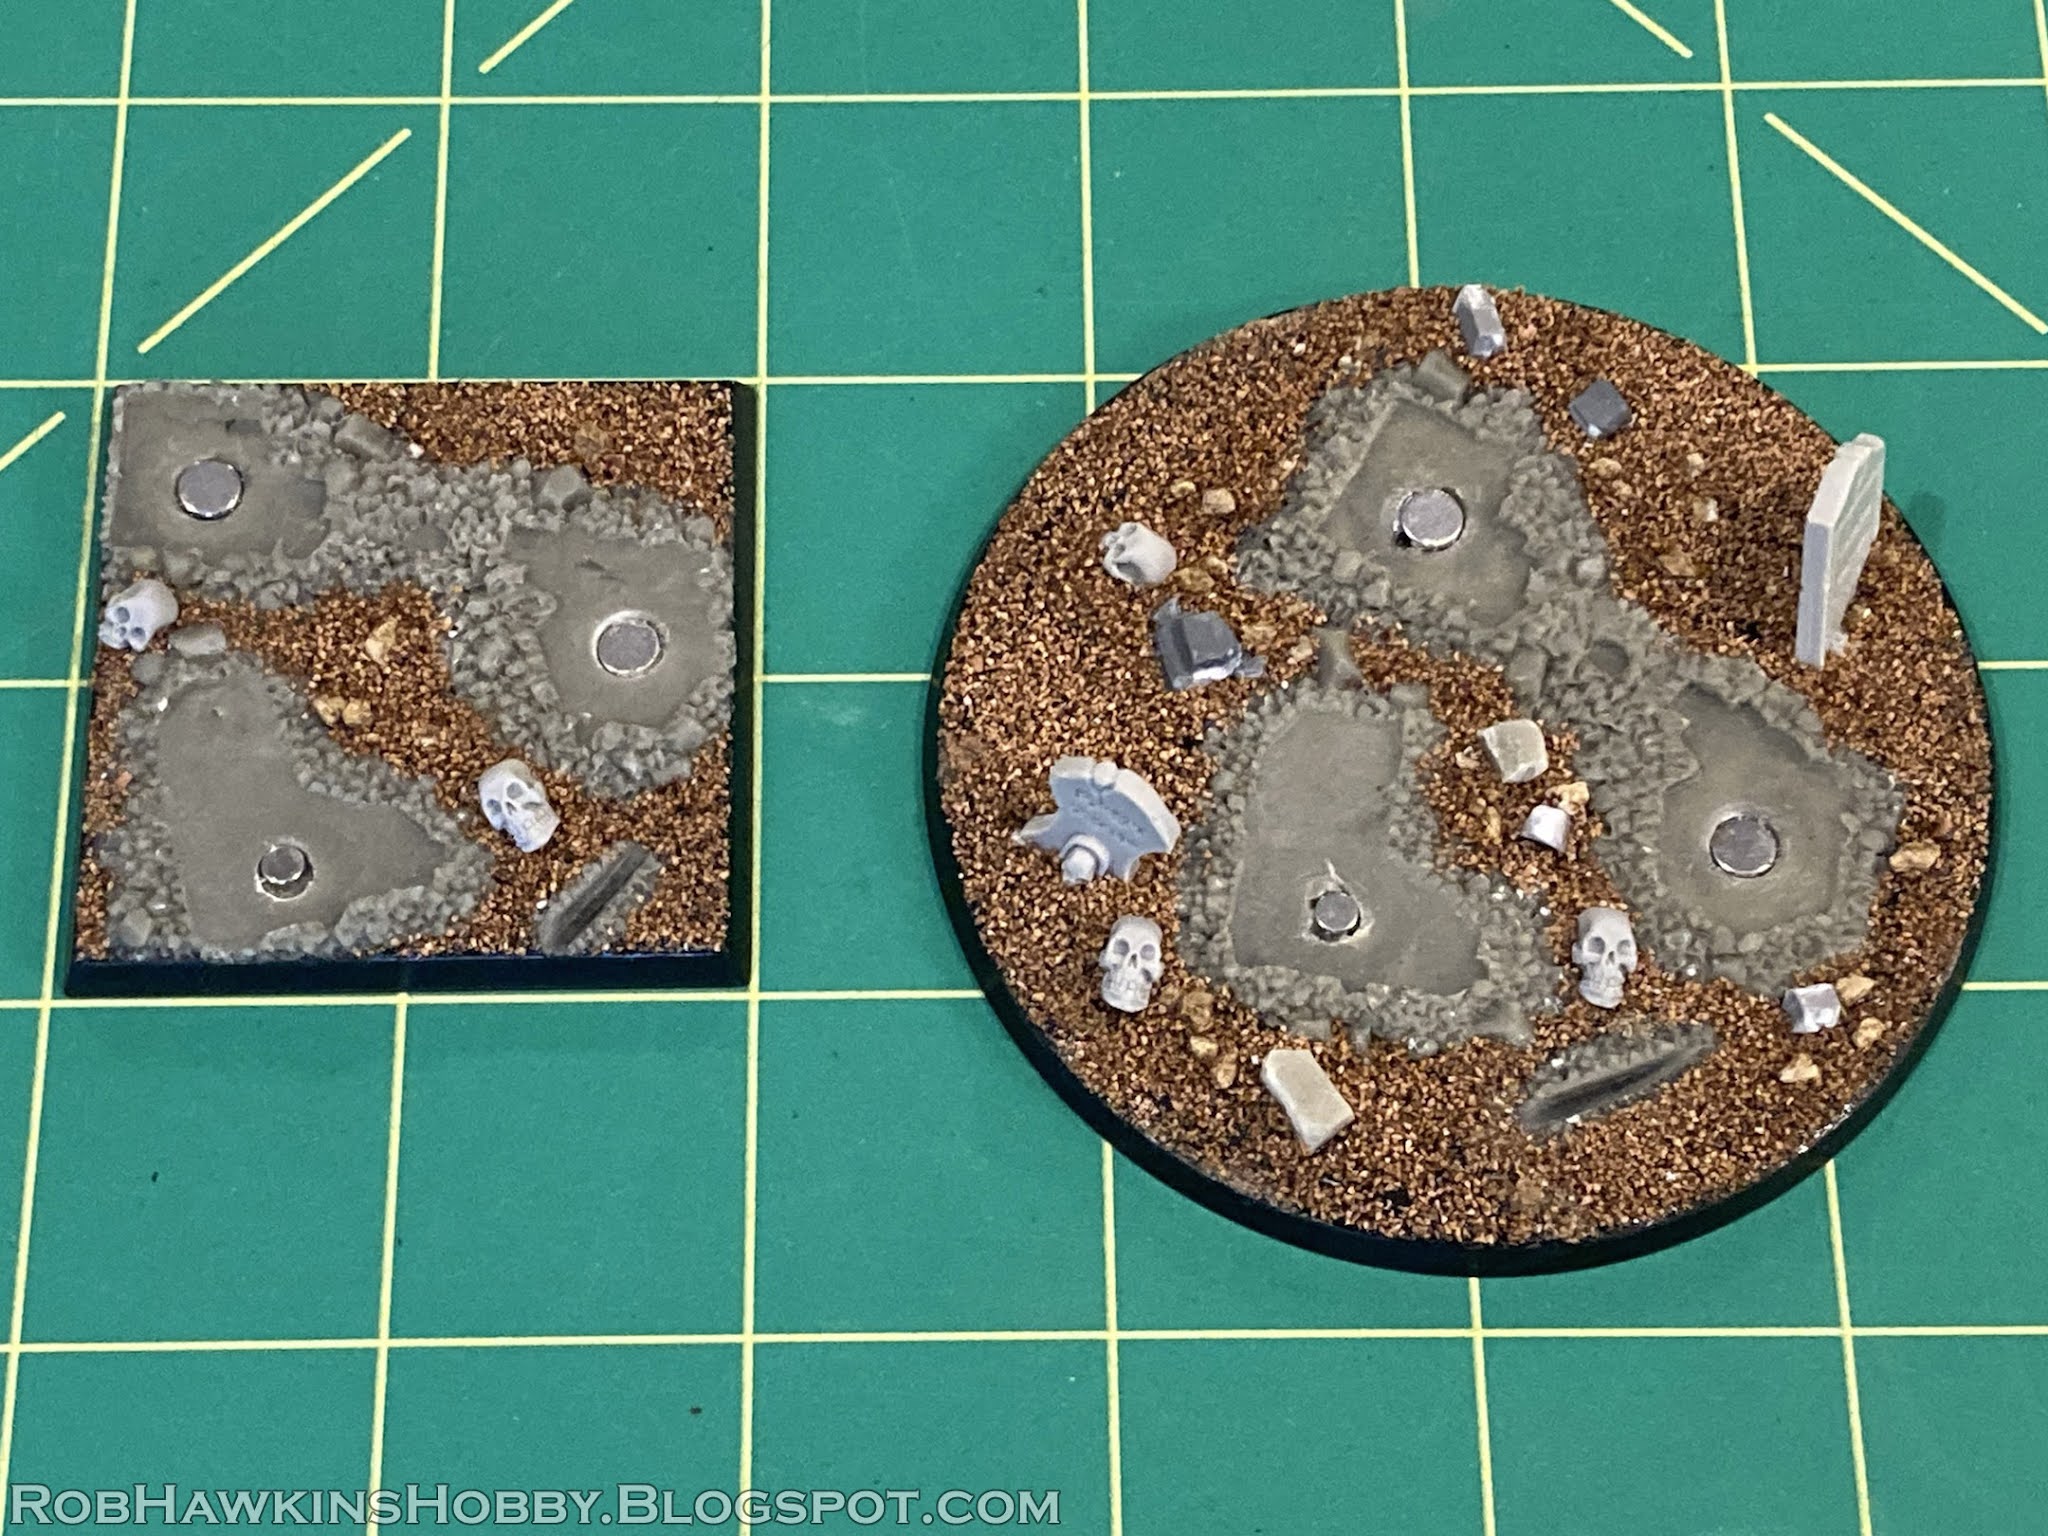
All that was left was the base. I'm building all of my Soulblight Gravelords models with an eye toward one day swapping between squares, so I trimmed the bottoms of the walls so they'll fit comfortably on a 50mm square. Then, I added magnets in the bottom of the masonry and pressed them into some Aves modeling putty on each of the bases. I coated the bottom of the walls with Chapstick to keep them from sticking in the putty. I sculpted some ground texture in the putty around the walls. When removed, the walls left impressions of the magnets in the putty, which allowed me to drill out corresponding holes for the magnets to go in the base.
I had to turn and trim the front pillar to get it to fit on the 50mm square. This also required me to trim the join between the rocks in the model's hand and the stonework; I removed the locking "key" and filled the gap with putty.
The wing tip touches the surface of the base, so I sculpted a little divot for it to rest in, so it won't get in the way of the sand.
With the attachment points on both bases finished, I broke apart the column attachment and cleaned up the putty that was filling the gap.
Then, it was just a matter of adding sand, rubble, skulls, and tombstones. Done!
I think this looks much better! Some of the GW kits have great sculpting, but just don't really work for me as a whole. I did wonder if the Vengorian lord would work better as some sort of wyvern and this is just the right sort of thing.


I think this looks much better! Some of the GW kits have great sculpting, but just don't really work for me as a whole. I did wonder if the Vengorian lord would work better as some sort of wyvern and this is just the right sort of thing.
ReplyDeleteThank you! He turned out better than I hoped. :)
DeleteWow, great work on improving a rather poor miniature, and I really appreciate all the step by step.
ReplyDeleteThanks! I'm glad you enjoyed it! :)
DeleteWow man! Properly vicious! Can't wait to see it painted.
ReplyDeleteThank you! I've got it primed, just working on a couple other projects before I get back to it.
Delete