Project Log: The Tombs of Tithing, Part 4
This week, I finished most of the tomb's exterior (I also gave up on any hope of having this project completed by Halloween). Here's a look at how the stairs and wall decorations came together:
In part three, I had cut the foam shapes for the stairs, and nailed down the overall shape of the tomb. To cover the exterior with stonework, I cut thin slices of insulation foam and tiled them together on the surface.
Rather than put two long strips, one above the other, I cut some irregular pieces to break up the connections and avoid a straight horizontal line. I also cut away some stones on the front to create a crenelated pattern that would interlock and prevent a single vertical line where the two walls meet. I attached the foam with a combination of Liquid Nails construction adhesive and hot glue– Construction adhesive for a permanent bond, and hot glue to create a quick fix that would hold it in place while the adhesive slowly dried.
On the surface of the walkways, I spread a thin layer of construction adhesive that, once dry, would allow me to super glue parts to it without melting the foam.
To build the stone pattern, I first cut the stonework pattern into the foam with a hobby knife. If you're using this technique, it's important to use a new, sharp blade so you get clean cuts without tearing the foam. (And, take care not to cut yourself!) That odd insert block near the bottom is replacing a section where my cut went astray; I just sliced out the crooked section and pressed in a new block that was cut to fit the hole.
Next, I traced over the cuts with a wood pencil to get some nice indents between each stone. I've seen people use a ball point pen to just draw the cracks into foam, but ink can sometimes repel the paint or show through even after priming and painting, so I never use ink or marker unless its on a surface that will be covered over with more foam or sand. Any "paintable" surface should remain free of ink.
The last step was to distress the stones and add some irregularity to the surface. First, I trimmed off some of the corners and edges of the stones with my hobby knife. Then, I used a pencil eraser to press in some of the stones and vary the depth of each block. I recommend an eraser because it has a soft, rounded edge that won't leave marks or lines in the foam. Finally, I added some texture by rolling a ball of aluminum foil over the surface.
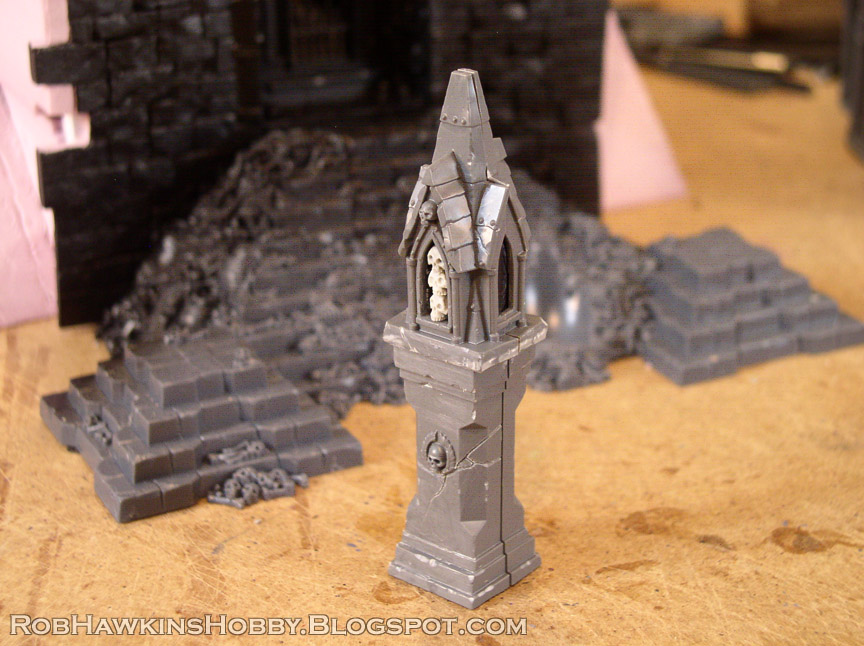
I used two halves of the Sigmarite Mausoleum/ Garden of Morr statue as the support columns for the dormers that I was making out of a mausoleum's steeple. I needed to get rid of the roses growing up the side, so I carefully sliced them away and scraped and sanded the surface smooth. (That hole where I broke through the surface near the bottom will be covered with sand when I attach the components.)
Because the roses had obscured part of the wreath icon, I etched some cracks into the surface with my sharp sculpting tool. Now the missing bit of the wreath just looks like it has a crack running across it.
I trimmed the bottom of the steeple so it would better fit the top of the column, and made a backing for the little window. The piece is cut from a large I-beam that I trimmed down to a U-beam (An actual U-beam would have been preferable, but I didn't have one that matched the width of the window). I added a bit of card to the bottom and trimmed the top so it would fit inside the dormer.
Then I filled the window with three skulls, and covered the side windows with thin plastic card.
An idea that came to me as I was working on these is that if the halves were assembled normally, they would make a nice stand-alone shrine. Oh well. Next time, baby...
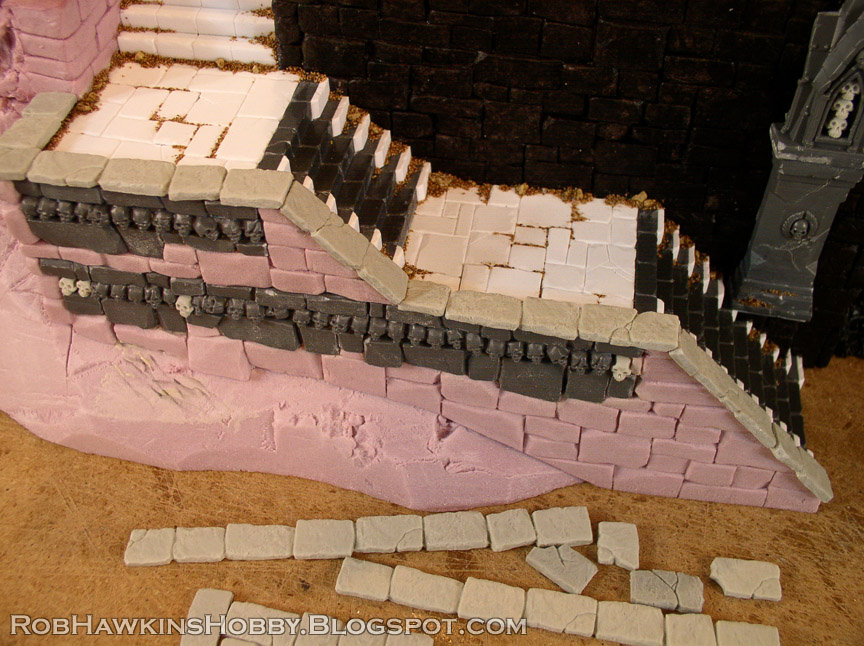
The steps that I had made in part three needed more detail, so I scored some lines to mark the separate stones, and I glued strips of styrene on the front of each step. The strips were cut with a beveled end to evoke the shape of the steps in the Bonetithe Nexus. The finished step panels were then glued in place on the slope, pressed against the foam wall.
I painted the foam stones with Mod Podge and then with black paint. When they were dry, I super glued the dormer column against the wall. There's also a small foam block below the column, cut to align with the steps. I added styrene card flagstones on the walkway, and some sand and gravel in the corners.
I continued to build up the walkways and steps in this manner. The topmost steps are just styrene L-strips; I didn't bother modifying their shape.
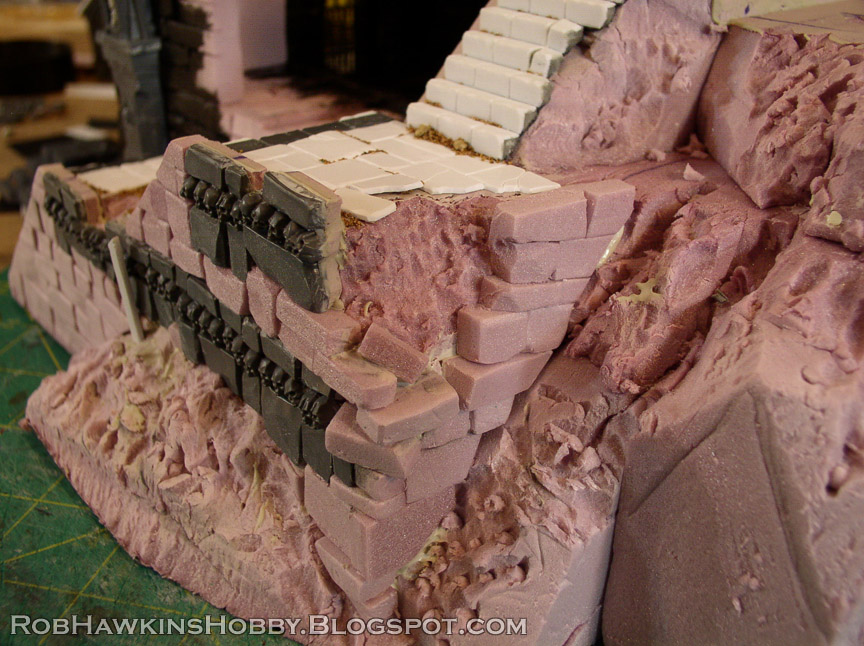
For the opposite side, where the wall has collapsed, I cut up the steps as though they were crumbling as well. This was a necessity because I used up the last of my L-strips and literally did not have enough to make a full set of stairs!
On the front where the exposed crypts and broken wall will be, I added more foam. I cut this block so it would fit like a puzzle piece into the corner because the layer of foam stones on the front was so thin, none of them looked like they would be appropriate corner stones.
Like the wall and the stairs, I built the walkway to be partially crumbling.
For the outer wall on the stairs, I used the bases from the Sigmarite Mausoleum statues. I cut up the rows of skulls into individual segments.
These were super glued onto a thin slice of foam that I had previously coated with Liquid Nails.
The foam added some thickness to the plastic parts, and I cut more foam stones to butt up against the plastic stonework.
These components were all tiled together along the outside of the steps and walkway.
A final touch was to add paving stones along the top of the wall. For that, I used some of the wall toppers from my Skull Forge Scenics graveyard wall set.
On the side with the broken wall, I built up the crumbling corner with individually cut foam blocks.
Here's a bird's eye view of the entire layout:
Once the foam blocks were coated with Mod Podge and paint, I added some sand and wall toppers.
These window boxes were left over from the Warscryer Citadel kit. I removed the twin-tailed comet iconography and added metal roof sheeting to match the dormers.
These were glued to the wall with some gargoyles underneath. The pair fills out this wall nicely, even if it covers up most of my stonework (in retrospect, I probably didn't need to concern myself with things like how the sections of foam tiled together). Now, it's on to the rooftop graveyard...
'Til next time!


Fantastic work
ReplyDeleteThank you!
DeleteIf ever the day comes, I would be proud to play with ya on this scenery
ReplyDeleteThank you! :)
DeleteI am in absolute awe at your dedication and clever ideas to build this. It looks amazing and I shall be trying to steal as many ideas as I can for my scenery!
ReplyDeleteThank you! Glad you're enjoying it and find the tips useful! :)
DeleteThis is amazing. I'm looking forward to the result.
ReplyDeleteThanks!
Delete