Counting Toward DOOMSDAY, Part 3
Work and life have kept my Doomsday Ark project from moving as quickly as I would have liked, but I still managed to get a significant chunk finished this week. Each of these rib sections was made up of 46 component pieces that all needed to be painted separately before assembling it all! Here's how everything came together...

DAYS 15 to 18
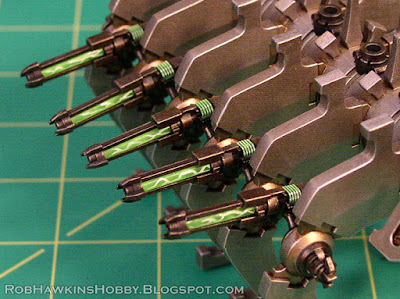
On each of these days I only managed to do a little bit of painting, just enough to maintain my #HobbyStreak of doing at least half an hour of personal hobby work every day. (I'm up to day 130 so far this year!) All of the guns were painted with a dark brass drybrush over black primer. The silver bits and hoses were then picked out, and the green glowing bits on the main cannon were painted.


DAY 19
Metallic sprays are notoriously bad for painting washes over– The wash usually beads up and doesn't flow properly. But the spray is still useful to help establish an undercoat. In this case, I used a large flat brush and applied (over the spray) a thin coat of Formula P3 Pig Iron, mixed with a little brown ink to darken it slightly. Then, I painted a mix of brown ink darkened with a little black into the "joints" of all the ribs.

DAY 20
The next step was to paint the green glowing coils on the gauss flayer guns. I also painted the muzzles and the retro thrusters, and sprayed the green rods with Testors Dull Cote. The Dull Cote serves as a sort of clear primer, over which I can paint the lightning crackle later.


DAY 21
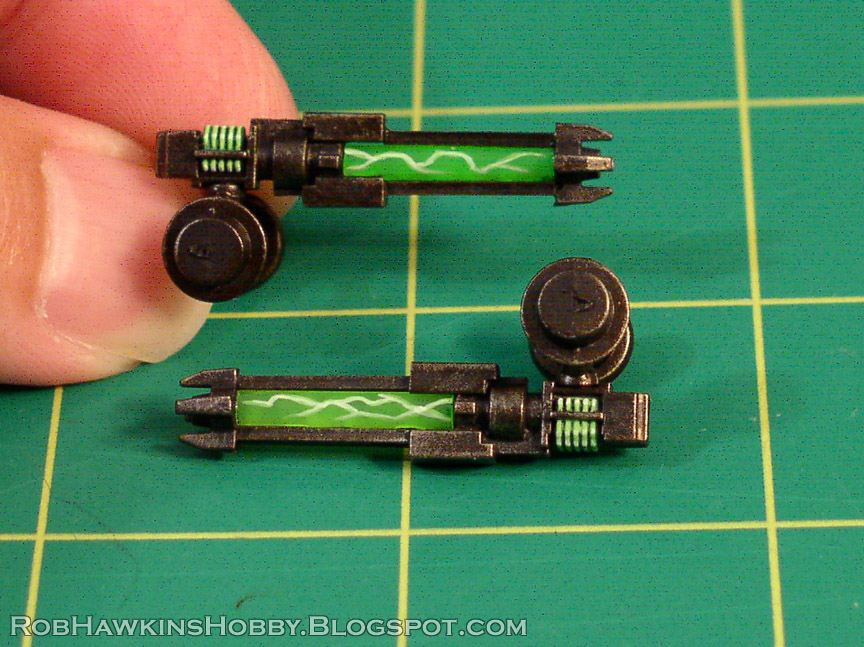
With everything painted, I assembled the gauss flayers. The green rod was super glued in place, then the plastic strips were trimmed to the length of the rod, and the muzzle glued on the end. I finished them off by touching up the points of the muzzles where they were removed from the sprue, and painting the lightning on the green rods. The gauss flayers now looked "right side up" whichever way they were facing.


DAY 22
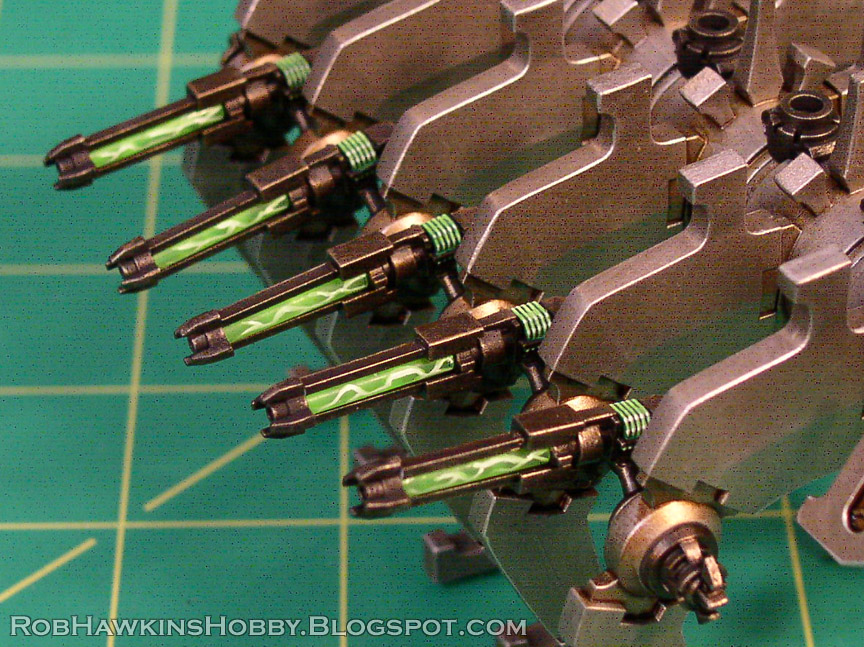
To complete the ribs, I gave them a light drybrushing with straight P3 Pig Iron, and highlighted the edges with Formula P3 Quick Silver. Then, I painted the brass icons and the green lights on the tops of the ribs.


DAY 23
At last, all of the components for the ribs and guns were painted and it was time to assemble everything. I left the gauss flayers loose so they could swivel in their mounts. The prows attach in either orientation, and the main cannon fits in place under the ribs. That's the major work for this project out of the way. Now, it's on to the cockpit and Necron passengers.


'Til next time!


Looks fabulous already.
ReplyDeleteThanks!
DeleteSo much work is going into this, and it is paying off nicely.
ReplyDeleteThanks! I'm really happy with how everything is turning out so far.
Delete