Last week, I showed you the blimp that I made for the Rivet Wars diorama. Now we'll take a look at the troops that will fill out the scene.
I want to incorporate as many elements as possible without taking forever to paint them, so I use a spray method to get their base colors painted quickly. For the Allies troops, I used successive layers of Model Masters Dark Green and Medium Green sprays, and then drybrushed over them with GW Camo Green. Some final highlights were applied with P3 Thrall Flesh.
The Ostrich walkers were painted the same way, and I converted a couple of them into wrecks, which will be complete with flaming plumes of smoke (more on that below).
Here are some finished Allied rocket bikes, ready for war.
The Blight troopers took a little more work to get a grey color I was happy with. The range of Model Master and Tamya sprays that were available didn't seem to have an adequate mid tone; they jumped from a dark grey to an almost white-grey. I ended up washing them heavily with P3 Ironhull Grey and then drybrushing the tone back up with a mix of black & white, with a little P3 Frostbite to add a blue tint. This image shows them after the wash.
Here the walkers have been drybrushed up, and the final highlight of Frostbite was applied.
With the grey finished, I darkened the hatches with GW Nuln Oil, and added some rust with P3 Bloodstone. The chipped paint is a mix of P3 Pig Iron and Bloodstone.
The completed Blight walkers:
Here the Blight troops, with their helmets finished, are awaiting their face and detail painting.
The Blight troops, backed up by some machine gun units are ready to make their big push!
And, here are both armies all laid out:
Burning Wrecks
Tea lights from the dollar store are great for small lighting projects, because they have everything you need: the LED, a battery, and a switch, and you can buy them in packs of 3 for a dollar. Here, I've soldered wire onto the leads of the LED to make it long enough to fit in the walker.
I start by drilling out the turret to create a hole for the LED to fit through.
The LED goes through and can be held in place with hot glue. The wires at the bottom connect to the battery and switch.
The yellow light will provide the fire glow for the burning plume. For this example, the tea light housing is visible, but in the final diorama, it will all be rewired and concealed in the table.
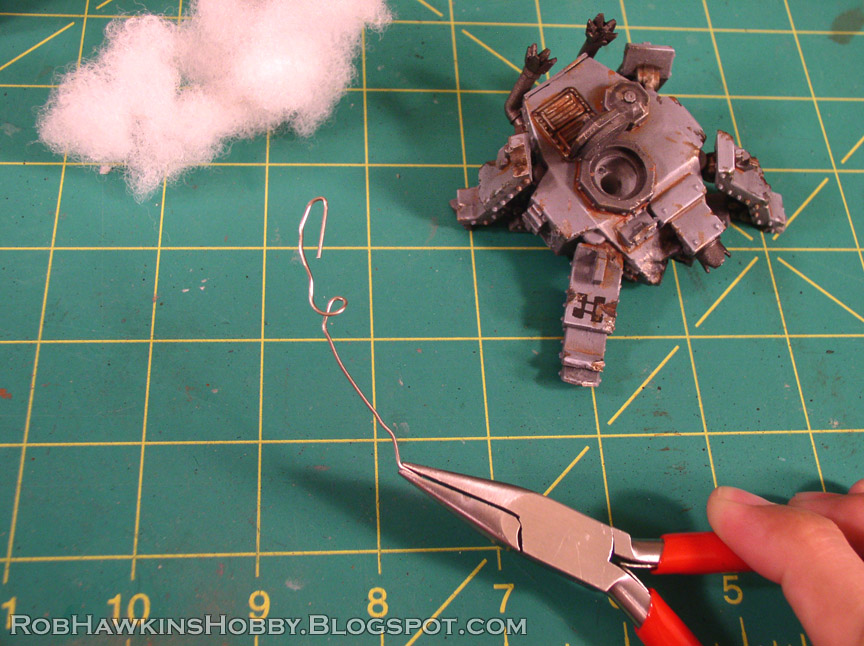
Poly-Fil® is used for the smoke. Since the Poly-Fil is pretty light and flimsy I've bent a wire to use as an armature. It will be inserted into a small hole, drilled nest to the LED opening.
The Poly-Fil gets wrapped around the wire and "fluffed" into the desired shape. The wire will hold it up, and can be bent to angle the smoke in any direction.
I attach the wire to a piece of wood and spray it, starting with yellow, then orange, red, and finally some black just at the top.
The wire is carefully glued into place...
...and the bottom of the Poly-Fil is tucked into the walker's hatch.
Here's the final walker with it's smoke plume.
And here you can see the fire effect in action:
Ugh, I definitely need to invest in a better camera. (If anyone has any recommendations, I'm all ears.)
Fantastic. I am really looking forward to september and getting my rivet wars stuff....may need to rr-visit this post if I paint them up. Once again great work.
Great work as ever Rob. Looking forward to seeing this finished.
do you add anything to your bloodstone when you water it down for your rust washes? I find it always seems to split, even after being brushed on to the mini, so I end up with green rust, not red/brown.


Fantastic. I am really looking forward to september and getting my rivet wars stuff....may need to rr-visit this post if I paint them up. Once again great work.
ReplyDeleteGreat work as ever Rob.
ReplyDeleteLooking forward to seeing this finished.
do you add anything to your bloodstone when you water it down for your rust washes? I find it always seems to split, even after being brushed on to the mini, so I end up with green rust, not red/brown.
Cheers.
They look great for how quickly you painted them! How long did you spend on both armies?
ReplyDelete@Nog - James Wappel had some pretty awesome tutorial vids too. They posted during the kickstarter, you can still find them in the updates.
I can't wait to get my Rivet Wars stuff too. Here's hoping for no big delays like ... well pretty much every KS.