Project Log: The Watchtower, Part 7
This time around, I finish off the remaining details and complete the construction of the watchtower...

Using Aves Apoxie Sculpt, I add some rocks at the base to connect with the ones on the tower.

To fill out the walls on either side of the shrine, I use the brazier from a Corpse Cart.

These are trimmed a little to remove the tabs on the sides, and then filled with skulls.

On the arch above the shrine, I sculpt a row of stones, and add little crenelations with bits of plastic card.


With the bottom of the tower finished, it's time to finally attach the top. I secure it in place with hot glue and then sculpt the stonework over top.


The balcony comes next. The underside has some rose bushes that I couldn't quite remove. But they are mostly hidden from view. I glue a pair of bats from the Corpse Cart under the balcony, and make some cuts in the roses to give them the appearance of furry shapes. When painted, it will look like a cluster of bats hiding under the balcony.

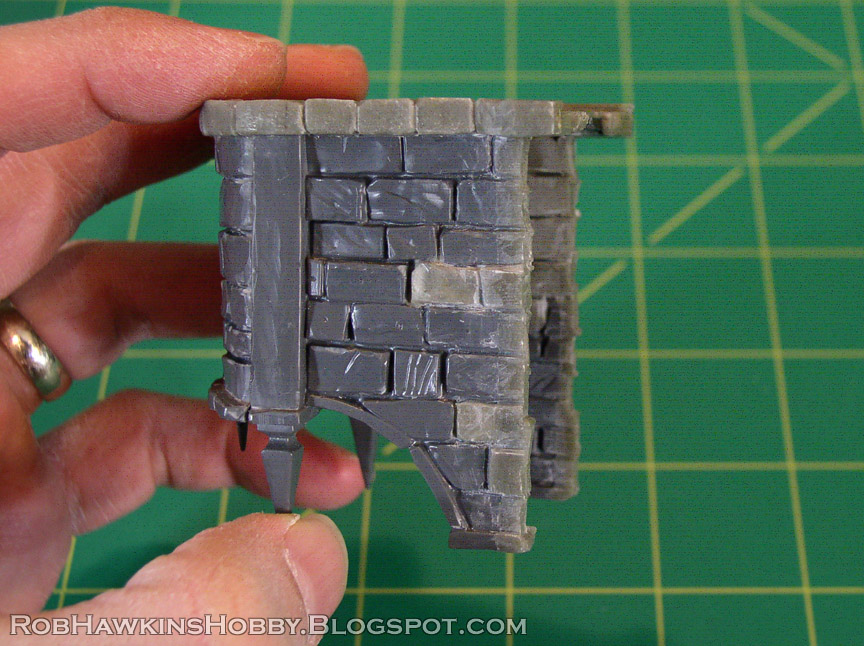
To attach the balcony, I mix up two rolls of Aves putty and attach it to the balcony. Next, I spread some Chapstick on the tower wall, and press the balcony in place. The Chapstick keeps the putty from sticking to the tower, so I can remove the piece once the putty fully cures.

This leaves me with a perfect imprint of the tower stones.

I trim away the excess putty on the sides and match the shape to the stones of the balcony walls.


Now the balcony fits in place seamlessly against the tower.

I need to do a tiny bit of trimming on the wood beams of the walls to allow the gates to fit in place.

To put the "watch" in watchtower, I make a telescope for the balcony. It's made from Warp Lightning Cannon pieces, styrene plastic card and rod, with an old Chaos Warrior lance for the stand.


The final detail is a pair of gibbets to hang from the tower. I've had this old metal gibbet in my parts box since my days at GW. 26 years later, the time has finally come to use it. (I've said it before, and I'll say it again: Never throw anything away!) For the second gibbet, I used the skeleton road sign from the Aleguzzler Gargant kit.

I trim away the skeleton's stand and re-position his arm, and then use thin styrene plastic strips to build the cage. On the metal gibbet, I replace the head and feet with similarly scaled plastic pieces, and add locks to both cages. I also replace the easily-breakable chain with rope made from floral wire, one strand of which is "pinned" down through the top of the cage into the skeleton's head to ensure a solid attachment point.


In retrospect, I wish I hadn't used that road sign skeleton. It's such a nice bit, and after building the cage around it, you can barely see him. I chose it because it already had that "straight, tied-up" look, but I could have achieved the same effect using a regular skeleton. Actually–As I'm typing this, I think my original idea was to use the sign skeleton as a "hanged" body without a gibbet cage, and just got carried away. Oh well. Either way, the gibbets are finished. I attach them by drilling holes into the bottom of the house, and inserting the ropes. (I'm keeping them separate for painting, of course.)

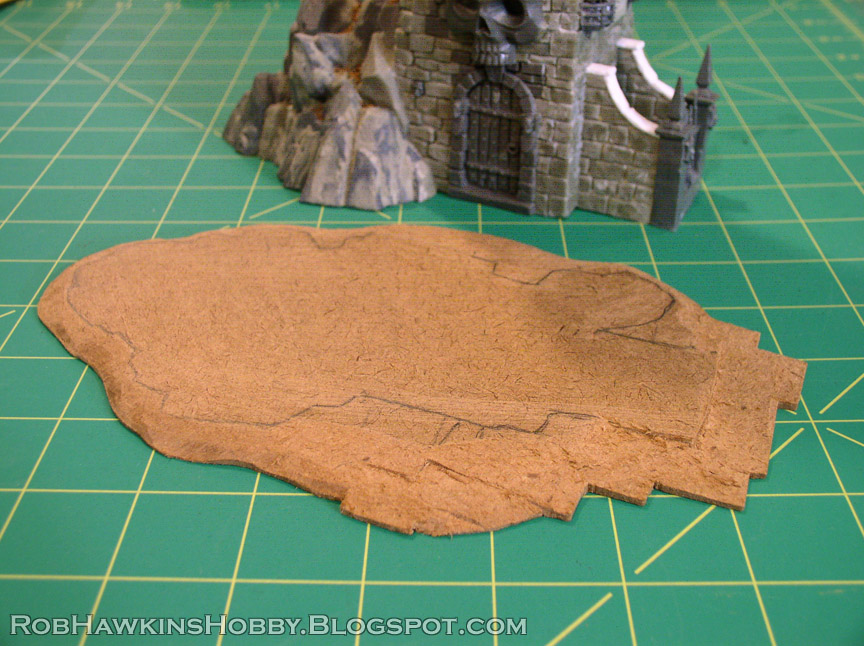
The base of the tower is cut from 1/4-inch MDF board.

I bevel the edges of the base, and cut in spaces for the flagstones that will run right up to the edge.

Each stone is individually cut from plastic card, trimmed and distressed, and super glued in place. I add fine and coarse ballast around the stones to cover the ground.


Some larger talus rocks are used to blend the transition from the big stones, and I add a liberal helping of skulls littered on the ground, of course.


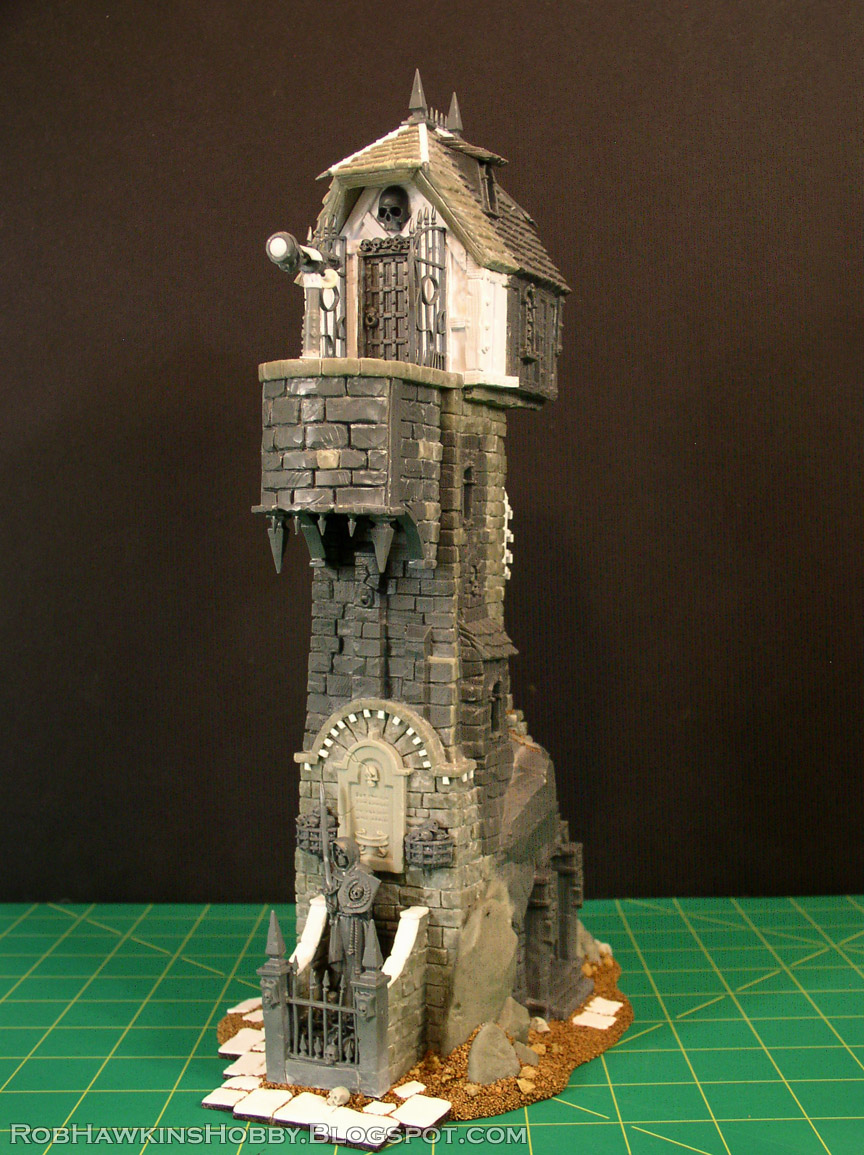
Here's the final tower. Now all I need to do is paint it.


'Til next time!


No comments:
Post a Comment
All comments are moderated. Any comments containing links will not be approved and will be marked as spam.