For the month of October, I'll be working on my Vampire Counts and I'll have a few other spooky surprises to show you. But first, I'm going to put the lid on my Skaven run by showing you how I converted the Screaming Bell/ Plague Furnace kit so I could field either choice.
Getting Started
For as complex as this model appears, it was amazingly simple to put together. Compared to the Doom Wheel and Hell Pit Abomnation, this thing was a dream to assemble. I built all of the major components of the kit, as shown here. (The two halves of the chassis were left unglued for easier painting.)
The top arches don't need to be glued. They just peg into the top of the stonework and stay in place pretty securely.
I was starting to think that GW might have designed the kit with the intention of players swapping between the two variations, but the crew made me think differently. The pegs in their feet and the tops of their chains didn't line up at all.
I toyed around with the idea of using the platform that comes with the kit. Unfortunately, I couldn't figure out a way to line up the magnets in the bottoms of the crew with the same positions on the platform. The raised details on each side of the platform, and the limited space under the crew makes it nearly impossible to have them standing in the same spot.
I decided to just build new platforms, one for each crew set, and the whole platform would be the part that was interchangeable, not just the crew.
Reconstructing the Platform
For the new platforms, I used 1/8-inch thick PVC card. The PVC card is a little softer than styrene plastic, making it easier to etch the wood grain texture in the surface. I measured the width of the platform and cit a section to match.
The individual boards were made using a series of V-cuts along he length of the card.
Then, using a pointer sculpting tool, I scratched lines to indicate the wood grain.
The ends were trimmed to mach the shape of the original platform.
Positioning the Crew
The Rat Ogre has the shorter of the two chains, so I used his as the guide. I carefully positioned the crew on their respective platforms so their chains would line up with the same spot, centered on the machine. With the stone arch in place, I glued bell arm to the arch so it lined up with the chain.
I made sure the Plague Monk crew's chain also lined up with the same spot and glued them to their platform. Since the chain was a little long, I needed to shorten it by removing a few links, indicated in red.
With the links cut out and the parts cleaned up, I connected the two pieces by cutting small notches in each end and fitting the links over one another.
Now, the chains of both the Rat Ogre and Plage Monks connected to the same spot on the bell arm.
Then, I glued the other bell arm to the opposite side.
As a final touch, I drilled out the posts on the arms, and replaced it with a length of brass rod. The rod is glued in one side, and pushes through the opposite side when assembled, holding the chain in place more securely.
Both the bell and the censor are notched so they stay in place when inserted into the arch.
The kit only includes one Skaven symbol to top either of the two devices, so I added a pin that would allow me to freely interchange it.
The final arch assembly consists of 5 basic parts: The 2 arch halves, the Screming Bell or the Plague Censor, and the top symbol.
Magnetizing the Crew Platform
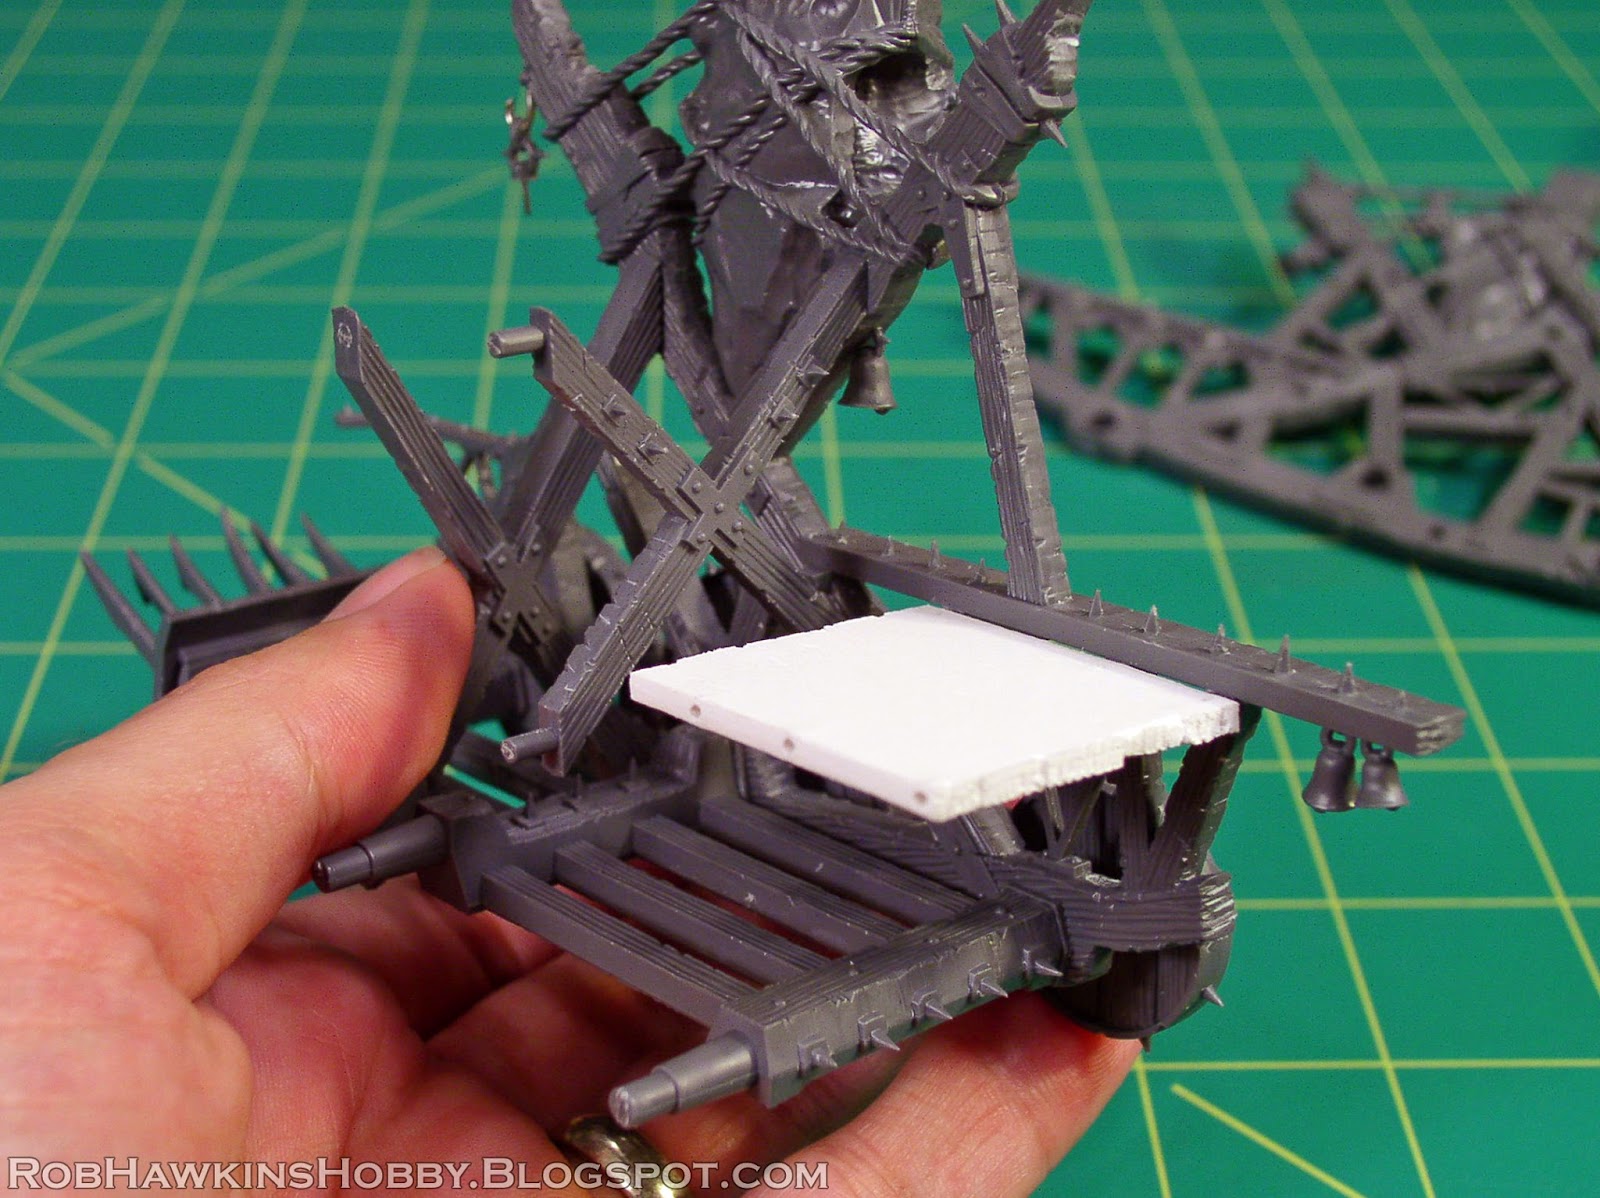
There wasn't anything underneath the platform that I could sink the magnets into, so I added another platform. The support points on the frame were sliced off, and this new support platform was pinned into those spots but not glued. Notice it is set down at the same level as the support studs; this ensures that the crew platform sits at the proper height. The bottom of the platform was detailed with wood grain in the same manner as the crew platforms.
To position the magnets, I fit the crew platform in place and marked two spots with a marker.
Next, I drilled a hole on each spot with a 1/8-inch drill bit. (The magnets are also 1/8-inch in diameter, so they will be a perfect fit.)
To match the spots on the lower support platform, I drilled down through those holes.
The other crew platform needed to line up, so I used the holes underneath as a guide, and drilled up from the bottom. All the magnet holes lined up perfectly.
Before inserting the magnets into the crew platform, I covered the top of the holes with thin styrene card and rivets. Then, the magnets were pushed up into the bottom. Because of their thickness, the magnets protruded a little, which was fine.
Without gluing anything (to avoid the two platforms from inadvertently sticking together), I pushed the magnets through the bottom of the support platform. Again, they stuck out just a little. To conceal them, I cut two strips of PVC card and drilled a hole halfway through at the spot it would cover the magnet.
To make hex bolts, I cut a few chads from hexagonal styrene rod and smaller round rod.
The "boards" were glued over the magnets and the hex bolts were glued over top of them.
The support platform was then glued in place (one side only, so I could separate the chassis for painting), and each of the two crew platforms fit perfectly!
The assembly of either variant takes 5 steps:
1. Insert the right half of the arch.
2. Attach the crew platform and secure the chain on the bell arm.
3. Insert the bell or censor.
4. Attach the left side of the arch and pinch the bell arm together over the brass rod.
5. Attach the symbol on top.
Characters, Odds and Ends
For the Grey Seer up top, I came up with a fairly simple solution:
Holes were drilled in the handle he's holding onto.
This allows the handle to "pin" over top of the little spikes on the bell arm. It's a snug fit, so it holds him in place pretty securely.
The brazier for the front of the Screaming Bell was pinned in place so it can be removed to allow the Plague Priest to stand there when fielding the machine as the Plague Furnace.
I assembled the priest himself in two parts so I could paint the detail on his front more easily. The little censors that decorate the machine are currently in my parts box. Before I add them to the model I want to see if they will work for a Plague Censor Bearer conversion I'm dreaming up. But that's for another day...
'Til next time!
I recently finished some new Wild West Exodus-themed terrain. Here's a look at the pieces in progress. You can see more detail shots of the finished terrain in my Wild West Exodus terrain gallery.
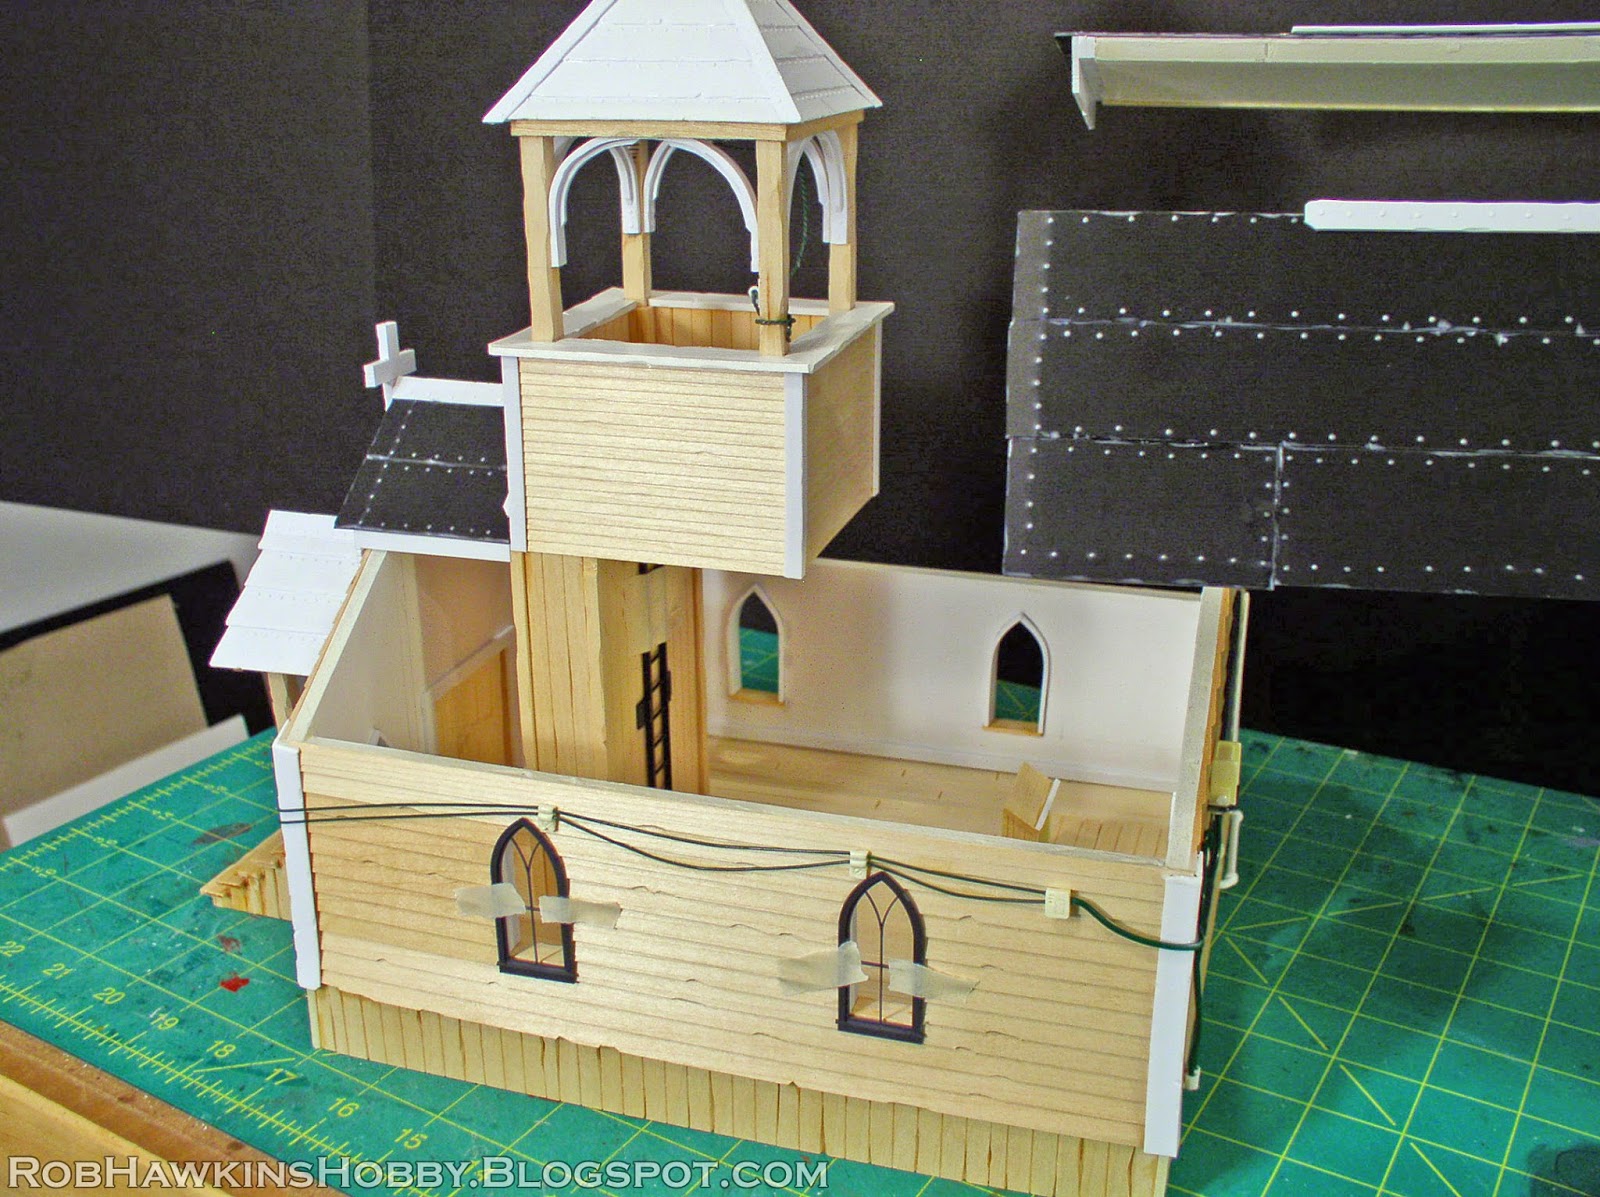
Old West Church
The construction uses a foam core frame, with basswood siding and framework.
The doors are my own resin-cast assets, and the windows are Grandt Line plastic accessories.
All the wiring is made from heavy gauge floral wire, with resin cast tech accessories.
The roof is covered with plastic card "sheet metal" and lifts off for access to the interior.
Water Tower
This water tower is constructed from basswood planks.
The water spout is made from plastic tubing, with more resin tech parts. One of the best things to happen as a result of the Steam Punk craze is all the costume accessories now available at craft stores. Things like these little gears and clock faces are great for terrain.
I made the roof of the water tower with plastic strips for the support structure and wood chits, scored with a wood grain for the shingles.
Check out the Wild West Exodus terrain gallery for all the detail shots of the finished water tower and Church!
'Til next time!
With the Empire and Dark Elves eliminated from the campaign, that left four players. Unfortunately, Due to his commitments to work and family and the distance needed to travel to meet up for games, Josh had to bow out.
There are rumors of a great evil returning to the Old World. Through their haruspex, the Slaughtermasters recognize a power not seen for an age stirring back to life. Content to let the lesser beings squabble over their insignificant lands, the Ogres retreat to the mountains to prepare for what is to come.
I had put a rule in place that if anyone dropped out, rather than simply clearing their territory, the positions of their banners would be marked and a Difficult Terrain test would be required to enter a territory with a Maw symbol. This represents fighting through the remaining elements of the Ogre occupation, pushing through left over garrisons, breaking fortifications, and such. Once the roll is passed, the remnant militias are scattered and the test is no longer required to enter the terrain.
Our Players
Justin Cunnane: Chixl's Warhost (Lizardmen)
Jason Pierson: Waaagh Blackfang (Orcs & Goblins)
Rob Hawkins: Skryre Lord Skreekits' Lightning Engineer Cult (Skaven)
Chixl's Warhost, having driven off the Dark Elves, took advantage of the Ogres' withdraw and push forward.
As Waaagh Blackfang worked to recover the razed lands and scour the filth of traitorous vermin from their realm, the Skaven secured the Gesteinmund Hills and Tor Anrock, and moved to snatch the city of Malko from under the Orcs' noses (or snouts?), but the Orcs were ready to stop their attack, and the two armies came to grips outside the city.
Jay and I met at the local shop to throw down. His army had a 200 point advantage from the fortified city, so it was 2200 points of Skaven vs. 2400 points of Orcs.
The majority of Jay's army was invested in a 70-man unit of Orc Boyz, flanked by large units of Black Orcs and Savage Ork Big 'Uns, and backed up by a battery of war machines and a giant. I held back and fired with 30 Jezzails and two Warpfire Cannons. I managed to kill the giant, but not before he drove off one unit of Jezzails. The large Orc unit was too much, however, and although I was able to whittle it down below 10 men, I could not fully destroy it.
The Doom Wheel charged the Savage Orcs, but was destroyed by his Boss's giant axe.
While the rest of my army chipped away at the Green Tide at range, the Stormvermin stayed as far away as they could from the Savage Orcs. Eventually, the Greenskins closed the gap and destroyed them.
The Foot of Gork stomped unit after unit, and was probably inflicted the most damage in the entire game. Jay threw six dice at it every time, and even though he never cast the spell with Irresistible Force, I was never quite able to dispel it when I needed to (and I was just commenting on how I never bother to take dispel scrolls).
At the end of of the day, the forces of the Lightning Engineer Cult were massacred, the Engineers run off, their machines shattered.
The city of Malko was now securely in Orc hands, and the Skaven would have to lay siege to the city's fortress. On the western front, the Lizardmen and Skaven were about to meet...
'Til next time!
As our campaign moves into its second half, my Skaven forces need to focus on the city in the center of the map. The fortress city of Malko is worth an additional 10 victory points, and attacking it while occupied requires a siege battle. Since the General's Compendium was a 6th Edition supplement (and 8th Edition doesn't really have adequate siege rules) we'll be using the siege rules from the 6th Edition rulebook.
That brings me to the equipment necessary to attack and defend a castle. I've had the old metal siege defenders kit collecting dust pretty much since I began playing Warhammer, and finally got around to assembling and painting them. (Proof that the phrase "I'll build them someday" is not an empty promise!) I took the time to convert them with an appropriately "Skaven-themed" aesthetic.
Some of the items are scratch built, like the ladders and rock buckets. All the defender's rocks are painted to look like warp stone. This makes them useful as scenic elements in a Skaven mine, or as Mordheim objectives. And having warpstone dropped on your head from the battlements not only hurts, but it will probably give you some kind of crazy space-cancer.
These buckets were made from wooden cups I got from the craft store, filled with talus rocks.
The log ram and ladders are all made from basswood strips and dowels. A few of the ladders incorporate bones from the plastic zombie kit as rungs.
This boiling oil cauldron has been modified with extra gears and painted with a sickly glow from the hunk of warpstone infusing the oil.
The rock droppers have been decorated with bells. The large bell on the first one is a metal bell from the Warmaster Screaming Bell. I used it and the bucket as a counterweight to balance the model because it was so front-heavy from the metal rock.
My Plague Claw Catapult is also finished. There are a few modifications like the slop bucket and ladder rungs running up the back. I still need to paint the crew, and I figure I'll tackle them when I finish my Plague Monks. In the meantime, I'll crew it with spare Skaven Slaves or Clanrats.
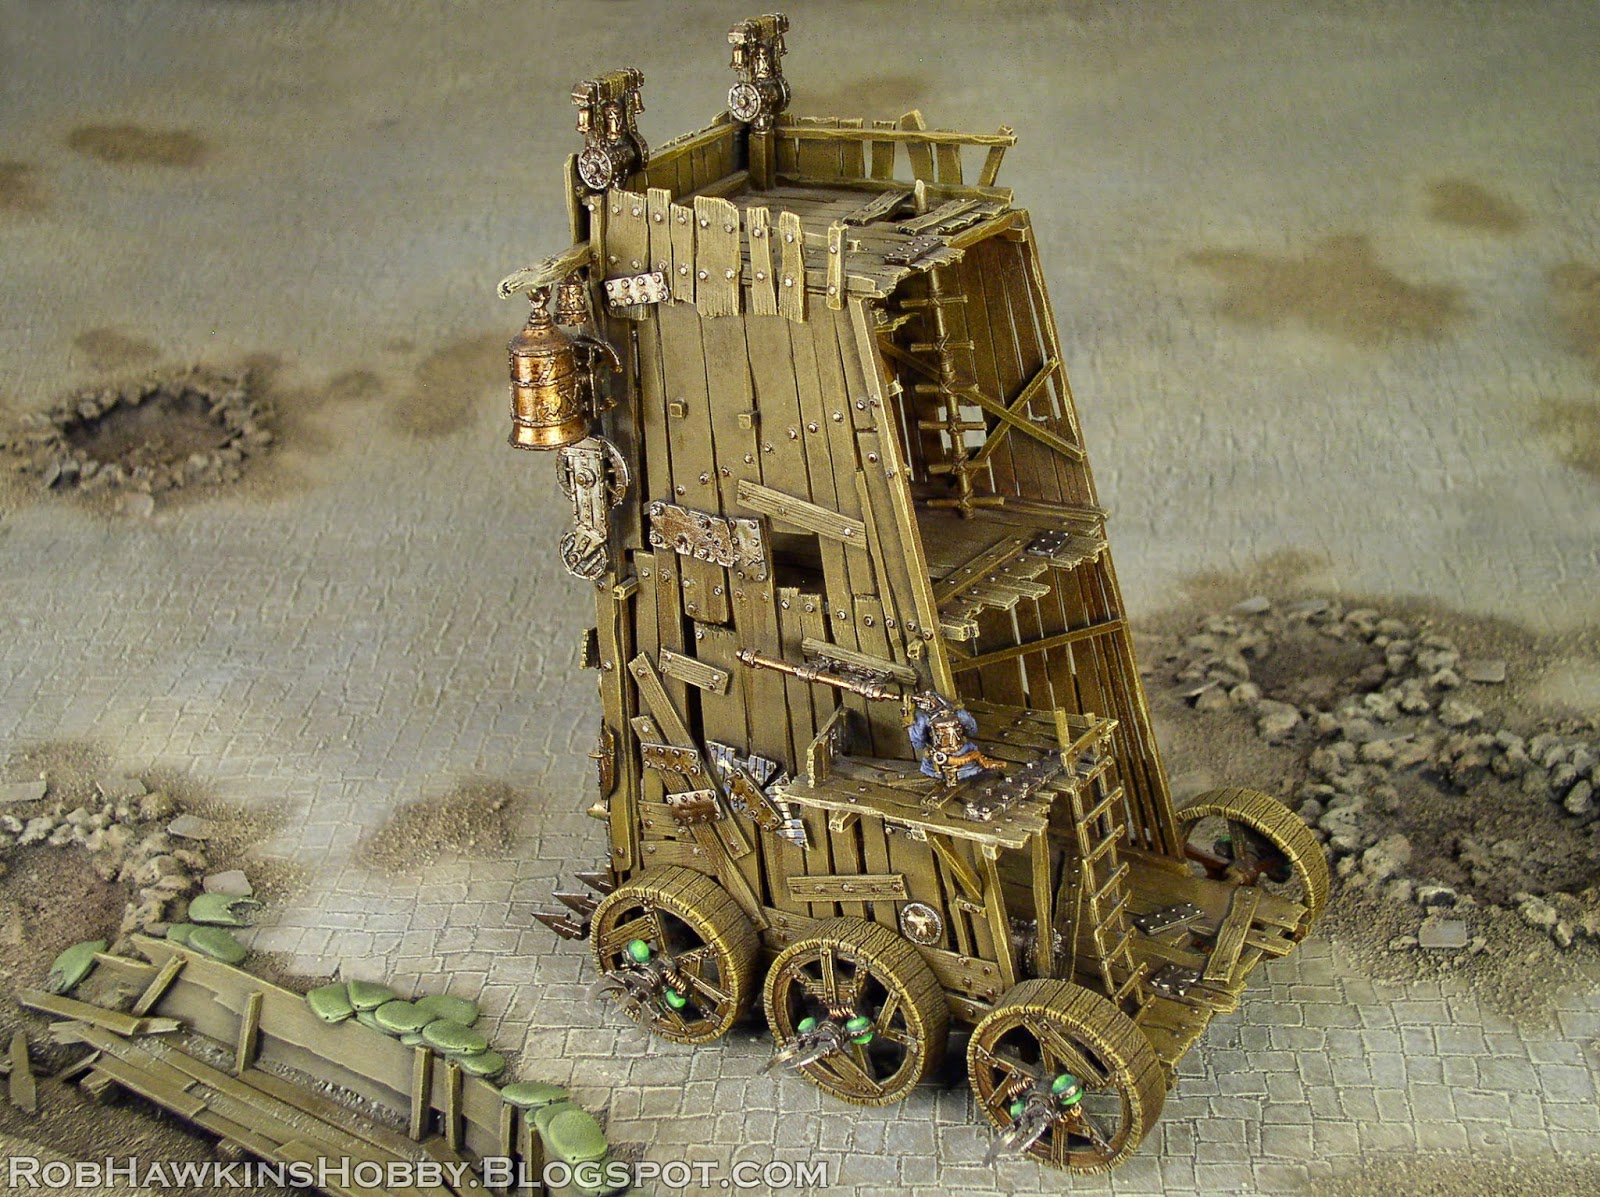
My crowning achievements are these mantlets and the Skaven siege tower. They were made during my time at GW, and were featured in White Dwarf and Troll Magazine. The mantlet is designed for a unit of Jezzails, and has a row of Slaves pushing it underneath.
The siege tower appeared in White Dwarf 292, which had a brief assembly guide and special rules that incorporated the poison gas generators, self-propulsion, and the Jezzail snipers inside.
The construction is mostly basswood, with metal and plastic parts from all across GW's model ranges. The wheels are from the classic Doom Wheel, and the engineer with the telescope is the operator from the classic Warp Lightning Cannon.
It's definitely a monstrosity you don't want to see rolling toward your fortress!
'Til next time!