In this post, I'll show you how I finished converting my Tomb Kings Skeleton Horse Archers.
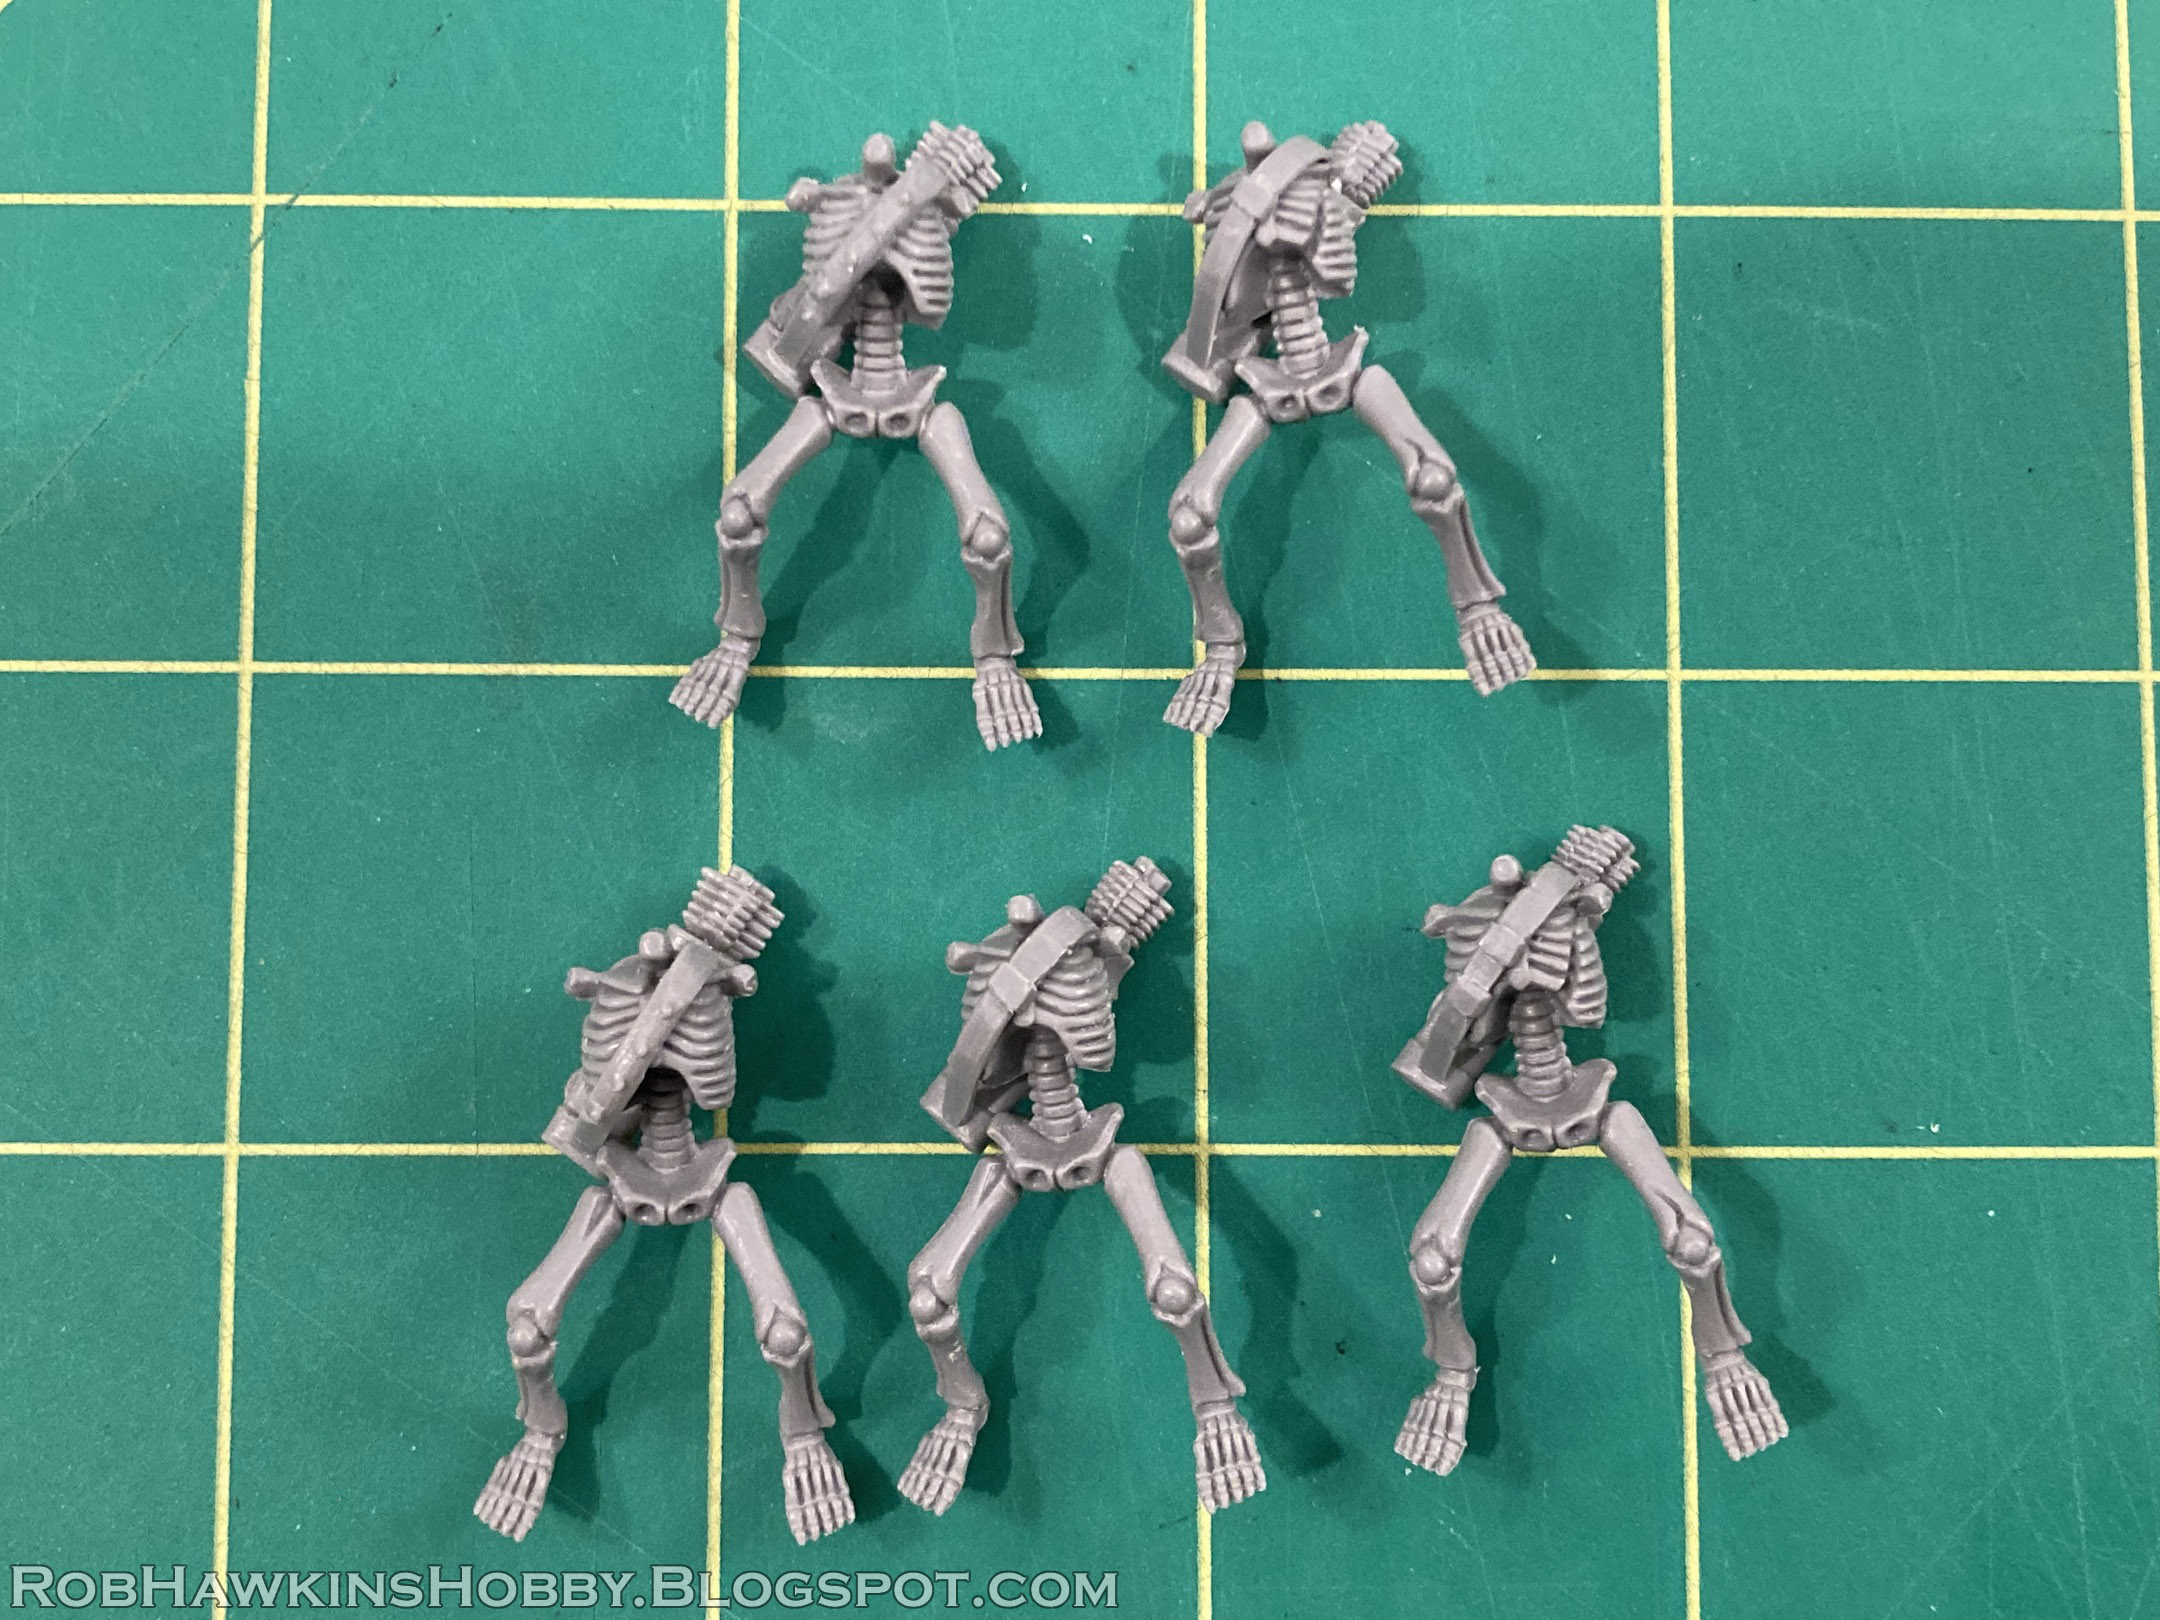
With the horses out of the way, it was time to tackle the riders:
I had a bunch of the old skeleton bows from back in the Nineties. Unlike the current Tomb King skeleton archers, they are holding the bows in the left hand, which gave me the opportunity to have the archers drawing their bows. All I needed was a suitable "draw hand," taken from the skeleton spear arm, and an arrow.
Repositioning the Bow
Because the bows are perfectly in line with the arm, I wouldn't be able to get a convincing looking draw with a bow string. This meant that I needed to angle the ends of the bow inward a little. After some unsuccessful attempts to simply bend the plastic, I decided to cut and reposition it. I carefully sliced the bow from the hand, and drilled holes in each half of the bow and through the hand.
I inserted some 22-gauge floral wire into one end of the bow. (The wire is just a bit thinner than a paperclip, so I could use a thinner drill bit in my pin vise and not weaken the plastic as much.) I cut some rings from a length of 2.4mm styrene tube to create the appearance of a handle on the bow.
When inserting the pin through the hand, and attaching the bottom portion of the bow, I was careful not to get any glue on the hand itself so the bow could rotate freely in the skeleton's grip.
Now I could rotate the bow to whatever angle I needed. The tips of the bow were also drilled with a tiny drill bit so that I could string the bows after painting. To see my tutorial for stringing bows, check out this post: Modeling Tutorial: Bow Strings
Posing the Draw Arm
This skeleton spear had the tightest elbow bend in the entire range and, with a little modification, would be a perfect draw arm. First, I cut the arm free from the spear and cleaned up the part.
Next, I drilled through the hand to allow the bow string to pass through. The angle is similar to holding a pencil; between the fore and middle finger, and out the top.
I separated the hand at the wrist, and pinned the two parts back together so I could rotate the skeleton's hand.
The socket joint at the top of the arm is intended to fit onto the shoulder vertically. To get it to attach horizontally, I used a larger drill bit to deepen the hole, and cut a notch at the top.
Now, the arm could rest on top of the shoulder ball with the elbow out straight and the hand rotated sideways.
I glued the arm in place and cleaned up the join with a little filing.
I attached the bow arm, angled to match the position of the draw arm. Once I was satisfied with the position, I added some glue at the bow hand to set the bow in place.
It's not exactly a proper draw of a bow, but it's close enough. The bow is in line with the draw hand, and when I have the arrow and head in place, it will look like the skeleton is readying his shot.
To fit the arrows, I cut a small notch in the left side of the bow that the arrow shaft could rest in, and cut a notch in the back of the arrow so it could fit around the skeleton's fingers.
Here are the skeletons with their heads in place. I wanted to have more bend in the bow since it's being drawn back, but had to compromise with the integrity of the plastic; I bent them about as far as I could without risking the plastic snapping (which, compared to the original shape, is barely noticeable).
Making Weapon Belts
For the belts, I cut strips of thin styrene, and glued them around the skeletons' waists, leaving a bit hanging down.
I glued some of my Skull Forge Scenics scorpion swords to the belt to represent the unit's hand weapons.
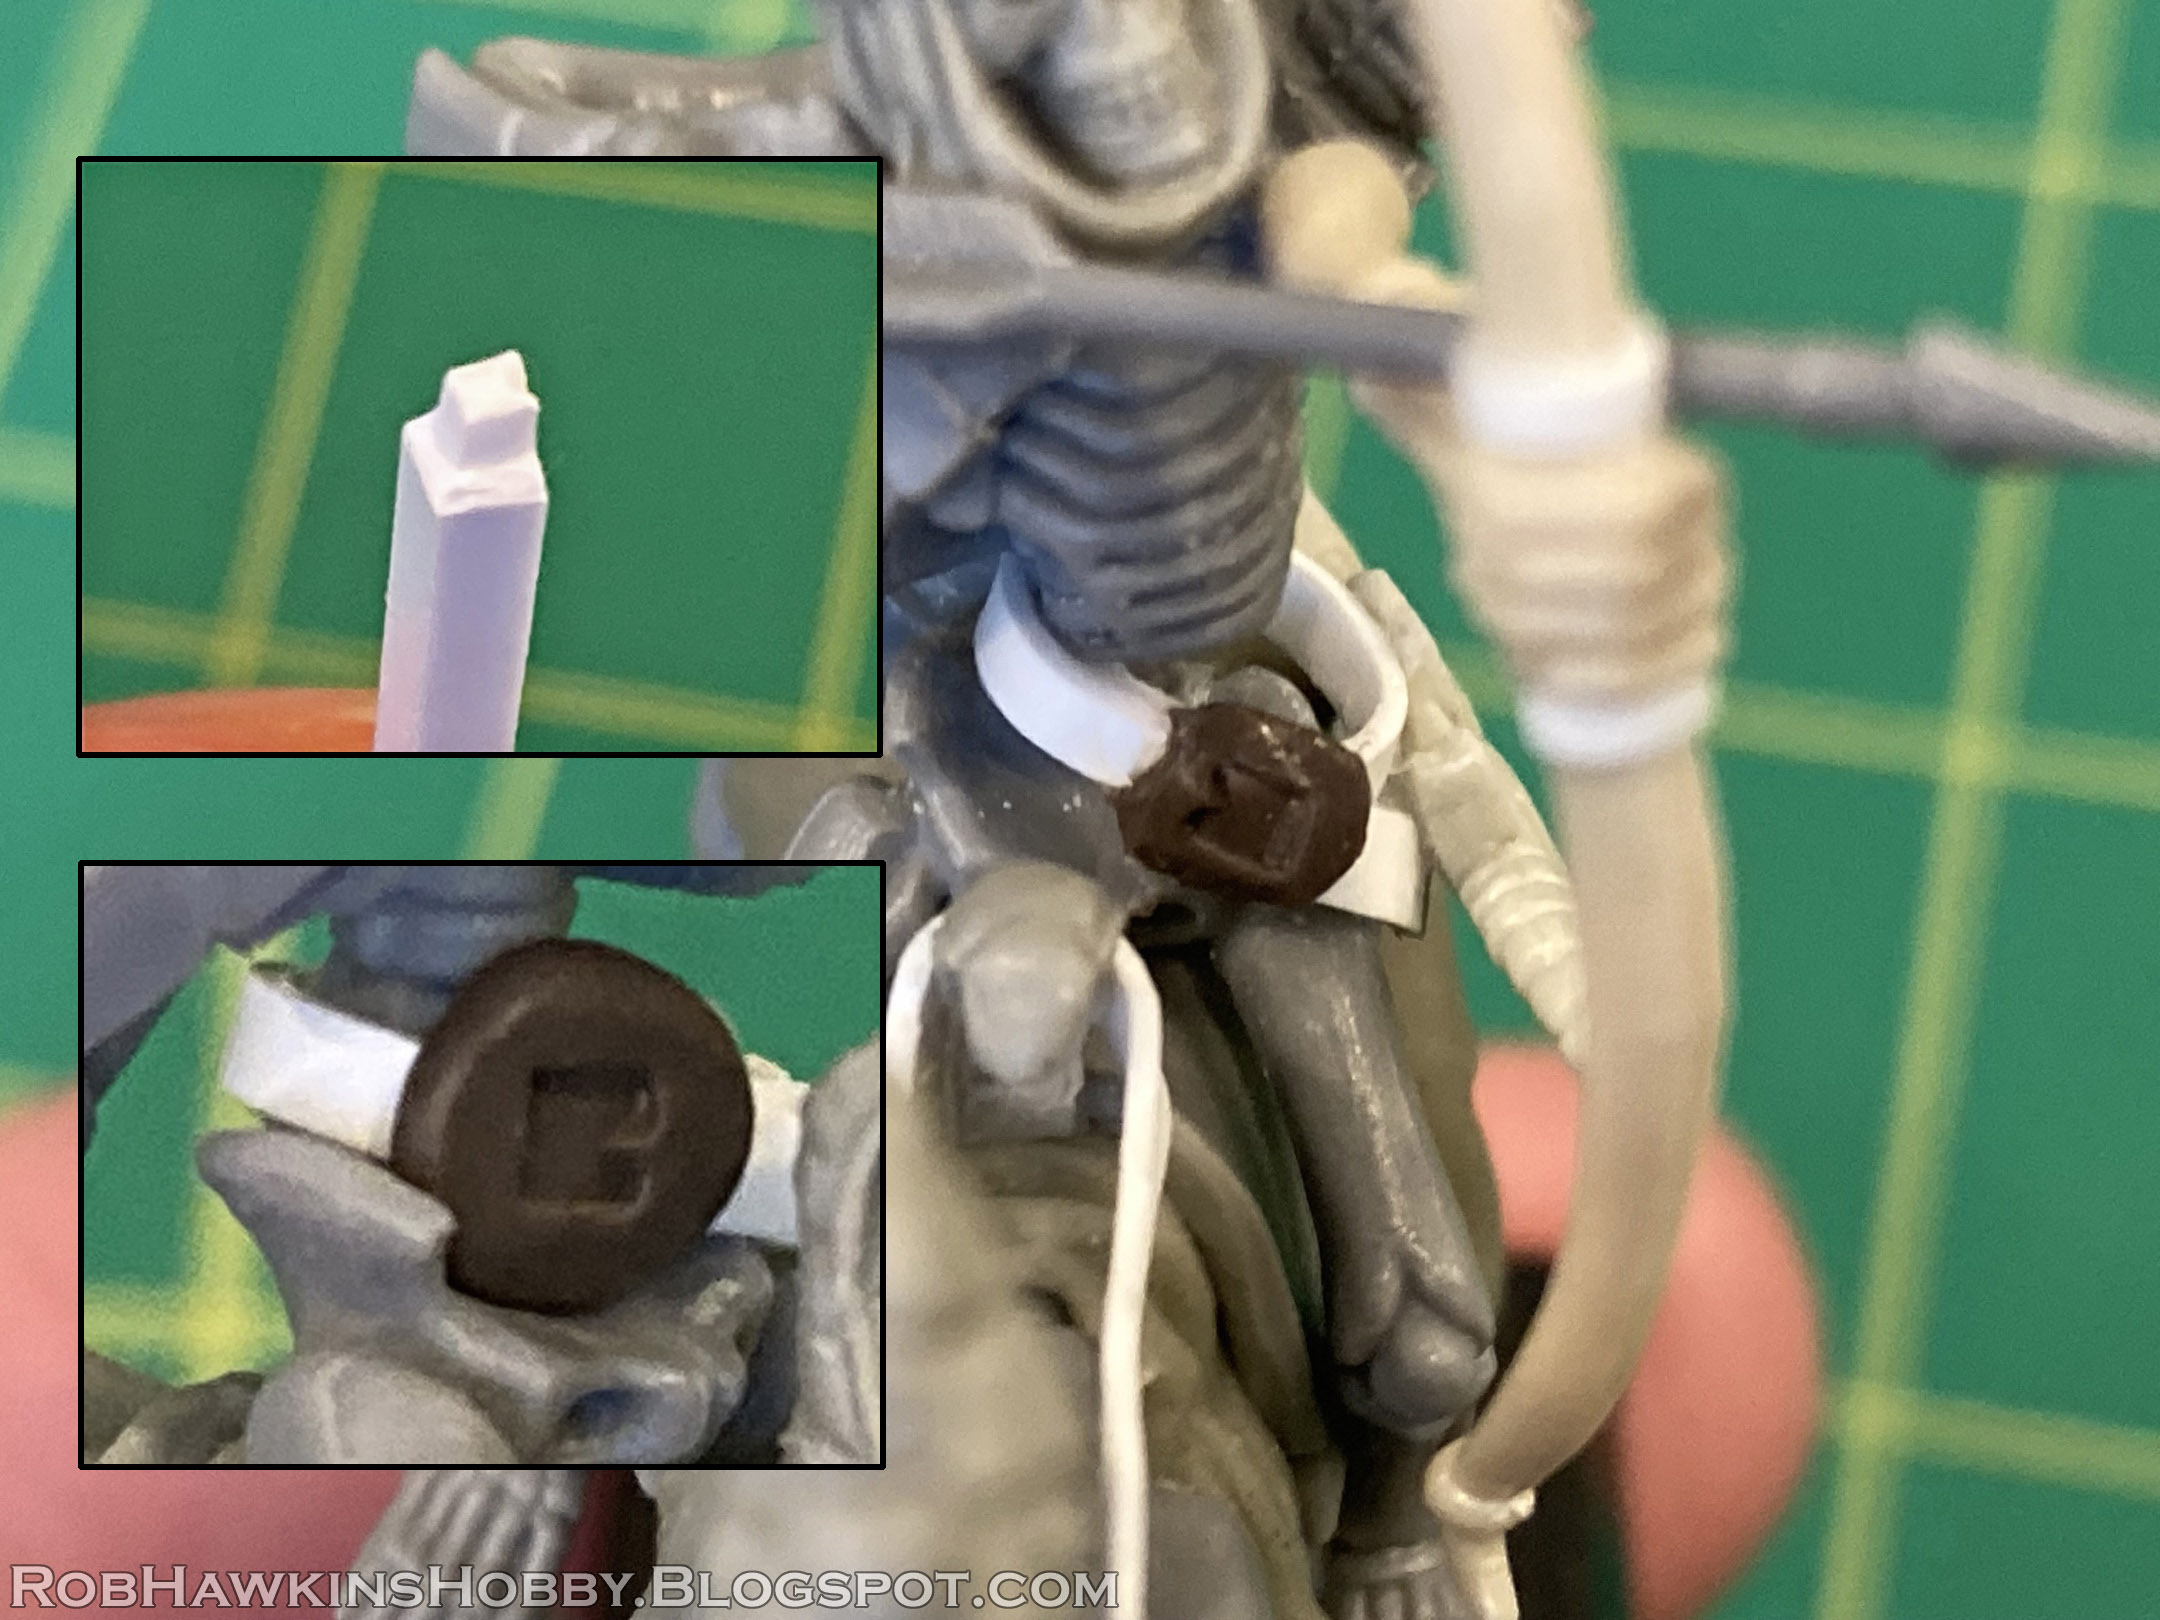
To make buckles, I applies a bit of modeling putty to the belt.
I cut a bit of styrene rod to make a stamp for the center of the belt buckle, and pressed it into the putty. The inset image was the cleanest photo I had of the stamped buckle, but the prong was facing the wrong way, so I had to redo it. (The prong should face away from the end of the strap!)
Once the buckles were stamped (the correct way!) I trimmed the outsides, leaving a simple buckle frame.
In hindsight, it would have been easier to add the belts before attaching the rider's arms and gluing him on the horse. When I add more archers to the unit, I'll definitely tackle the belts first. I might even sculpt the buckles separately on a flat piece of card, and then glue them on once they've cured.
Finishing the Horses' Reins
I had ended the previous post unsure of how I would address the horse reins and bridle. After looking at the Hexwraith steeds, I noticed that their armor was just attached to the head with no visible straps or bridle, and there was just a decorative bit in the steed's teeth. I decided to do something similar for my Tomb King horses.
For the reins, I cut a strip of thin styrene about 3mm wide. I used a heat gun to soften the middle so the strap would fold over on itself. This allowed me to have the plastic bent around the horse's neck without stressing and breaking the thin styrene.
To make the bit, I cut some rings of 2.4mm styrene tube, and made small rivets from thin styrene rod. I also had a bunch of tiny skulls from the Tomb Kings shields that I used as a decoration. After measuring and cutting the reins to fit each horse, I added the ring and skull on the end. The rivets on the inside of the ring hook into the opening in the skeleton steed's mouth.
(By the way, I was making these shields for my skeleton warriors. I sliced the small skull from the shield, and replaced it with a modified skull icon from the classic Vampire Counts skeleton warrior regiment.)
Here's the finished horse, with his reins and scorpion-themed head armor:
Aside from their basing, the first batch of horse archers is assembled! As with the other models in my army, their "glow up" really helps them shed that old 90s aesthetic and ties them to Tomb Prince Selketta's scorpion motif.
'Til next time!


Impressive conversion work as always! I love the idea to use a stamp for the belt buckle - that one is getting squirreled away in the back of my head for future use!
ReplyDeleteThank you! Don't forget to stamp it with the prong facing the right way! :D
DeleteYep really impressive, I can't even think about drilling out the bow strings. Let alone any of the other changes. Thanks really interesting to read.
ReplyDeleteThank you!
DeleteThis is sick!
ReplyDeleteThanks!
DeleteExcellent! You have really improved the figures with the bigger changes (saddle, barding, bows) but the tiny details really elevate them to fit in with newer figures.
ReplyDeleteThank you! The newer figures have so much detail and decoration, the old TK skeletons just looked too plain by comparison– Especially the cavalry, because there was *nothing* on the horses, and even the "newer" TK rider bodies, heads, and arms didn't have any added detail, just naked skeletons, which is odd.
DeleteGreat job! Styrene seems to be a very nice material and I got to try it out in my work. Thanks for sharing your secrets :)
ReplyDeleteAwesome, glad the styrene is working out for you! And thanks! :)
DeleteThank you so much for this tutorial! Super excited to fix up my ugly archers now! Would you mind sharing where the archer heads came from please? :)
ReplyDeleteGlad you enjoyed it! As for the heads– I sculpted those cowls over the basic TK skeleton heads.
DeleteJust excellent.
ReplyDeleteThank you!
Delete