Painting Tutorial: Tomb Kings Bone Giant
Here's a look at my newly-completed Bone Giant, and the process I used to paint him and my other Tomb Kings:

If you'd like to see the blog post about how I painted the Bone Giant, you can find it here: Converting a Colossus

I had painted a Tomb Kings skeleton ages ago, and came up with a color scheme that, despite being red and bone, would make them stand out from my "Vampire Counts" Legions of Nagash skeletons. I incorporated more brown and yellow ochre into the bones to give them a more "desert sand" aesthetic, and kept the highlights a little more muted by only bringing them up to Screaming Skull at the brightest points.

On this model, I used the following colors:
GW Tau XV88
P3 Moldy Ochre
GW Screaming Skull
Liquitex Burnt Umber Transparent Ink (brown ink)
GW Agrax Earthshade
Black
P3 Menoth White Highlight
P3 Sanguine Base
Army Painter Crusted Sore
P3 Khador Red Base
P3 Pig Iron
Army Painter Shining Silver
P3 Bloodstone
P3 Rhulic Gold
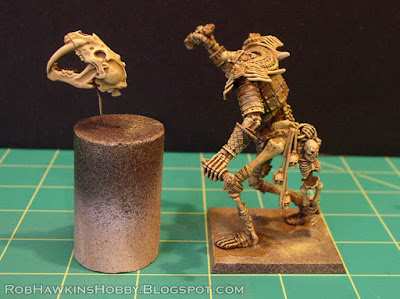
I started by spray priming the model with flat black primer, and then giving it a dusting of Testors Model Masters Light Earth to get a brown base to work up from. Then, I gave the bones and wrappings a basecoat of Tau XV88.

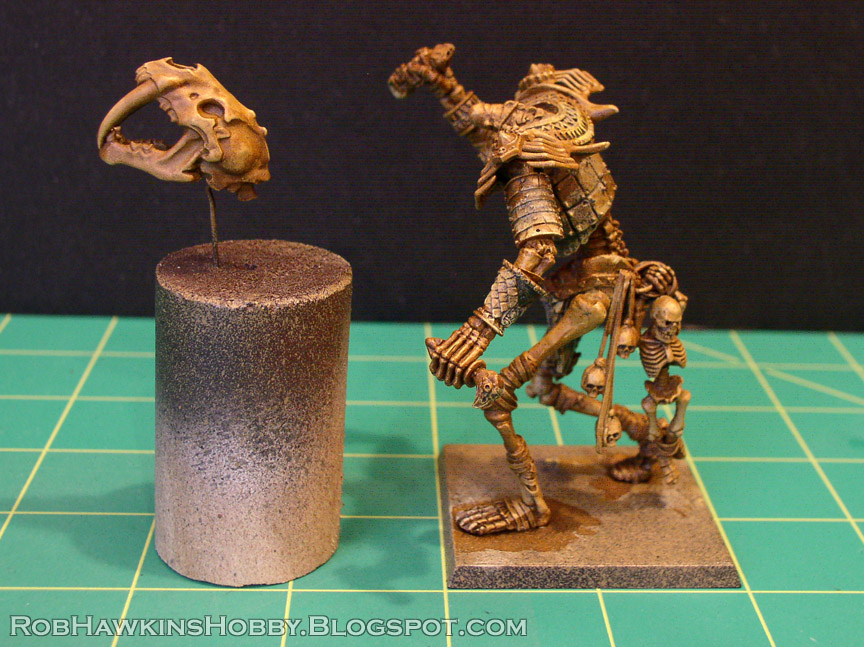
Next, I drybrushed the bones and wraps with successive layers of Moldy Ochre and Screaming Skull. I added just a touch of water to keep the paint from being too thick, and I wasn't concerned if the recesses filled in a little.

Then, I mixed a wash of brown ink and Tau XV88, and washed it over all the bones. This gave them a nice, deep tone, and filled in all the recesses. I've seen people online asking how to achieve "dark bones" and this would probably be a nice solution for that. You could probably stop at this stage and have skeletons that look like realistic "brown" bones– the kind you'd see in an actual mausoleum or dug-up grave. (Not that I'd know...)

From there, I began drybrushing back up to a bright color. For these stages, I used a "proper" drybrush technique to keep the paint out of the recesses. I used a mix of Tau XV88 and Moldy Ochre for the first step...

Then, Straight Moldy Ochre...

And finally, a mix of Moldy Ochre and Screaming Skull.
I finished off the bone with highlights of straight Screaming Skull on the knuckles and tops of the bones, around the eye sockets, etc. I painted the teeth with Screaming Skull and brought this highlight up to Menoth White Highlight to get the teeth stand out a little more.

I went around the bones and looked for any spots that needed the recesses datkened, and used a fine brush to paint brown ink into the gaps. This included around the teeth. To darken the eye sockets and nasal cavities even more, I added a little black into the ink.

Next, I painted all the wrapings and ropes with a basecoat of Moldy Ochre and an overbrushing of Screaming Skull. The leather straps were painted with Tau XV88.

Then, I washed the leather straps, ropes, and wrapings with Agrax Earthshade. Once the shade was dry, I looked for spots where the gaps between the wraps needed to be darkened a little more, and lined these with brown ink. I highlighted the leather straps with a mix of Tau XV88 and Screaming Skull.

All that remained on the model was the red and metal bits. For the red areas, I used a base-mid tone- highlight process using a blend of Sanguine Base, Crusted Sore, and Khador Red Base, never taking it to straight Khador Red Base, as that was brighter than I wanted. I just used the Khador Red to punch up the color a little. I finished it off by using Brown Ink to shade the recesses around the edges.

At this stage, I sprayed the model with Testors Dull Cote, then moved on to the metal so I could keep the metallic paint bright and shiny. I basecoated the steel with Pig Iron, and then washed it with brown ink. Once the ink was dry, I drybrushed it a little with Pig Iron and Shining Silver. The brass was basecoated with a mix of Rhulic Gold, Bloodstone, and Brown ink. Then, it was washed with brown ink, and drybrushed with Rhulic Gold.

The final step was to paint the gems with Crusted Sore, a bright swatch of straight Khador Red Base at the bottom, and a spot of Menoth White Highlight at the top. I added a little more brown ink onto the base of the blades to keep them from being too "clean."

The process worked out much the same as I remember, and matches my test model quite nicely.

As I said in the post about this model's construction, this guy is an homage to my Warmaster Bone Giant. I even based him with the same mixture of flock. The base is temporary until I find out whether I'll be able to build out a full Tomb Kings army in the Old World.


'Til next time!


Cool, I like the new head!
ReplyDeleteThank you!
DeleteBrilliant!
ReplyDeleteThanks!
Delete