Making Static Grass Tufts
One of the things I've been working on is a way to produce static grass tufts for terrain projects.

The key to making them is having the right length of grass and an electric charge to make the grass stand upright. I made a static grass applicator using an electric flyswatter and a metal strainer.

If you search Youtube, you can find a bunch of video tutorials showing how to build one for yourself, but I found this one most helpful:
Note: An electric flyswatter is essentially a battery-powered tennis racket that shocks flies and mosquitoes it contacts. It should not be modified or tampered with. There is a danger of electric shock when using this thing, so do this at your own risk.
Electric flyswatters can be found online or at DIY home improvement stores. I picked this one up for about seven dollars and got the strainer for three dollars. Check dollar stores, and the home and kitchen department at discount stores. I also used some wire, solder, and an insulated alligator clip, and picked up a sheet of galvanized steel (also available at DIY stores for less than $10).
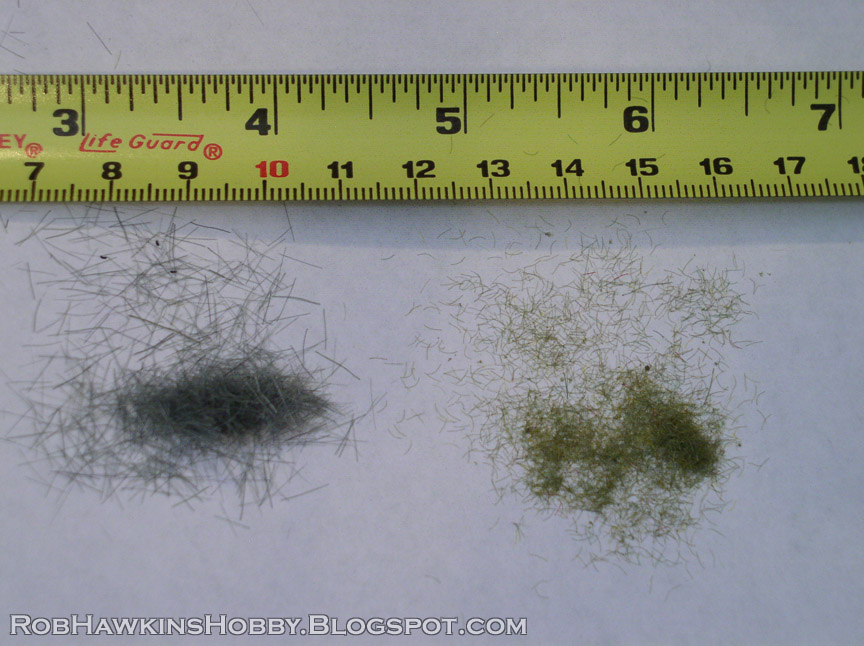
As I mentioned, the length of the static grass is important. Standard static grass is about three millimeters long. To make effective tufts, you will need grass that's about six millimeters long.

You can buy grass in that length, but none of the stores in my area carry it. My solution was to make my own using Woodland Scenics field grass. I used a pair of scissors and did the cutting over a piece of paper, folded so I could easily collect and pour the grass into a container.

The field grass is a little fiddly to work with. I found the easiest way to manage it was to gather a small bundle and make sure it was smooth and straight, I trimmed the stray ends and then began snipping 6mm lengths of grass to make the clippings. I didn't measure, merely eyeballed it. Once I found my groove, it went pretty quickly. I mixed some medium and light greens together to create a unique blend that suits the terrain I'm working on.

The tufts were made on wax paper. You can also use cooking parchment paper, but I found that the glue permeates the parchment paper a little, whereas the wax paper kept it from seeping through. The tufts pop off the wax paper very easily. I taped the paper, wax side up, to the metal plate, and have my collection paper laid out next to it.

Before applying the glue, I got the grass ready, putting a bunch of it into the strainer.

The alligator clip was attached to the metal plate. This creates a current between the strainer and the metal plate once the power button is activated, and when the two are held close together, it generates a static charge between the two.
Note: This is where the risk of shock really comes into play– The strainer and plate are electrified, and will spark if they touch. If you try this yourself, make sure you don't touch either the plate or the strainer. Even once the flyswatter's power button is let go, there will still be a residual charge that needs to be dispersed by touching the strainer to the plate.

I laid out some dots of glue on the wax paper. This is just regular Elmer's glue, cut with a little water.

With the glue down, I activated the strainer and began shaking it over the surface. The static charge makes the srass stand upright in the glue.


Once the strainer was empty, I discharged the static, and dumped off the excess grass. This grass was collected up and the process was repeated. I did this a few times until the glue was completely covered and the tufts were as thick as I thought I could get them.

Here's what the finished tufts look like:


It took a little experimentation to get these results. I had tried longer grass (about half an inch) but that didn't work very well; it didn't go through the strainer consistently and I ended up with a few strands stuck in the glue. Smaller dots of glue yielded smaller tufts, and the "normal" length static grass ended up looking like little grass clumps. Like anything else, practice makes perfect!
'Til next time!


That's a really neat trick for getting lots of static grass. Thanks for the tutorial!
ReplyDelete