Painting Ethereals
The Vampire Counts range contains a lot of ethereal models– banshees, spirit hosts, the mortis engine, and hexwraiths. I've been sitting on these models because I was never quite sure how I wanted them to look. In the past, my banshees and spirit hosts were simply drybrushed with grey and white but the new, ubiquitous blue-green hue of ethereal models has started to grow on me.
I had painted a bunch of banshees during the End Times campaign, but I was never happy with the result. I attempted a subtle wash over some white primer. They were fine to get some models on the table but the color wasn't quite what I was looking for.

During my recent Skaven blitz, I had painted the smokey plumes from the plague censors with an effective technique using only a few green washes over a white primer coat. I was able to dial in my wash technique and get a really nice transition between the white smoke and green glow of the warpstone.

After digging around online, I found some techniques and colors that worked pretty well, and decided to have another go at it on my newly assembled spirit hosts. The idea was to come up with a formulaic process that could be easily replicated when I get to my other models like the mortis engine.
Painting Ethereal Spirits
For this technique, I am using some of the Citadel shades and technical paints. They are simultaneously the greatest things and the worst things in the world. On the one hand, they result in really smooth shadows and glazes. On the other hand there is only one way to use them, and deviating from using it straight out of the pot can lead to terrible results. GW Lahmian Medium, at least, allows you to thin them, but adding any water ruins the properties of the shade. You also need to cover the entire area in one go, without portions of the shade drying because, once it begins to dry, painting more over top before the coat is completely dry will cause it to peel and flake, leaving deposits, lines, and "crumbs" on your otherwise smoothly shaded miniature.

Supplies
I picked up a pack of large brushes to use for the washes and drybrushing. A fine brush was also used for the details. The list of paints I used are as follows:
GW Citadel Paints
Lahmian Medium
Nihilakh Oxide
Coelia Greenshade
Dryad Bark
XV-88 (brown)
Screaming Skull
Formula P3 Paints
Thrall Flesh
Cryx Bane Highlight
Gnarls Green
Menoth White Highlight
Gun Corps Brown
Cold Steel
Quick Silver
Other Paints
Black
White
Liquitex Transparent Burnt Umber Ink (Brown Ink)
Vallejo Game Color Ghost Grey
Model Master Medium Green
Testors Dull Cote
Model Master Navy Aggressor Grey (spray)
Assembly and Priming
When assembling the spirits, I was meticulous in cleaning the mold lines. Not that the lines were excessive, I merely wanted to ensure that there wouldn't be any seams that might capture the wash and be made more prominent. Each base has three spirits that fit together into a swirl of ghosts. I assembled and primed each one separately to ensure proper coverage in the recesses.

I stuck some double-sided tape over the attachment points so I wouldn't need to scrape the primer away before gluing the plastic together.

After spraying the models with white primer, I removed the tape and completed the assembly of all of the spirits hosts. I attached them to their bases, making sure they could rank up cleanly.


Each host base was then attached to a priming stick for the next spray step.


The models were given an all-over spray of Testors Model Masters Navy Aggressor Grey, and then a top spray of white primer.

Painting
The first step is to give the spirits an all-over wash. I find that Nihilakh Oxide is a little too blue, so I added some Thrall Flesh to give a more green hue. The ratio is a little difficult to gauge because I mixed a large batch. I poured a fair amount of Lahmian Medium into a cup and then added a few brushfuls of Nihilax to bring the color up. Then, I added a couple drops of Thrall Flesh. In these shots, you can see the color before and after I added the Thrall Flesh.


Then the wash was painted over the entire spirit with a large brush, taking care to cover as much as possible in a single pass so I wouldn't get lines at the edges of the wash where it may have dried.

Once the wash was completely dry, I mixed up a batch of Nihilakh Oxide, Thrall Flesh, and Ghost Grey, and drybrushed this over the model. The intention of this drybrush was to bring the color back up on the raised areas and eliminate any points where the wash may have pooled outside of the recesses. I kept the brush very dry to avoid any brush streaks.

Next, I used more of the first wash and a fine brush to paint it into some of the recesses. These were recesses that I wanted to darken a little more, or that may have filled in from the drybrushing. I also painted it more heavily on the undersides of the spirits and on their hands to shade the gaps between their fingers.

I wanted the bottoms of the spirits to be darker, so I mixed another wash of Lahmian Medium, Coelia Greenshade, and Cryx Bane Highlight. The ratio was about three parts Medium to one part Greenshade, and one part Cryx Bane Highlight to add a little grey into the green. This wash was painted heavily on the bottom of the "tails" of the spirits, and a little thinner as it blended up toward the body.

After the wash was completely dry, I mixed another wash of equal parts Lahmian Medium and Coelia Greenshade and painted this over the lower areas of the spirit to add a darker green shade in the recesses.

The next stage was to smooth over the mid tones and fix any places where the washes were patchy. To do this, I used the colors from above in various combinations to match the mid tones and build highlights. There were three main steps:
First was to match the mid tone using Nihilakh Oxide, Thrall Flesh, and a little Coelia Greenshade to keep it from getting too bright. This was used to blend the middle area where the green transitions from light to dark.

Then I started to build up the highlights using Nihilakh, Thrall Flesh, and a little Ghost Grey.

More Ghost grey was then added into the mix to brighten the highlights.

Finally, I mixed equal parts Ghost Grey and White and painted the brightest highlights on the head tails, faces, and arms. With that, the ethereal portion of the model was finished.

The weapons needed to be picked out with metal, so I base coated them with Cold Steel and then washed them with the following mix: Three parts Coelia Greenshade to one part each of Lahmian Medium, Nihilakh Oxide, and Thrall Flesh. I also used the wash to shade the fingers gripping the knives.

Once the wash had dried, I touched up the fingers with Ghost Grey.

Basing
Normally I add the basing elements during the assembly process but, because the models were primed white, I wanted to tackle the tombstones separately and rely on the natural brown of the ballast as much as possible to minimize any potential splatter onto the nice, clean spirits while painting those elements.
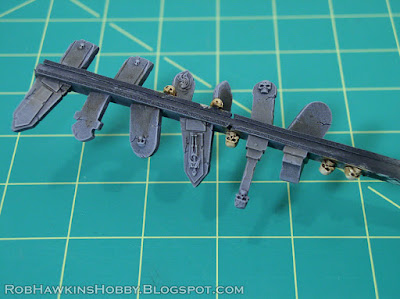
The Tombstones were all affixed to a stick with double-sided tape.

They were primed black and drybrushed with successively lighter layers of grey, mixed using black and white with a little Screaming Skull.

The bases were painted with Dryad Bark and the skeletons with XV-88.

Then, the skeletons (and the skulls with the tombstones) were drybrushed with Screaming Skull, then washed with a mix of Brown Ink, XV-88, and a touch of Lahmian Medium. Once this was dry, a much drier brushing of Screaming Skull and then Screaming Skull with a little Menoth White Highlight was applied.

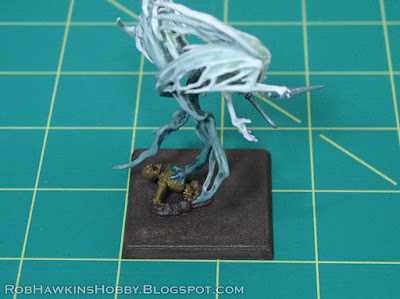
I touched up the ethereal wisps around the skeleton with a mix of Coelia Greenshade, Nihilakh Oxide, and touches of Thrall Flesh, and Cryx Bane Highlight. I found that adding a little Gnarls Green into the mix allowed me to increase the opacity while matching the color. This was thinned a little with water and glazed over the chest, shoulders, and around the skull. Finally, more Thrall Flesh was added to the mix to punch up the highlights on the tendrils.

I super glued the tombstones on the base and then used white glue to add the ballast.


Once the glue had dried, I painted the sand with Brown Ink to darken it just a bit, then drybrushed up with XV-88, Gun Corps Brown, and Bleached Bone.
The Edges were painted with Model Master Medium Green and then the whole model was sprayed with Testors Dull Cote.
The final touch was to add static grass and paint Quick Silver on the edges of the knives (I saved this step for after the Dull Cote so the metallic paint wouldn't be matted by the Dull Cote).
The Finished Spirit Hosts:
'Til next time!


Thanks for a great tutorial.
ReplyDeleteSuch a great tutorial
ReplyDeleteMany thanks!
Nice work!
ReplyDeleteIncredibly useful, thanks!
ReplyDeleteThanks, guys! Glad you liked it!
ReplyDelete