For the month of October, I'll be working on my Vampire Counts and I'll have a few other spooky surprises to show you. But first, I'm going to put the lid on my Skaven run by showing you how I converted the Screaming Bell/ Plague Furnace kit so I could field either choice.
Getting Started
For as complex as this model appears, it was amazingly simple to put together. Compared to the Doom Wheel and Hell Pit Abomnation, this thing was a dream to assemble. I built all of the major components of the kit, as shown here. (The two halves of the chassis were left unglued for easier painting.)
The top arches don't need to be glued. They just peg into the top of the stonework and stay in place pretty securely.
I was starting to think that GW might have designed the kit with the intention of players swapping between the two variations, but the crew made me think differently. The pegs in their feet and the tops of their chains didn't line up at all.
I toyed around with the idea of using the platform that comes with the kit. Unfortunately, I couldn't figure out a way to line up the magnets in the bottoms of the crew with the same positions on the platform. The raised details on each side of the platform, and the limited space under the crew makes it nearly impossible to have them standing in the same spot.
I decided to just build new platforms, one for each crew set, and the whole platform would be the part that was interchangeable, not just the crew.
Reconstructing the Platform
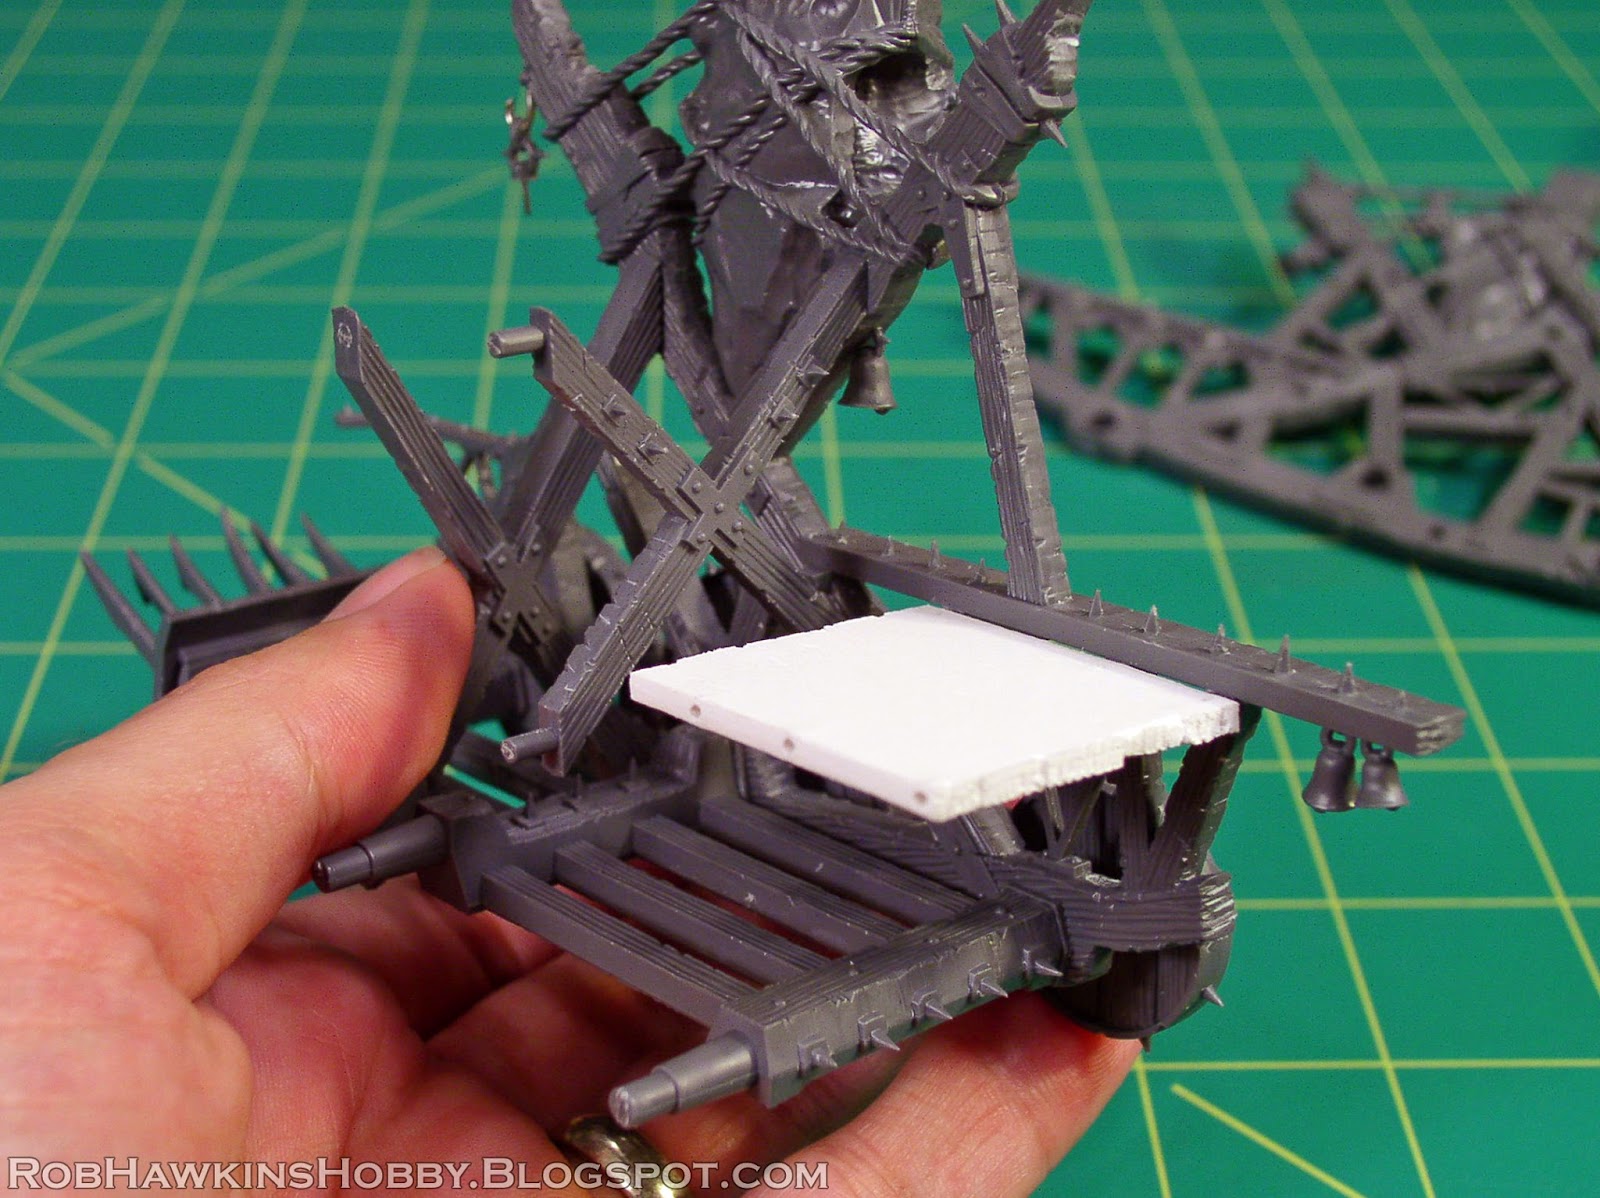
For the new platforms, I used 1/8-inch thick PVC card. The PVC card is a little softer than styrene plastic, making it easier to etch the wood grain texture in the surface. I measured the width of the platform and cit a section to match.
The individual boards were made using a series of V-cuts along he length of the card.
Then, using a pointer sculpting tool, I scratched lines to indicate the wood grain.
The ends were trimmed to mach the shape of the original platform.
Positioning the Crew
The Rat Ogre has the shorter of the two chains, so I used his as the guide. I carefully positioned the crew on their respective platforms so their chains would line up with the same spot, centered on the machine. With the stone arch in place, I glued bell arm to the arch so it lined up with the chain.
I made sure the Plague Monk crew's chain also lined up with the same spot and glued them to their platform. Since the chain was a little long, I needed to shorten it by removing a few links, indicated in red.
With the links cut out and the parts cleaned up, I connected the two pieces by cutting small notches in each end and fitting the links over one another.
Now, the chains of both the Rat Ogre and Plage Monks connected to the same spot on the bell arm.
Then, I glued the other bell arm to the opposite side.
As a final touch, I drilled out the posts on the arms, and replaced it with a length of brass rod. The rod is glued in one side, and pushes through the opposite side when assembled, holding the chain in place more securely.
Both the bell and the censor are notched so they stay in place when inserted into the arch.
The kit only includes one Skaven symbol to top either of the two devices, so I added a pin that would allow me to freely interchange it.
The final arch assembly consists of 5 basic parts: The 2 arch halves, the Screming Bell or the Plague Censor, and the top symbol.
Magnetizing the Crew Platform
There wasn't anything underneath the platform that I could sink the magnets into, so I added another platform. The support points on the frame were sliced off, and this new support platform was pinned into those spots but not glued. Notice it is set down at the same level as the support studs; this ensures that the crew platform sits at the proper height. The bottom of the platform was detailed with wood grain in the same manner as the crew platforms.
To position the magnets, I fit the crew platform in place and marked two spots with a marker.
Next, I drilled a hole on each spot with a 1/8-inch drill bit. (The magnets are also 1/8-inch in diameter, so they will be a perfect fit.)
To match the spots on the lower support platform, I drilled down through those holes.
The other crew platform needed to line up, so I used the holes underneath as a guide, and drilled up from the bottom. All the magnet holes lined up perfectly.
Before inserting the magnets into the crew platform, I covered the top of the holes with thin styrene card and rivets. Then, the magnets were pushed up into the bottom. Because of their thickness, the magnets protruded a little, which was fine.
Without gluing anything (to avoid the two platforms from inadvertently sticking together), I pushed the magnets through the bottom of the support platform. Again, they stuck out just a little. To conceal them, I cut two strips of PVC card and drilled a hole halfway through at the spot it would cover the magnet.
To make hex bolts, I cut a few chads from hexagonal styrene rod and smaller round rod.
The "boards" were glued over the magnets and the hex bolts were glued over top of them.
The support platform was then glued in place (one side only, so I could separate the chassis for painting), and each of the two crew platforms fit perfectly!
The assembly of either variant takes 5 steps:
1. Insert the right half of the arch.
2. Attach the crew platform and secure the chain on the bell arm.
3. Insert the bell or censor.
4. Attach the left side of the arch and pinch the bell arm together over the brass rod.
5. Attach the symbol on top.
Characters, Odds and Ends
For the Grey Seer up top, I came up with a fairly simple solution:
Holes were drilled in the handle he's holding onto.
This allows the handle to "pin" over top of the little spikes on the bell arm. It's a snug fit, so it holds him in place pretty securely.
The brazier for the front of the Screaming Bell was pinned in place so it can be removed to allow the Plague Priest to stand there when fielding the machine as the Plague Furnace.
I assembled the priest himself in two parts so I could paint the detail on his front more easily. The little censors that decorate the machine are currently in my parts box. Before I add them to the model I want to see if they will work for a Plague Censor Bearer conversion I'm dreaming up. But that's for another day...


That is an insane amount of work ;) I'm sure I would have just bought two kits!
ReplyDeleteTheres some excellent plastic card work, have you ever considered doing a tutorial?