
WWW.SKULLFORGESCENICS.ETSY.COM

Thursday, June 23, 2016


Tuesday, June 14, 2016
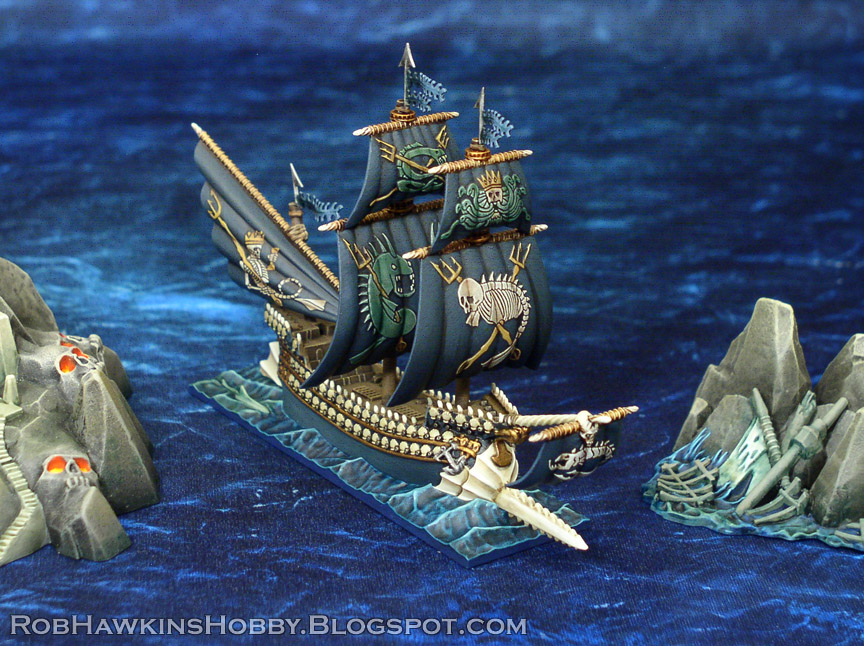
Dreadfleet: The Curse of Zandri and Volcano Island
Another ship down! The Curse of Zandri painted up the quickest of all the ships so far. It was a matter of drybrshing the wood, basecoating the gold and then washing the entire thing with brown ink. Next, I hit the gold and brown areas with some controlled drybrushing highlights and painted the obsidian marble with P3 Coal Black and a few lighter lines to represent the marble pattern. This was then washed with GW Nuln Oil. Finally I picked out the red bits and green gem, and once the parts were assembled, the ship was ready for sea.
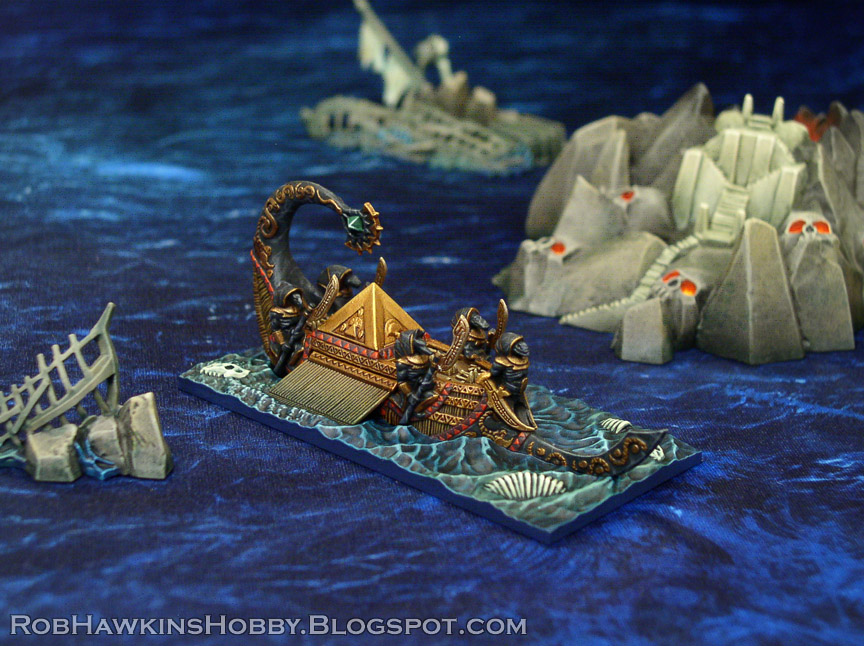
I wasn't entirely sold on the design of the vessel, and thought it would look more like a floating pile of "stuff" rather than a ship, but the color on it, everything pulls together quite nicely.


I think the creatively named "Volcano Island" is my favorite of the land masses. Reminds me of the board game Fireball Island!


If you've been following the challenge between Chris and me, he just finished his Deathwatch set before I finished my Dreadfleet, so he can handily claim victory. You can check out his models over on his blog. Believe it or not, even with all the progress I've made, I don't even think I'm halfway through my Dreadfleet box yet. I still have six more ships (with all their sails), the three sea monsters, Leviathan Island (that's the one with the giant turtle skeleton), and the measuring cogs. Oh yeah, and all the little auxiliary boats. I had better get cracking or he'll finish his next boxed game before I finish even one.
Coming up, the Seadrake and Swordfysh...
'Til next time!
Thursday, June 9, 2016
Dreadfleet: Skabrus (And Other Things)
I've been so busy working on Skull Forge Scenics business and casting that I've totally neglected my own personal projects, Dreadfleet in particular. I think Chris can claim victory in our challenge; his Deathwatch set is complete except for the bases, and he's even been able to play a complete game (the review of which you can see over on his blog.)
I finally put some more paint on my Dreadfleet ships. The Skabrus is ready to set sail. This thing was pretty fun to put together with its interior guts molded on the base and visible through the openings in the hide of the monstrous monkfish.


I have a few other Warhammer-scale Skaven pirate ships (which you can see here) and I would love to build a 28mm-scale version of this. I like the idea of 30 full-sized warp lightning cannons lining the decks of a two-foot long behemoth. (Would it be possible to convert it from an actual monkfish? Imagine slapping that thing on the table and placing models on it! Yuck.)

A face only a mother could love:

Up next, I've got the Curse of Zandri and the Swordfysh underway. They just need a little more washing and drybrushing and then the details need to be picked out. The Swordfysh will also be the first ship with sails.

On the undead front, now that my Mortis Engine is finished, I can turn my attention back to the Morghasts. I've got plans to use my Skull Forge shrines as perches for them. The wings have had all the ethereal bits trimmed off, and I'll need to do a lot of resculpting to repair the missing wing tips. The feet also need to be tweaked a little so they'll stand properly on the shrines.

I think the full shrine might be a little overbearing, so I'll probably go with a partial pour of the mold to create a shrine that's toppled and sunken into the ground.

'Til next time!
Wednesday, June 1, 2016
Skull Forge Scenics Graveyard Walls
The new resin graveyard wall sets are finished and up are up for sale in my store:
https://www.etsy.com/shop/skullforgescenics
I painted up a set so I could show off some better detail pics. I'll also discuss some conversion work below, using models to add statues to the tops of the wall posts.
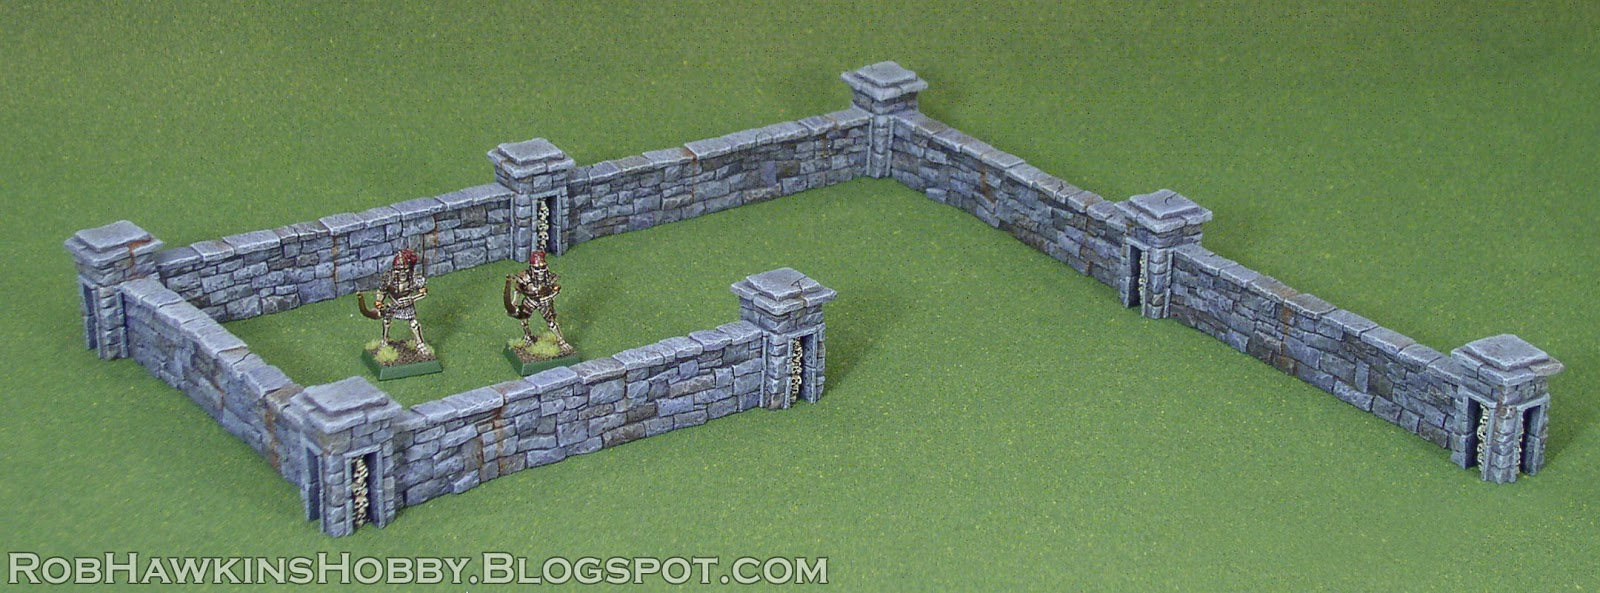

The walls themselves are 5-inches long. I designed them with game play in mind; many games establish linear obstacles in 6-inch increments, so each section of wall comes to about six inches with the end posts added.

The tops of the walls and posts are separate parts so there's a little variety possible by mixing and matching them. It also allowed me to ensure the overhanging tops would be bubble free, and I could make different designs farther down the road that would use the same wall base.


There are three unique sculpts of the posts and the walls.


My favorite bit is how the walls and posts work together. One of my pet peeves has always been wall sets that don't properly match up at the corners– Just two walls or fences that happen to terminate in the same spot, but don't really connect. I wanted my walls to interlock using the posts, so they could form straight joins or 90-degree corners that would have a seamless join. The walls insert into the skull columns and the top stones on the walls butt up to the framing stones around the skulls.


Converting Statues
The center stone atop the post is just about 20mm square, so it can accommodate most man-sized 28-35mm models. I have a cache of old metal tomb guards from Hero Quest that I've been hanging onto for just such an occasion.

To add a "statue" just remove the model's base tab and add a pin. (Brass rod or a length of paperclip will do.) Use a pin vise to drill a hole in the center of the wall post (or wherever the feet will be if the model you're using for a statue doesn't have a single block of skirt at its bottom).

Attach the model to a stick, cork, or spare base for painting. Prime it with black spray primer, and then give it a thorough drybrush of GW Hashut Copper.

Next, mix up a wash of P3 Arcane Blue and Thrall Flesh to create a green patina and wash this over the entire model. If the recesses are too light, you can apply a wash of GW Coelia Greenshade in some of the deeper areas. Once the wash is completely dry, drybrush a little more copper on the highest points of the model.

Finally, pin the model in place atop its perch.

Perfect for a stand-alone monument or as the entry posts forming an opening in the wall.


'Til next time!
Subscribe to:
Posts (Atom)