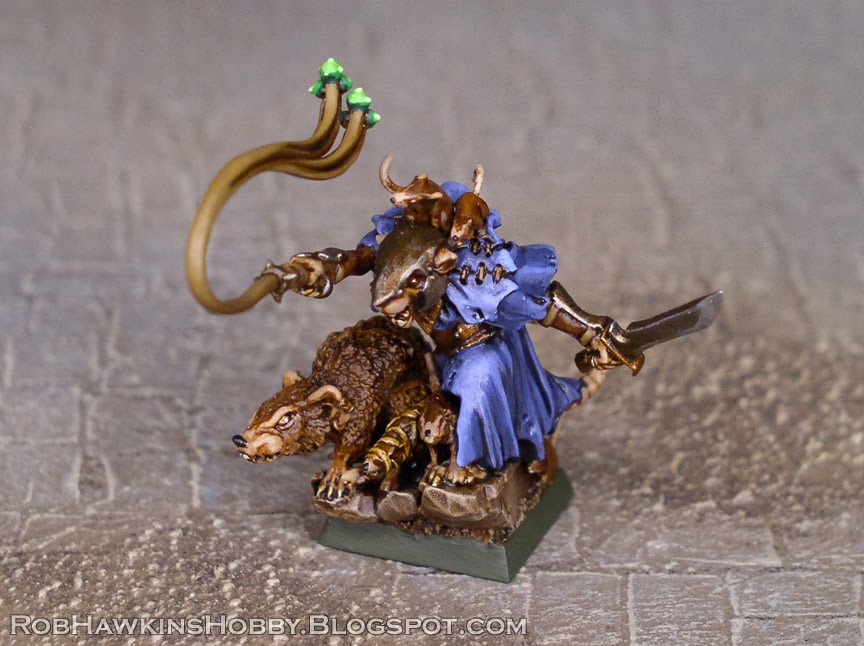
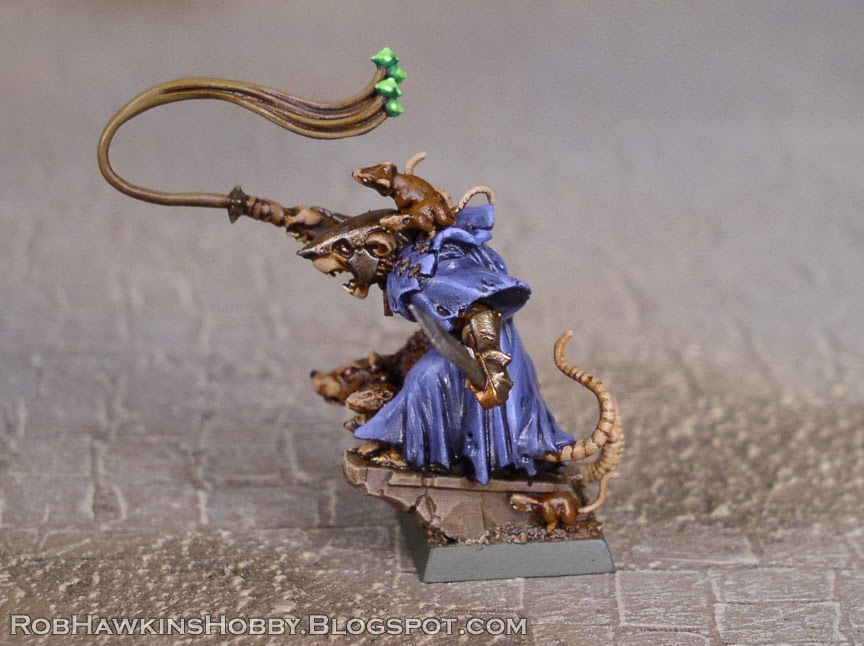
I've been working on my Skaven recently (much to the chagrin of my Terrorgheist). I picked up a second Doomwheel, and finally assembled the Rat Ogres from my Island of Blood starter set. The packmaster Skweel Gnawtooth is a must-have to accompany Rat Ogres; one of his abilities bestows a mutation to the unit that can result in poisoned attacks, extra attacks, or regeneration.
I was having trouble tracking down a model, so I decided to convert my own. The body is based on the Skaven warlord in the starter set, with arms pulled from one of the champions. The whip is from an Orc model. One of the classic metal giant rats and a bunch of plastic rats make up his verminous bodyguard. Some sculpting on his robes and the rocks finish off the model.
Skweel gets the same quick-and-dirty paint scheme as the rest of my Skaven.
'Til next time!
Here's how I create the ubiquitous neon signs for the Wild West Exodus terrain. This technique would also work for contemporary and sci-fi settings.
What you will need:
Heavy gauge floral wire
Pin vise and drill bit (same size as floral wire)
Clippers
Needle nose pliers (with flat jaws)
Constructing the Sign
The round floral wire will form the "glass tubing" of the neon sign. It can be bent into letters or different shapes. Use needle nose pliers to bend the wire. It's important that the pliers have flat jaws, as serrated jaws will mar the smooth surface of the wire. It helps to plan the path of the wire so the letters can flow in one long line without too many overlaps or doubling up. The pliers will also help you get clean 90-degree bends.
For a lettered sign, begin at one end and work your way to the right. Start with a 1/4-inch section that will insert into the back of the sign, and build the letter from there.
The rounded sections, like this B can be bent by hand.
Where the middle of the B bends, use the pliers to fold the wire back over itself, and then squeeze the two sections together.
Do the same at the bottom of the B and bring the wire over to the next letter. Try your best to get consistent spacing and height to the letters. Practice makes perfect!
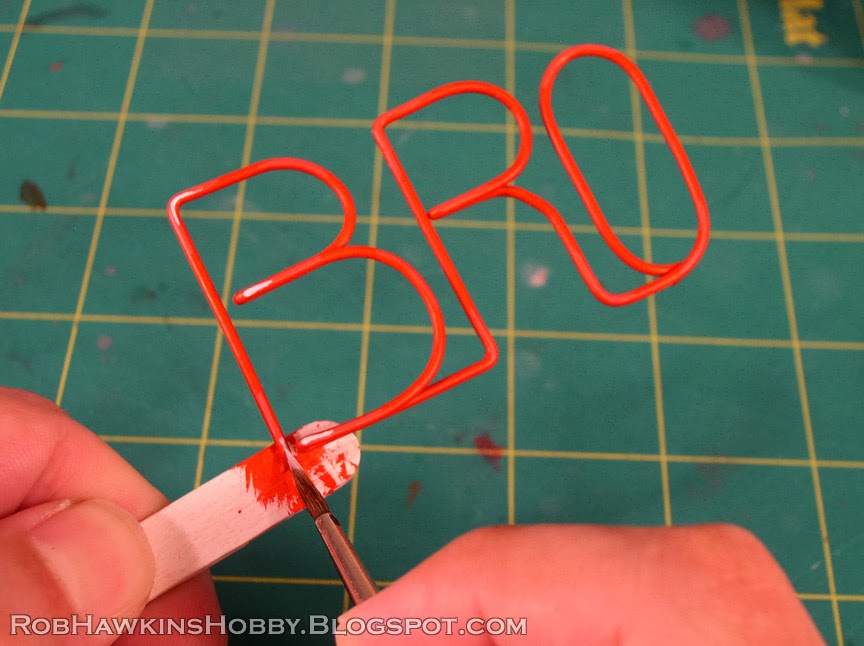
On larger signs, the word may need to be broken into sections if the wire isn't long enough. Here, the word brothel has been broken into "BRO" and "THEL." There is an attachment point at the end of each section, in this case at the bottoms of the B, O, T, and the top of the L.
Fit your letters as you work to avoid running out of space. It may help to draw a pattern on a piece of paper the same size as your sign, and match the wire letters to what you've drawn.
Once the wire work is finished, mark the attachment positions on the sign, and drill holes with a pin vise. Fit the sign in place, but do not glue it yet. In this shot, below the main, sign you can see the legs and sign frame that were outlined with thin wire to make the neon shapes. The sky's the limit to what you can do!
Painting the Sign
Drill holes in popsicle sticks and lightly glue the neon letters in place. Spray them with white primer, and you're ready to begin painting.
Since this is a red neon sign, that's the color I'm working with in this tutorial. You can use whatever color you like for your signs, the process remains the same.
Start by basecoating the letters with red.
Be sure to get clean, smooth coverage with no white showing through.
For the next step, mix a little white into the red. Just use enough to lighten the red without turning it pink. Brush this mid tone over the corners and upper curves of the letters.
Finally, apply a straight white lighlight line on the corners and ends.
Create the separations between the letters by blacking out the negative spaces just like on a real neon sign.
Any of the sign that passes behind the letter should be blacked out.
Here are the finished neon letters:
Painting the Glow
Once the building and the letters are painted, it's time to add the glow on the sign itself.
Start by painting a dark glaze over the area, blended out at the edges. To darken the red, I added a little P3 Sanguine Red.
Before the glaze dries, pull out some of the color where the open areas of the letters will be. It's important to note that from here on, you should let each layer of color dry completely before moving to the next step. Otherwise the blending can pull up the layer of paint underneath.
Use the letters as a guide, and paint a lighter version of the letters on the sign. I used straight red, thinned a little. You can see it running into the cracks between the boards. Before the paint dries, diffuse the edges with a dry brush, and pull any of the color out of the recesses where it may have gotten out of control.
It's a bit of an organic process. An airbrush might make things a little easier.
Once you're satisfied with the letter glow, add a little white to the red and paint it into the centers of the letters. Things may get a little pink, but that's okay.
To finish everything up, apply a thin glaze of red over the entire area. This will tone down the pink, and brighten the background a little, leafing a nice impression of the sign's glow.
All that remains is to glue the neon letters in place!
Similar techniques are used on the smaller signs and the glow around them. Experiment with different colors and thicknesses of wire. Above all, have fun!
'Til next time!