Skull Forge Scenics Graveyard Walls
The new resin graveyard wall sets are finished and up are up for sale in my store:
I painted up a set so I could show off some better detail pics. I'll also discuss some conversion work below, using models to add statues to the tops of the wall posts.


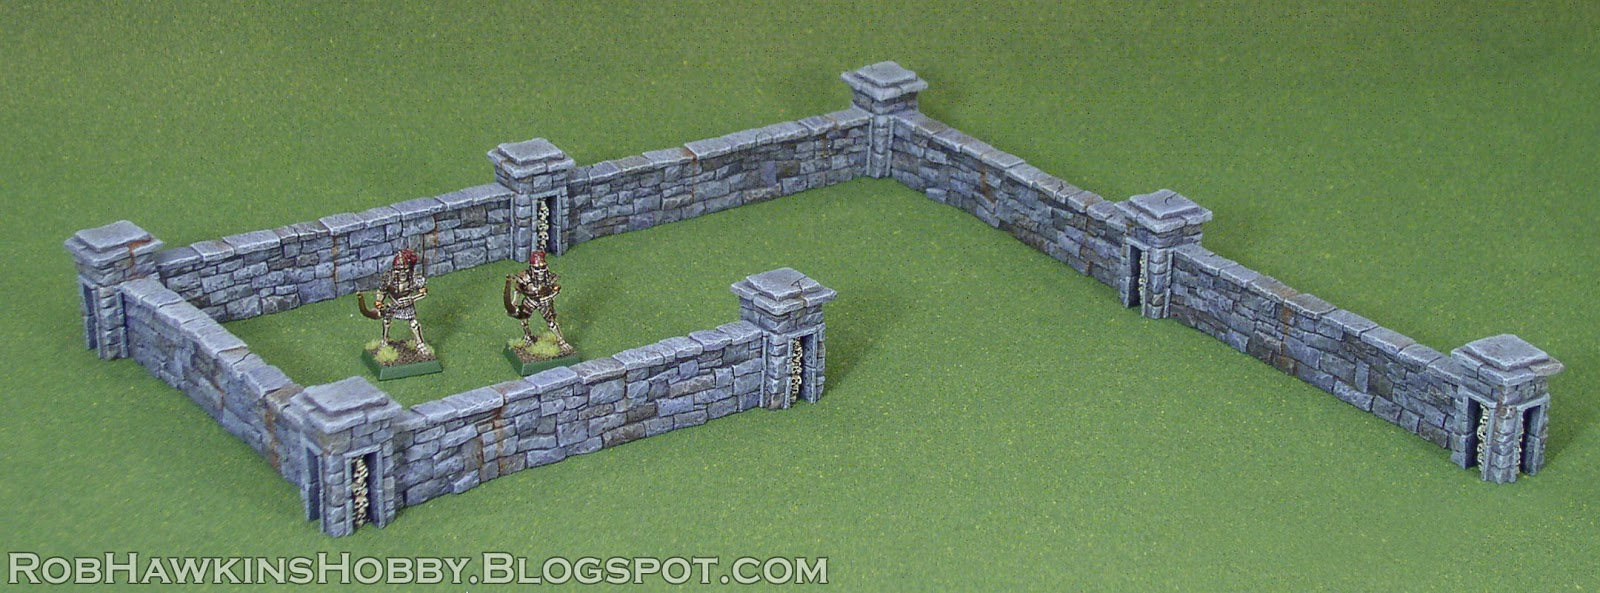
The walls themselves are 5-inches long. I designed them with game play in mind; many games establish linear obstacles in 6-inch increments, so each section of wall comes to about six inches with the end posts added.

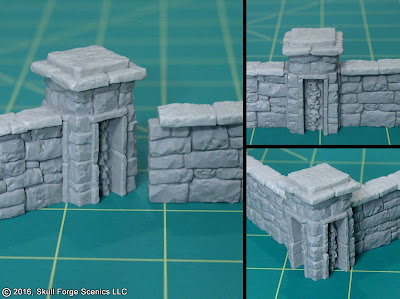
The tops of the walls and posts are separate parts so there's a little variety possible by mixing and matching them. It also allowed me to ensure the overhanging tops would be bubble free, and I could make different designs farther down the road that would use the same wall base.


There are three unique sculpts of the posts and the walls.


My favorite bit is how the walls and posts work together. One of my pet peeves has always been wall sets that don't properly match up at the corners– Just two walls or fences that happen to terminate in the same spot, but don't really connect. I wanted my walls to interlock using the posts, so they could form straight joins or 90-degree corners that would have a seamless join. The walls insert into the skull columns and the top stones on the walls butt up to the framing stones around the skulls.


Converting Statues
The center stone atop the post is just about 20mm square, so it can accommodate most man-sized 28-35mm models. I have a cache of old metal tomb guards from Hero Quest that I've been hanging onto for just such an occasion.

To add a "statue" just remove the model's base tab and add a pin. (Brass rod or a length of paperclip will do.) Use a pin vise to drill a hole in the center of the wall post (or wherever the feet will be if the model you're using for a statue doesn't have a single block of skirt at its bottom).

Attach the model to a stick, cork, or spare base for painting. Prime it with black spray primer, and then give it a thorough drybrush of GW Hashut Copper.

Next, mix up a wash of P3 Arcane Blue and Thrall Flesh to create a green patina and wash this over the entire model. If the recesses are too light, you can apply a wash of GW Coelia Greenshade in some of the deeper areas. Once the wash is completely dry, drybrush a little more copper on the highest points of the model.

Finally, pin the model in place atop its perch.

Perfect for a stand-alone monument or as the entry posts forming an opening in the wall.


'Til next time!


These look amazing. The idea of the modular terrain that can be configured in different ways is great.
ReplyDeleteGreat looking walls, they look realistic and superb!
ReplyDeleteThanks guys!
ReplyDelete