While working on my Space hulk Terminators, I'm magnetizing their feet so they can be placed on round bases for use in games of 40K. I touched on this briefly in my post about Brother Noctis, but I figured I'd show the process in more detail.
Since every model's feet are space differently, you'll need to make some adjustments when drilling the holes. Ideally, you want to have the magnets in the base set in two of the existing peg holes. If that's not possible, then use one of the holes and an open area. Check the fit on the bottom of the base to see which holes best match with the model's feet.
The rare earth magnets are 1/8-inch in diameter, so use a similarly sized drill bit to drill out the holes. Start by putting a hole in the model's foot and one in the base, through the peg hole.
To put the magnet into the model's foot, apply a dot of super glue to the top magnet in a stack. Press the magnet into the hole, leaving about 1/16 inch protruding.
Hold the magnet in place until the glue sets, then pull the rest of the magnet stack away. I find this method easier than trying to use tools or my fingers to hold the magnet; fingers are too fumbly and the magnet sticks to metal tools.
Drill out the other hole in the base.
To line up the spot to drill in the other foot, place the model on the base with its magnet in the first hole, and position the second foot over the other hole.
Then drill up into the foot through the bottom of the base. If it's difficult to hold the model steady, add a tiny dab of super glue to the feet. Use just enough to hold it in place and allow you to pop it apart when you are finished.
Now you have two perfectly positioned holes in the base and in the model's feet.
Glue the second magnet into the other foot. Then, add your basing material to the base, taking care to keep the holes clear.
To attach the magnets in the base, put them on the model's feet.
Then, stand the model on the base, with the magnets in the holes. Even with the thickness of the sand, the magnets will be at the proper depth to make contact with the model. This method also ensures you won't accidentally glue them with the magnetic poles the wrong way around.
Add some super glue from underneath.
Then fill the holes with some ballast (sand) to give the magnets more surface area to adhere to and prevent them from sliding down.
Once the glue holds on the sand and magnets, pop the model free.
And there you have it– perfectly positioned magnets for interchangeable bases.
'Til next time!
My plans for the Stormfiends are progressing nicely. This week I'll show you how I converted the warpstone-laced armor to make four models equipped with the melee options.
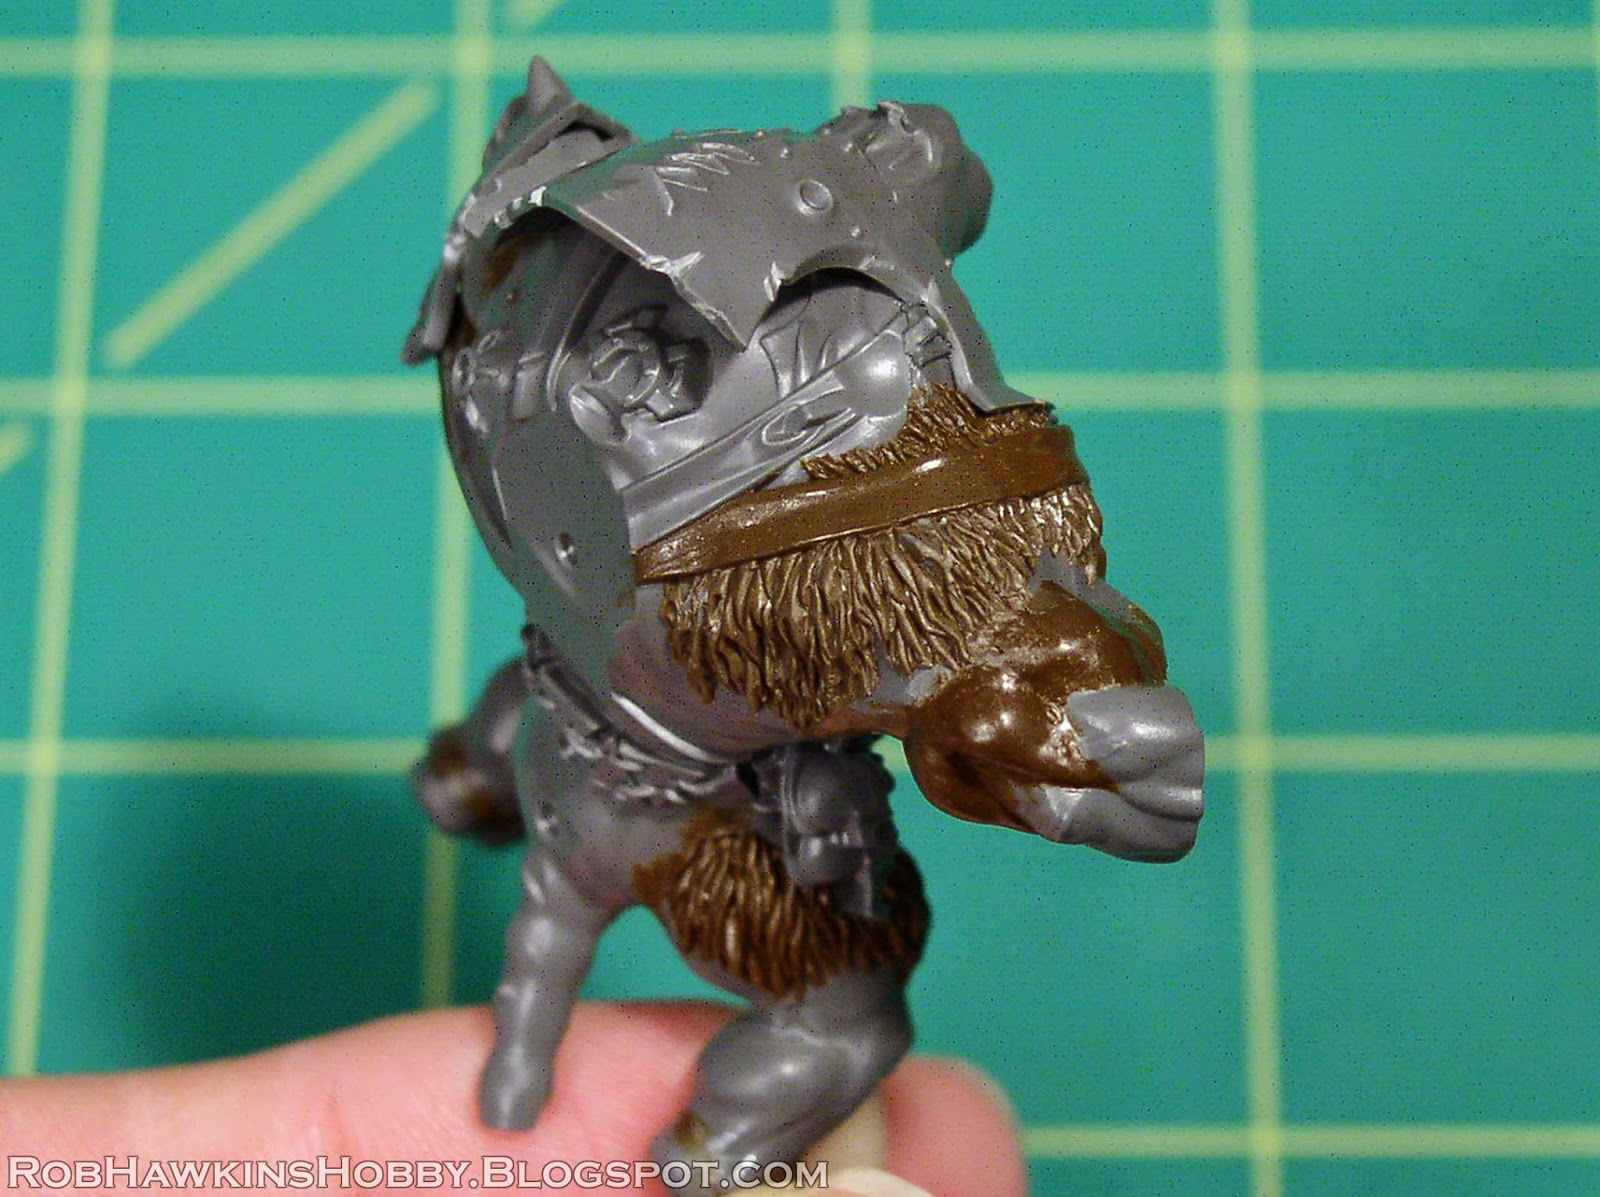
First off, I need to cover the patches torn skin and fur that the newest rat ogres all have. A little putty sculpted with fur texture takes care of that.
Last week, I discussed swapping the arms from the rattling-gun pose and the warpfire thrower pose. The bits of arm cut from the latter pose get pinned into the former. I also trim down the weapon mount in the chest so I can sculpt a breastplate over it.
The arms are built up in layers, sculpting muscles to fill out the missing anatomy and smooth over the joins.
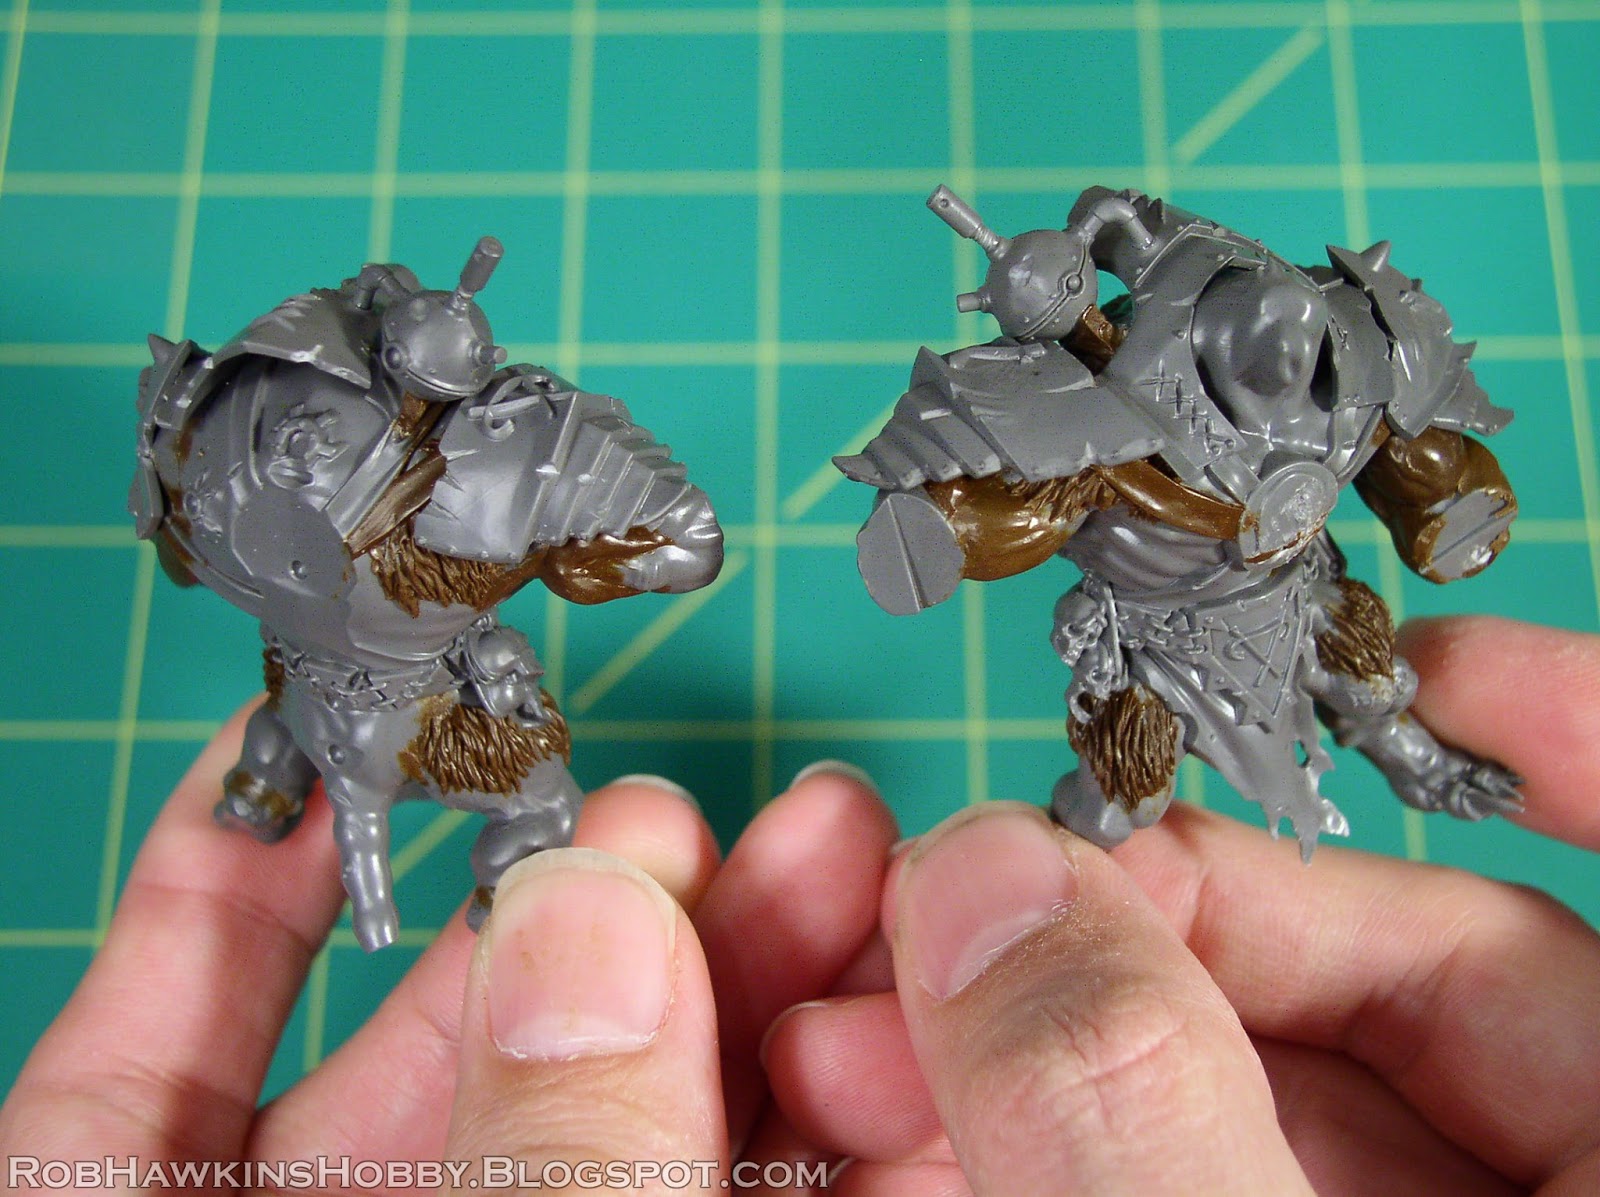
After the putty has cured, I glue the regular armor parts in place.
The large shoulder pad from the wind launcher pose will be added to the right shoulder, but first I sculpt a shoulder strap for it to attach to.
I'm a stickler for model accuracy and, because I want this Stormfiend to interchange between the melee option and the rattling gun option, the extra armor parts are magnetized so they can be removed. A 1/8-inch rare earth magnet is added to each piece. I also raise the fuel cell (that sphere on his shoulder) a little to accommodate the shoulder pad.
I sculpt a belt buckle to cover the magnet when the shoulder pad is left off.
Since the body cavity is hollow, I add a styrene tube to hold the magnet recessed in the chest. The breastplate is sculpted over top of the chest and then carefully pried loose (a thin coating of Chapstick helps keep the putty from bonding to the surface).
Two Stormfiend kits contain enough warpstone components to split amongst four models. I only put the warpstone on the armor, and save the blades for converting extra doom-flayer gauntlets. I think this is appropriate because whether the model has doom flayer gauntlets or shock gauntlets, his armor is still laced with warpstone.
The converted armor gets four pieces of warpstone on its removable armor plates.
The standard melee pose gets the rest of it.
Finally, I swap the heads and cut the loin cloths to vary the poses a bit. These two heads, while not designed to be interchangeable, are pretty easily swapped with minimal cutting and a little putty work to cover the back of the neck. (The third head really only fits on its own body.)
Here are the final armored models:
Now to convert extra doom-flayer gauntlets...
'Til next time!
I picked up some of the new Stormfiends this week. Here's a quick review of the kit, followed by my conversion plans for the unit.
The models are very nice. The box comes with three poses and each pose has two weapon options: shock gauntlets or doom flayer gauntlets; grinder fists or rattling cannons; warpfire projectors or windlaunchers. Each pose and its options are completely contained on a single sprue* so finding or trading specific poses should be easy.
*Edit: As I'm going through the models and assembling them, there are a handful of pieces that are scattered across all three sprues. Specifically, the little warpstone inserts for the armor, part #99 for the shock gauntlets, and the masonry the melee pose is standing on. So if you're trading, buying, or selling whole sprues, watch for that.

Right off the bat, I think the ideal options are the gauntlets (awesome in combat and come with warpstone-laced armor), the grinder fists (for tunneling a melee unit directly into combat), and rattling cannons. I'm sure the warpfire projectors and windlaunchers have their place, but for gearing up an all-shooting or all-melee unit, they seem to be lacking.
The ratling cannons have a better threat range and mobility and throw out an average of 10 shots per model, but will only hit with about half. The warpfire throwers move or fire but the flame template will hit automatically. The windlaunchers can hurt anything on a re-rollable 4+, but scatter like a stonethrower, so getting the template where you want it might be tricky. I think I'll need to play around with them a little to see which can consistently dish out damage.
After looking through the instructions, I think the weapons will be really easy to magnetize so you can swap out the different options with just the "stock" assembly. The gauntlets are a little more involved because there are different parts that attach to the armor– blades for the doom flayer gauntlets and warpstone chunks for the shock gauntlets. The parts have pegs, but they are too small to hold the part in place securely. I think a simple pin will do the trick, but that's a lot of little pieces to be fiddling with.
Planning the Conversions
For my Stormfiends, I'm trying to get as many melee gauntlets and Rattling cannons out of the two boxes as possible. This means converting the warp fire pose to accommodate a different weapon and improving the armor on some of the models so it resembles the heavier warpstone-laced armor.
I start out by assembling the bodies. The tails are kept separate so they won't get in the way while working in the conversion and sculpting.
There are a few seams that require putting, but I think the armor and accessories will cover most of them. I appreciate how the musculature is intact under the armor. If you wanted to convert these without the armor (for some strange reason), the resculpting would be minimal.
Next, I begin experimenting with the armor and weapons to see how I can rearrange the combinations.
It looks like the rattling gun torso will be the easiest to upgrade the armor. By adding the shoulder pad from the windlauncher pose, I can create a fully armored torso. I also plan to cover the weapon mount on the chest with a scratch-built breast plate. I don't care for the "gun in my chest" appearance, and those rattling cannons can go toward one of the other models.
Since the rattling cannon pose is going to become a warpstone-laced armored pose (with doom flayer gauntlets) that means the cannon arms need to come off. I'll trade it with the windlauncher pose. This is suddenly becoming more complicated than I had expected. (Just the way I like it!)
With a jeweler's saw, I cut off the rattling cannons and a portion of the arms on the other model.
The rattling cannons are then glued in place on the other torso. The joins will need some serious putty work to fill the gaps.
As my unit stands at the moment, the left models will remain mostly "stock" with the armor and gauntlet options. The center models will get the additional armor and scratch-built gauntlets. I need to figure out a way to exchange his gauntlets for rattling cannons. And the right models will be equipped with interchangeable rattling cannons and warp grinders. As I work on these, I'll see if there's a way to swap out the other ranged weapon options as well.
Coming up, I'll get the warpstone-laced armor in place and make sure the fur and joins are puttied where necessary.
'Til next time!
The first of my Space Hulk Terminators is finished. I'm converting and painting one of these per month and for January it's Brother Noctis:
I've shown the sculpted details before, but I'm including them here for completeness. All of the Blood Angels iconography was removed and replaced with suitable Black Templar crosses and skulls.
The feet were magnetized so I can swap the figure between a round base for use in 40K games, and square bases that fit on the Space Hulk game board (those will come later.) I'd gotten some questions about the magnets– There are two magnets in the feet and they protrude from the bottom of each foot due to the thickness. I marked the spots on the base and drilled holes that the magnets could sink into. The basing ballast was attached around the holes, and then the figure put in place. I pushed the base magnets up through the bottom to they would meet at the appropriate depth.
Here's Brother Noctis in all his painted glory!
I've put all the marines in a grab bag, and I'll randomly pull one out each month. Next up for February, Brother Claudio! The Black Templars banner will be used to swap the cross icon for the Blood Angels icon on his iron halo.
'Til next time!