Project Log: Skaven Warp-Skryre Tower, Part 9
I feel like I put more work into this telescope than I put into the giant warp-accumulator! Here's how it all went down:
Before getting into the telescope construction, I made one final adjustment to the celestial orrery– I raided my wife's sewing supplies and found some straight pins with round heads. I cut the pins down and inserted them into a few planets to add some moons.
One of the components left over from my Warscryer Citadel is the large telescope from the observatory dome. Since the dome had been turned into the warp accumulator, this left the telescope free to use as a stand-alone detail.
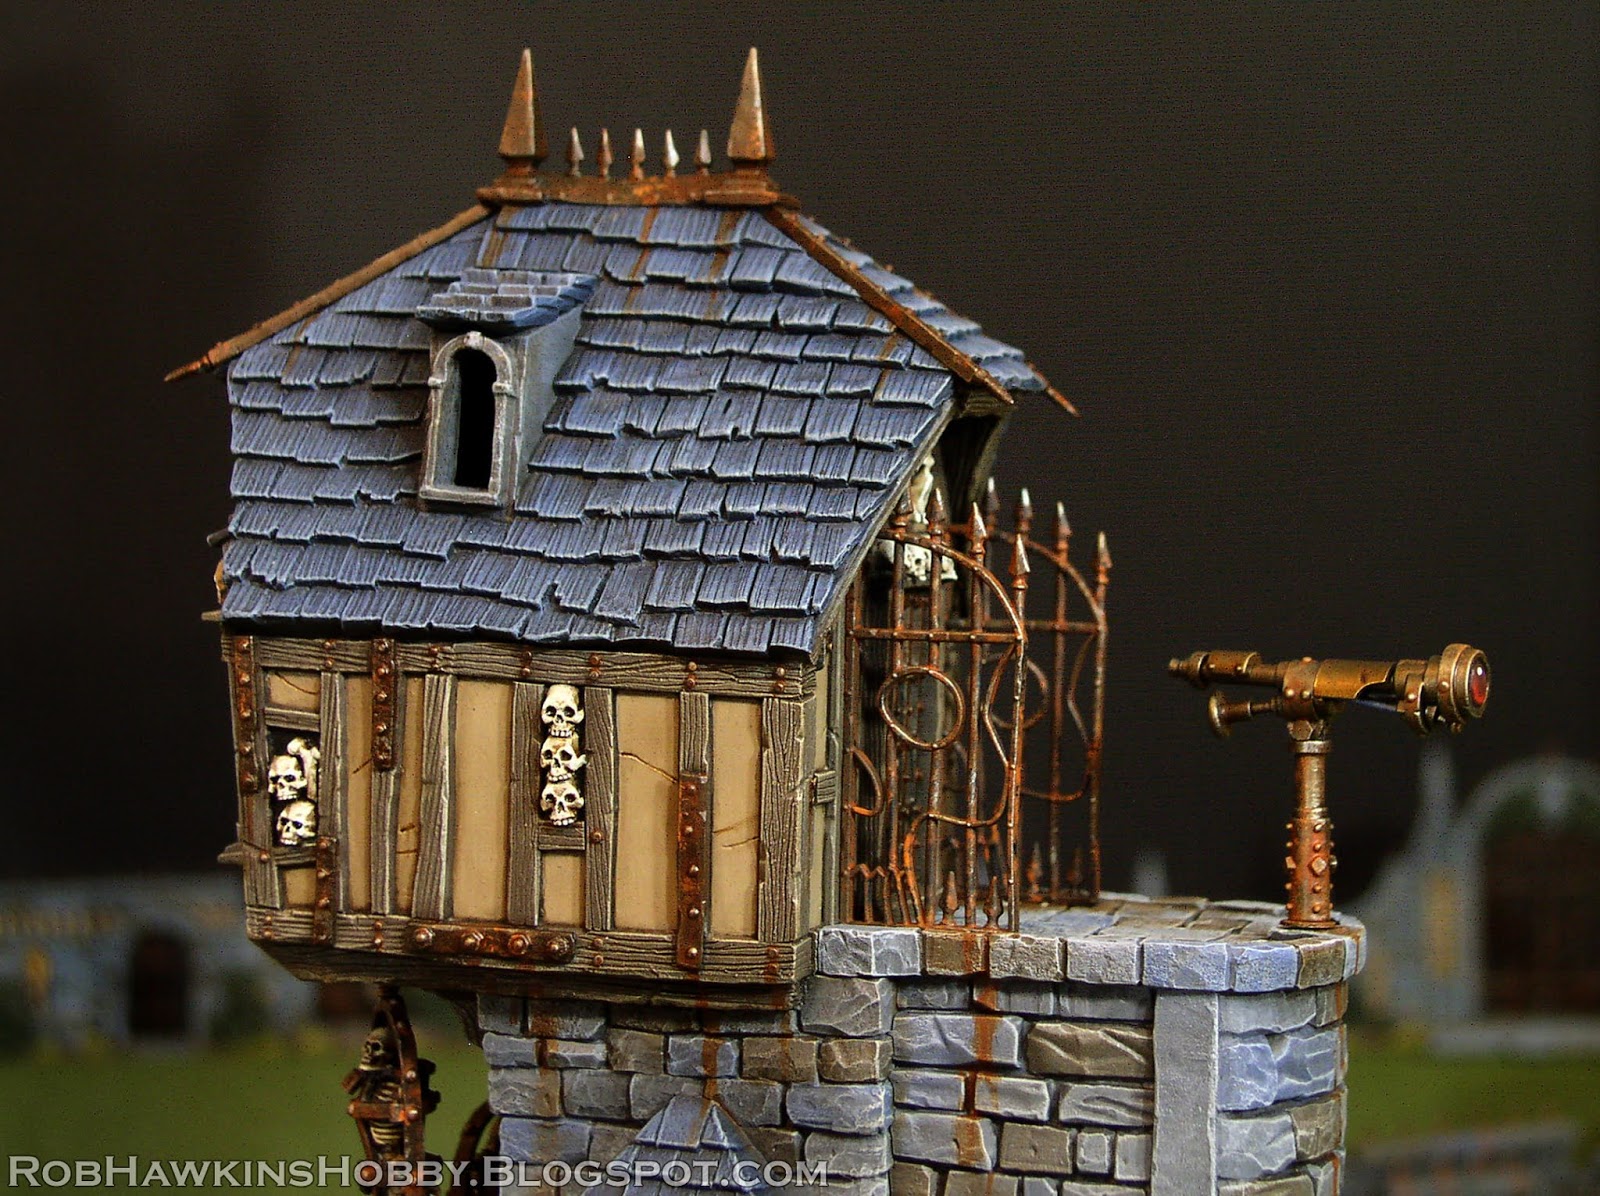
It needed a back half, however, and I settled on the telescope I had kitbashed together for my Watchtower. It was mostly made of Skaven bits, so it seemed appropriate. I always felt it looked oversized for the tower, and I intended to replace it with a "proper" telescope. The largest telescope from the Celestial Hurricanum will be a suitable replacement.
To build the mount for the telescope, I selected a batch of parts left over from my Chaos Defiler, along with some other Space marine vehicle bits.
The general idea was to have the telescope mounted on the Defiler arm, which would sit atop part of the chassis protruding from the main platform on the tower.
I cleaned up the halves of the Defiler arm and separated the gears. I removed the claw and trimmed the blades into straight "rails" that I could mount a stand on later.
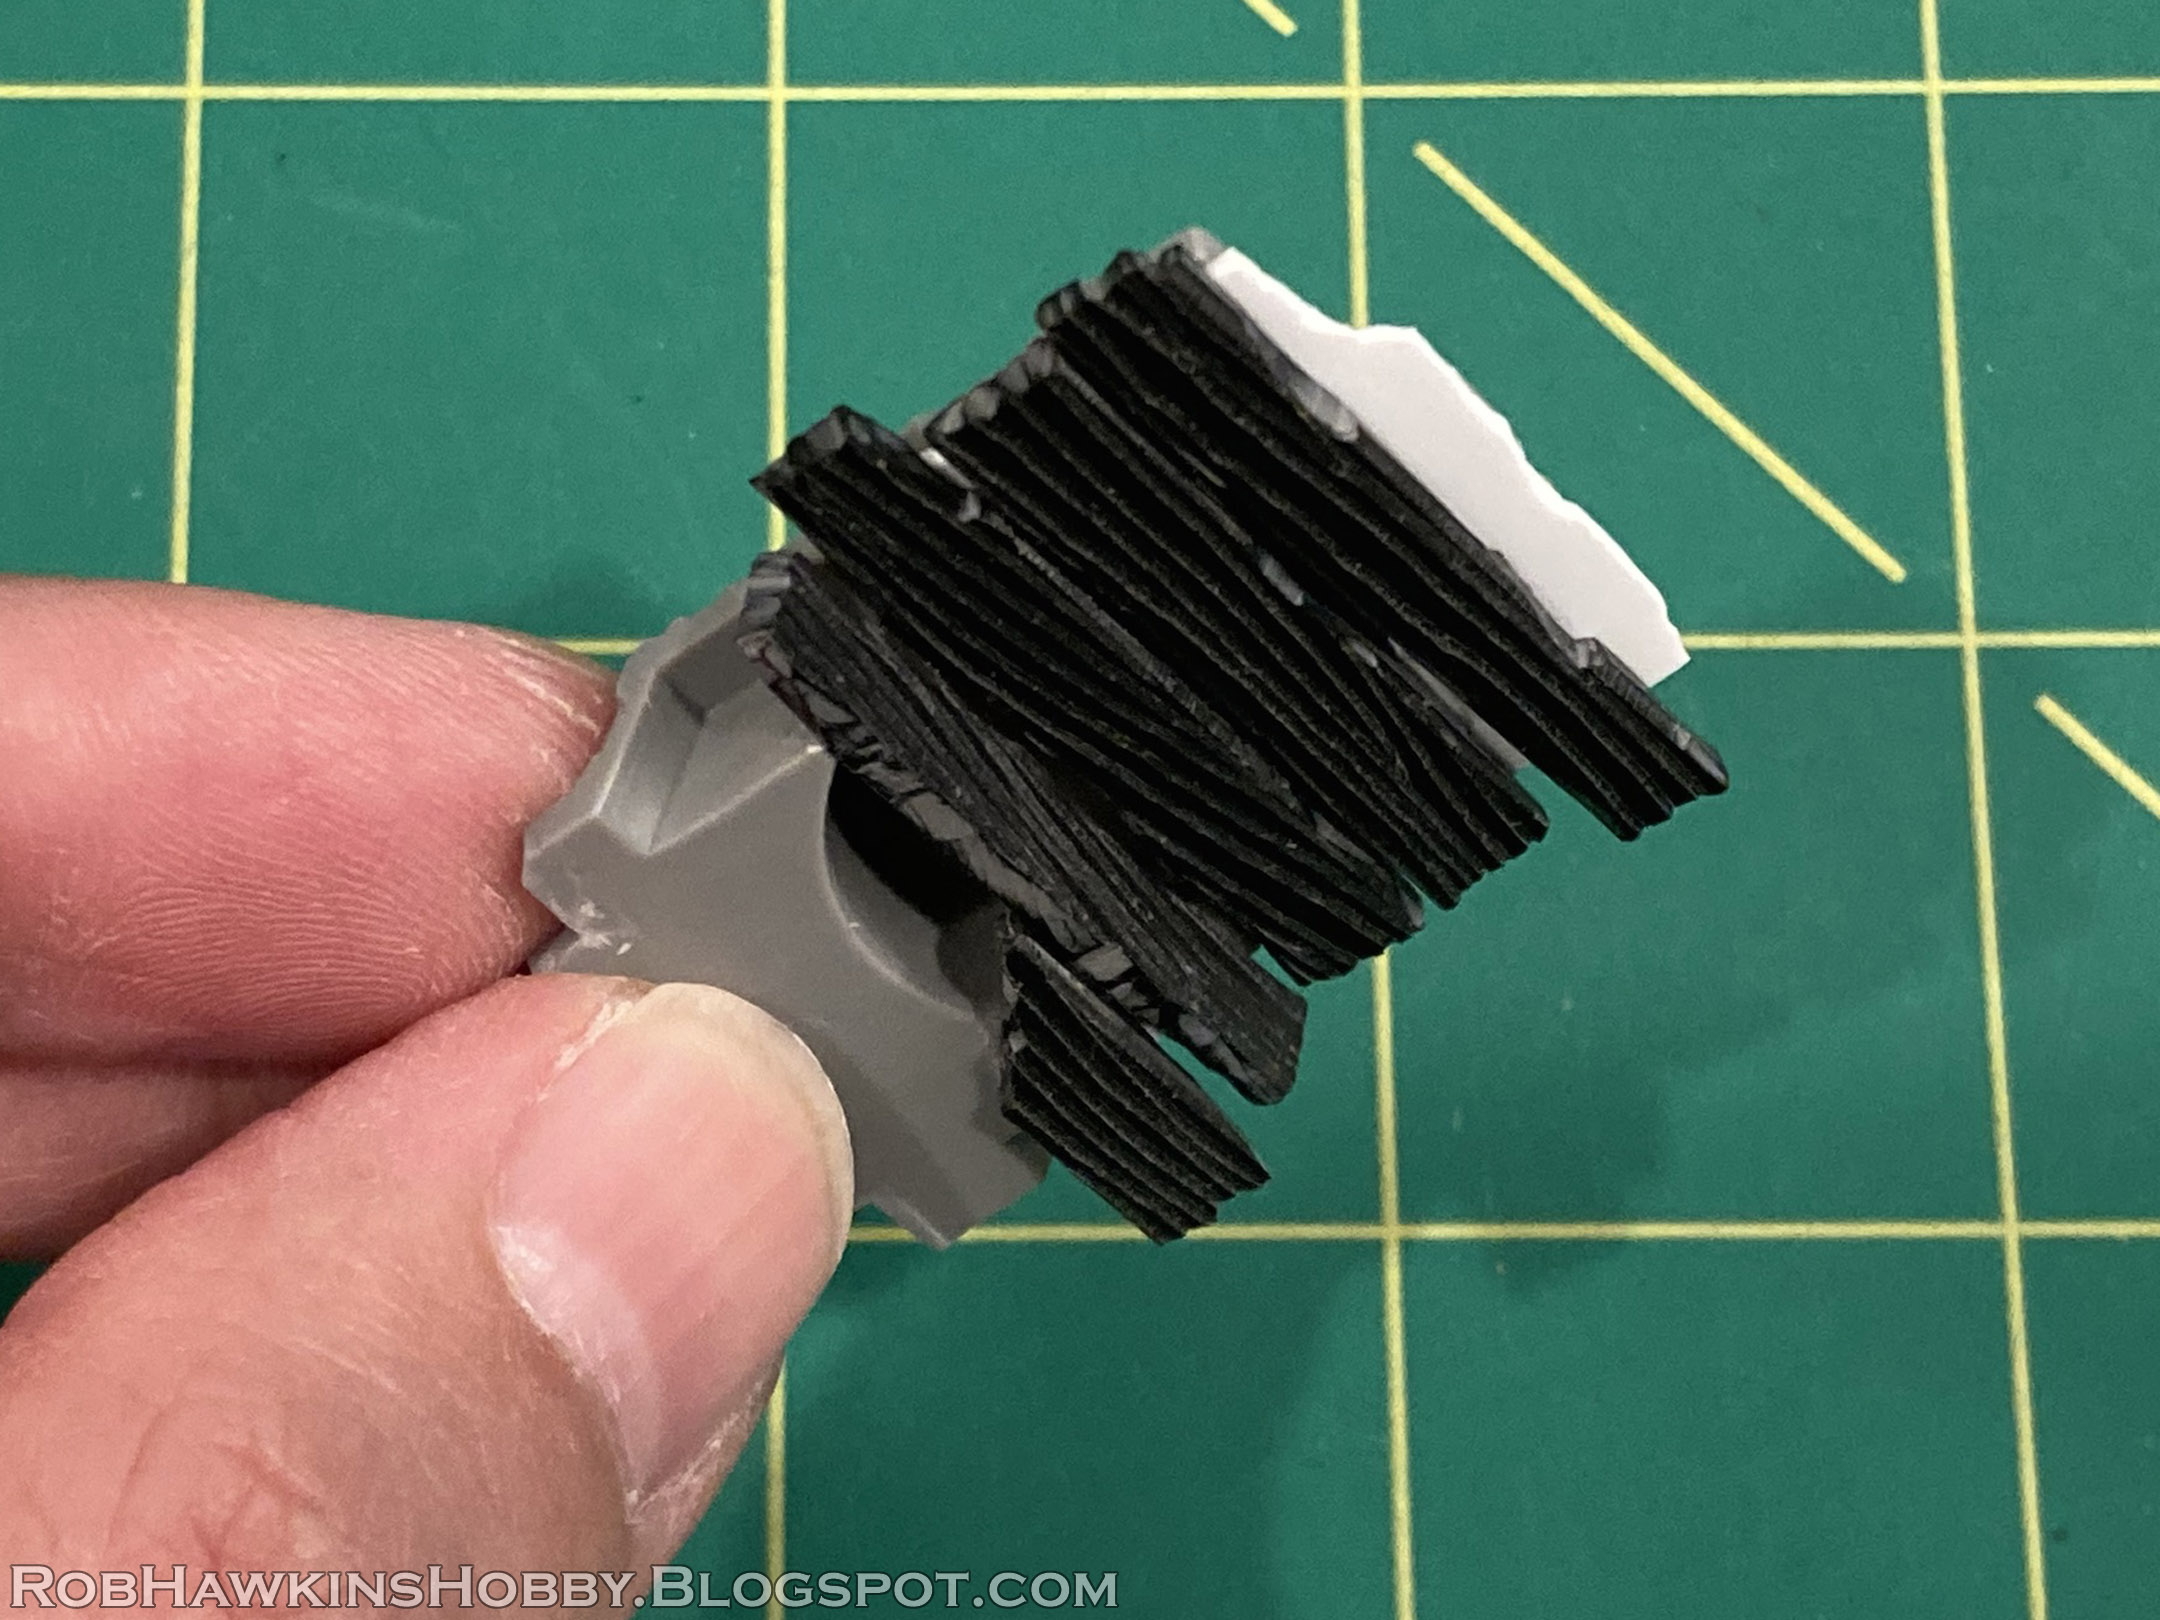
The waist panel from the Defiler was also cleaned up and distressed to make it look like a piece of battered Skaven machinery.
I wanted the telescope mount to appear as though it was on a set of gears that would allow it to rotate. Since the large "elbow" gear that I removed from the arm was incomplete, I couldn't use it as the base. Instead, I settled on one of the Chaos turret hatches. It already had notches around its perimeter, and I made more cuts between these to create some gear teeth.
I added a brass rod into the mount and drilled a hole through the gear to hold it in place.
The small gears I had trimmed form the arm were attached to a piece of styrene rod. I drilled holes in the mount, and adjusted the positioning of the small gears to get them aligned with the teeth of the larger gear below.
The principle was that the small gears could rotate in opposite directions and turn the mount about the larger central gear. (Not really; everything would be glued in place, but it needed to at least look like it worked.)
When I was satisfied with the position of everything, I added some thin super glue so its capilary action would run into the recesses and fix the parts in place.
But, as it often the danger with thin cyanoacrylate super glue, it caused the plastic to crack in a few places. (Not detrimental here, but I've had situations where I was gluing rings of styrene tube around a rod to make pipes, and the rings just cracked apart. So I try to use thin glue very sparingly.)
To reinforce the components, I packed the hollow underside with Aves Apoxie Sculpt putty.
While the putty was curing, I turned my attention to the pedestal and where it would attach to the platform.
After settling on a suitably precarious position, I added some styrene planks, scored with wood grain, underneath the pedestal.
I also drilled out the two pipes at the back of the pedestal so I could insert power cables at a later time.
For the support rail underneath, I initially built a wooden frame with a similar design to the wooden supports from the Screaming Bell.
In the end, the fit wasn't quite right, so I settled for metal supports. I used an I-beam and clipped away one side to create a "T."
To angle the beam, I cut out a notch and bent it to conform to the angle of the platform.
Another piece, cut with a matching angle was added at the top.
I added a second support beam, and applied some rivets cut from thin styrene rod.
The top was finished off with a few hex bolts.
By the time I was done with the platform, the putty had cured on the mount, so I began construction of the gear coverings. I cut a piece of styrene to make a flat plate on the side, and another rounded piece to be the cowl over the top of the gear.
I added a circle, made by using a hole puncher on thin styrene. The pins weren't necessary for structural support, but they helped keep everything centered. The armor plate was punched with rivets and etched with Skaven runes.
The top arch of the cover was made by gluing a strip of thin styrene around the curve of the gear cover.
I trimmed it to match the edge, and added another strip, punched with rivets.
Some nothes and distress marks, along with more hec bolts finished off the base of the mounting arm.
Next, it was time to work on the telescope itself.
I used a piece of styrene tube to cover the gap between the two halves of the telescope. I cut one side of the tube to get it to fit, and this gap made the perfect opening to fit the lascannon mount from the Land Raider.
I wanted the telescope mounted on the lascannon support, and my solution for attaching it to the main arm was to use the "ankle" joints from the Defiler. The arm was cut flat to accommodate the parts.
Once they were glued in place, I more styrene to build a cover for the top.
The cover was chipped, scored with Skaven runes, and shield icons were added to the sides. For the operator's stand, I cut up some thick styrene to make wooden planks.
These were glued on the rails, and a pair of angled supports were added to make a step at the back.
A model can stand on the platform, and I made sure to make it just wide enough to fit a 25mm square base.
Meanwhile, the telescope itself was shaping up nicely. I used some of the pistons and cables that I had cut away from the Defiler parts, and bits of a terminator homing beacon to add some tech to the telescope.
The final touch was applying some Skaven icons. These bits were cut from the Warp Lightning Cannon's barrel shroud.
I added a sort of "eyeball lens" to the front of the post protruding from the lascannon mount. This lense was made from part of a plastic Dreadnought leg and layers of styrene tube.
Some operator handles were made from the top of the light on the terminator homing beacon and an a bit from an Ork Dreadnought, both attached to brass rod.
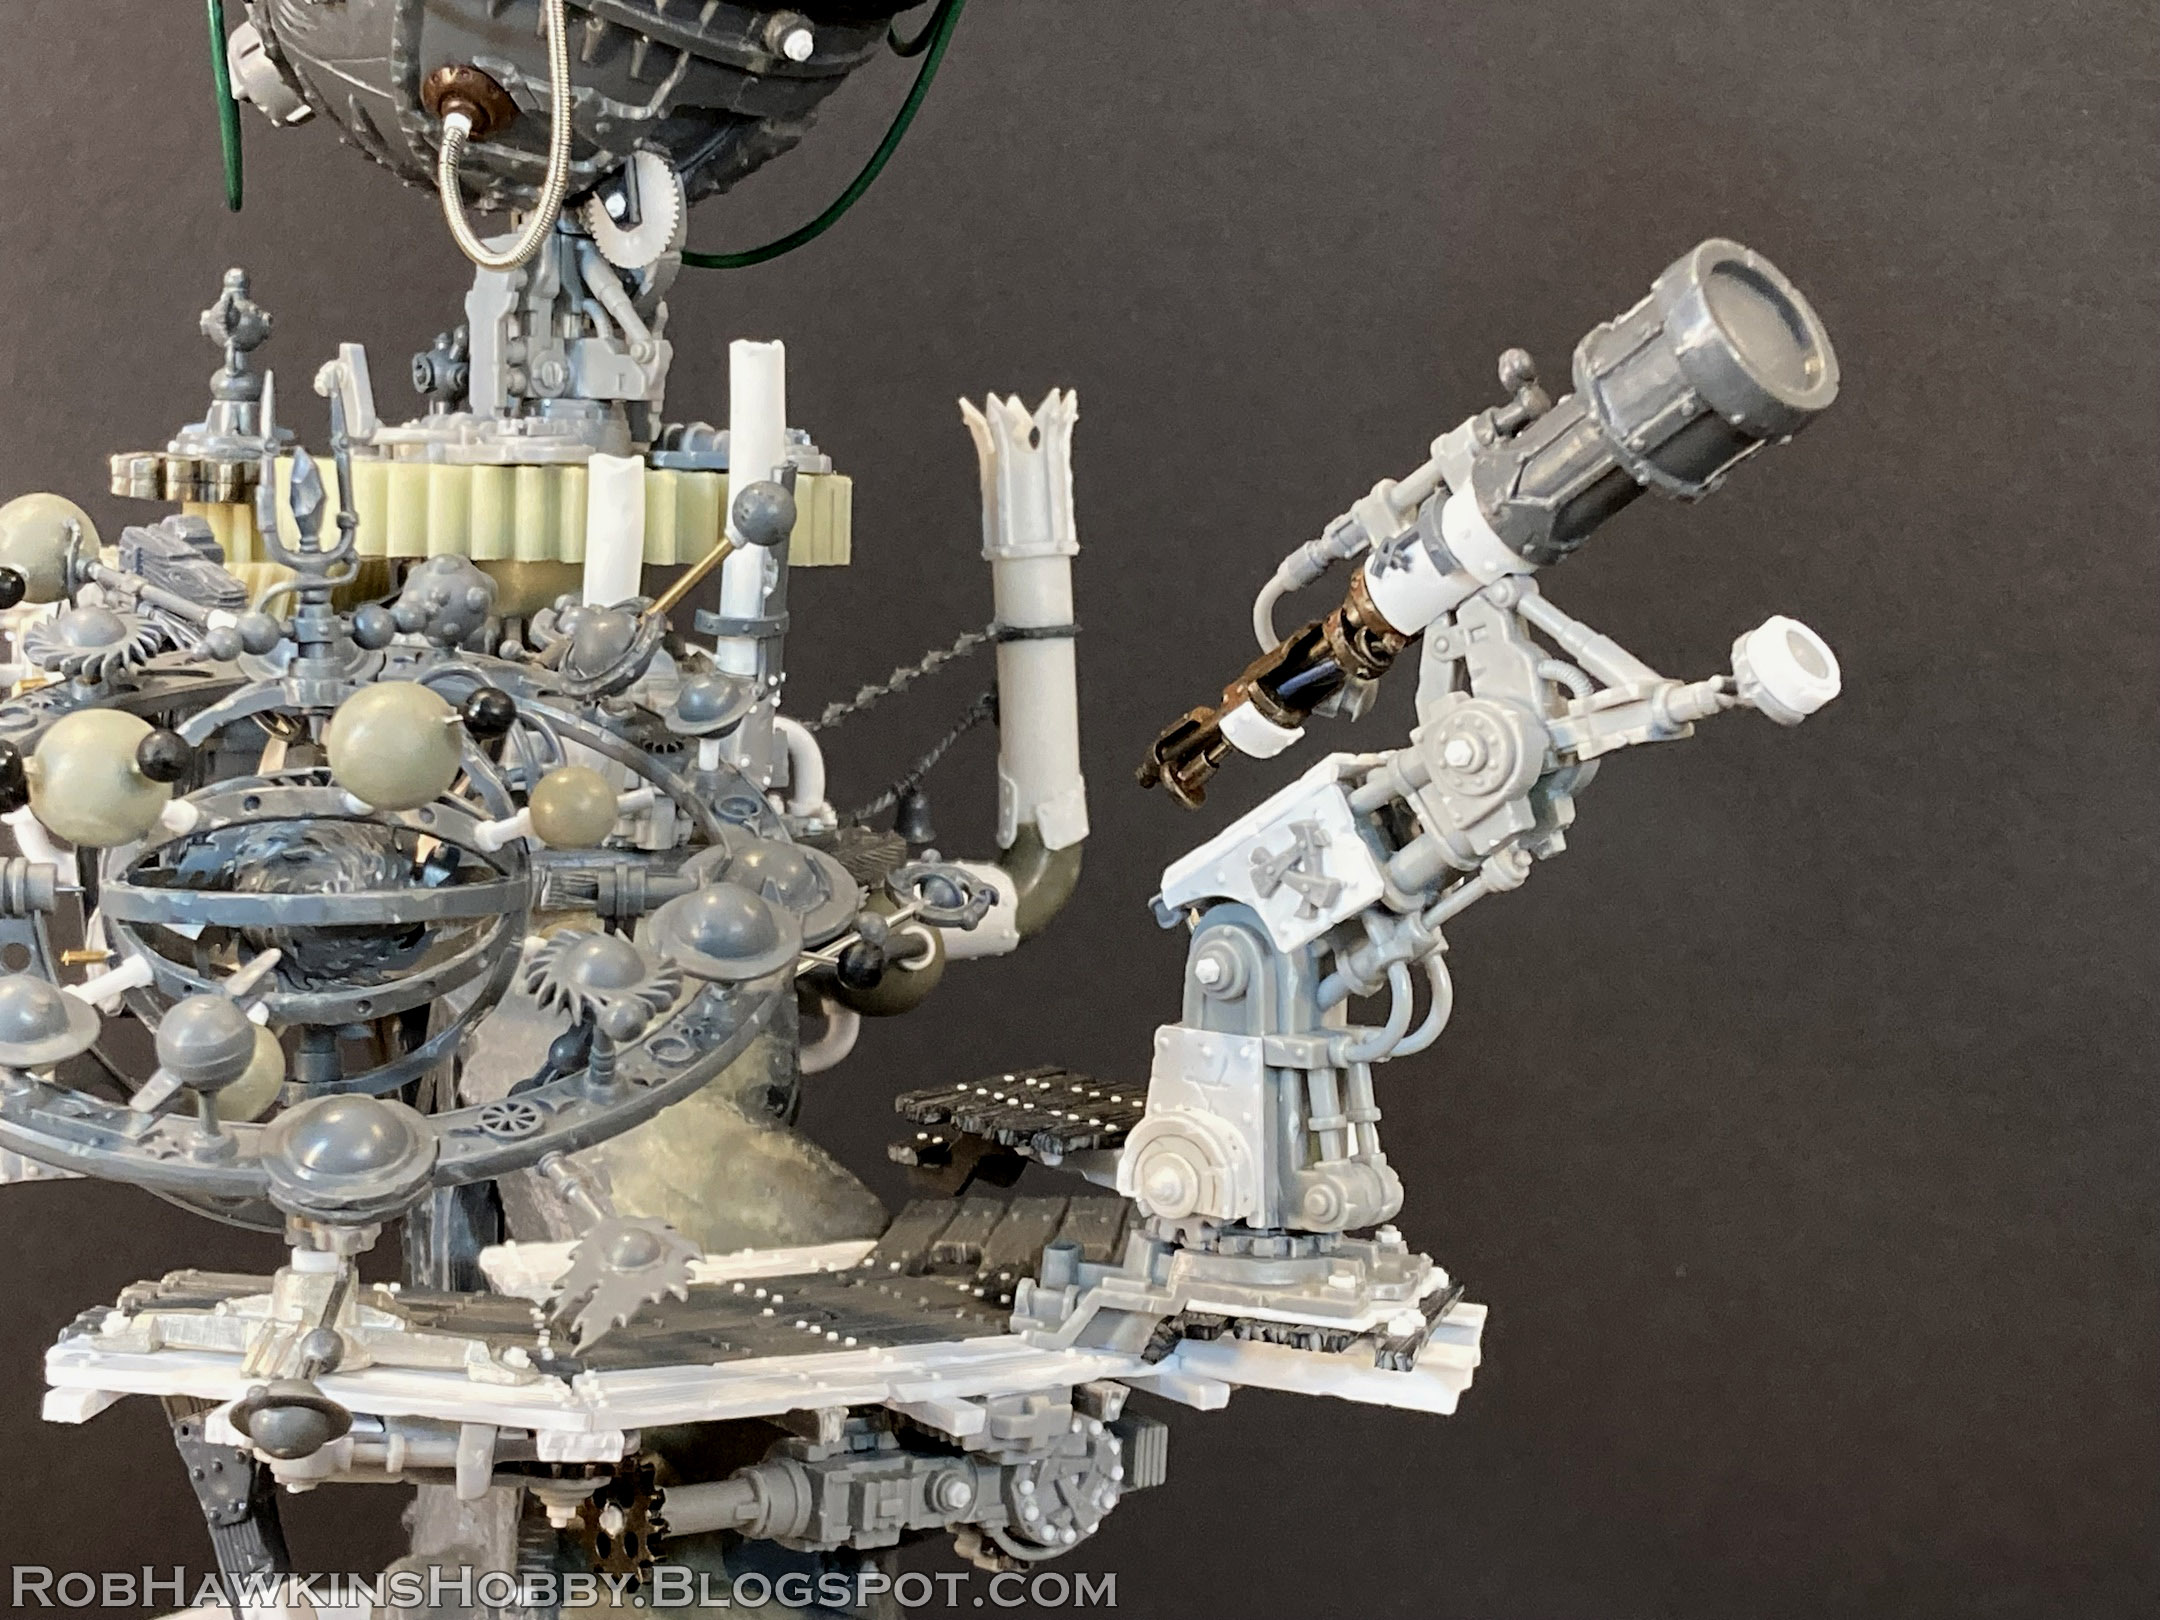
Here's the finished telescope, in position on the Warp-Skryre Tower:
The idea is that the telescope is used as a targeting sight for the warp-accumulator's beam. Aside from a few minor details, the top half of this monstrosity is just about finished.
'Til next time!


Man, this telescope and the orrery are incredible model in of tehm selves. Having them together on the Warp tower will be a sight to behold!
ReplyDeleteThank you!
DeleteGood job!
ReplyDeleteThx for this post!
Thanks!
DeleteTruly Epic. Well done.
ReplyDeleteThank you!
DeleteThis is amazing work and the sheer detail is incredible. Dare I ask how you're going to paint it?
ReplyDeleteThanks Toby! I've got all the major components separate, so I can tackle them individually. In the end, it's just metal, stone, and wood. I'll probably do a lot with sprays, washes, and drybrushing.
Delete