Modeling Tutorial: The Versatile Verminlord, Part 1
The Verminlord is one of the few Skaven models that I've never owned, so I decided to pick one up. I'm not sure which one I would want to field with any given army list, so I'm building it to be interchangeable with each of the five versions of the character. Here's a tutorial of how to do it:

This is one of the few model kits where the instructions really come in handy with staying on track during the building process.

Assemble the model's body, up to step 1k, but leave the tail separate so it doesn't get in the way while you are working with the arm attachments. I've also left the loincloth off because I'm not sure if I want to remove the hanging cloth (more on that in the future). I also built the piece of masonry for the model to stand on.

Magnetizing or pinning the arms requires a few extra steps, because the body cavity is hollow.

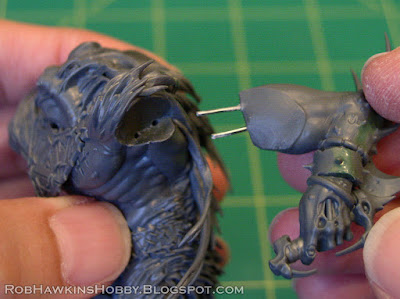
Use some modeling putty (I'm using Aves Apoxie® Sculpt) to fill in the gaps in the arms. Press enough of it into the cavity, and then fit the arms in place before the putty cures.


To fit the arms into the putty without them sticking, apply some Chapstick to the arm. Chapstick is great because it's not greasy, and evaporates over time, as opposed to Vasaline which needs to be washed off and is a mess to work with.

Press the arm into the joint, making sure it seats all the way into the socket. Some putty will squish out around the join, but that's fine.

After you remove the arm, slice away the squished-out putty with your sculpting tool.

Since there are multiple arms, check the fit of each to ensure that they all fit snugly.

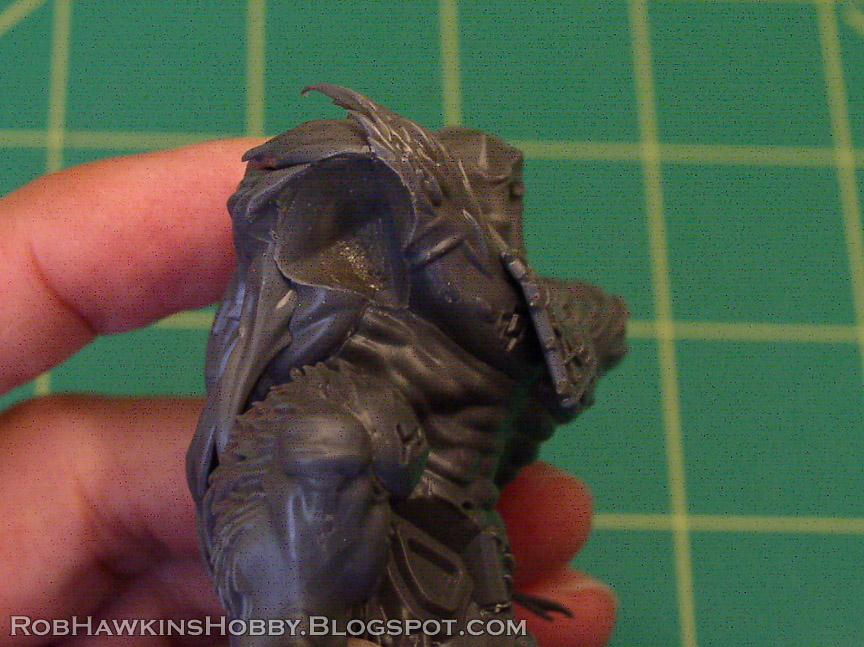
You'll be left with a perfect impression of the arm in the shoulder recess.

Repeat the process for the opposite arm, and then let the putty cure fully.


While the putty is curing, clean and finish assembling the parts for the arms, leaving the hands separate from the extended left arm.

For the magnets, I recommend 1/8-inch diameter, 3/32-inch thick rare earth magnets. (Product number D203, if you're ordering from K&J Magnetics). Use a matching 1/8-inch drill bit in a pin vise to drill out a hole in the center of the right shoulder.

Drill a hole in the same place on the arm (you just need to eyeball this). Angle the drill bit a little to widen the hole; it should be larger than the magnet so it has some wiggle room to account for any variation in the angle and placement in each arm.

Check the fit of the magnet to ensure that there's enough clearance for it in the hole.

Use super glue to attach the first magnet in the shoulder, being careful not to push it in too deep. You want the surface of the magnet to be nearly flush with the top of the hole, but still protrude about 1mm.

Once the glue has dried, place another magnet on the first, and check the fit of each arm overtop of the magnet. Each arm should be able to fit over the magnet, nesting fully in the shoulder recess. You shouldn't feel the magnet shift or get "pushed" around inside. Jiggle the arm a little to get a feel for where everything is sitting. If it can't go in all the way, or if the magnet feels like it is shifting, then deepen or widen the hole in the arm as necessary. You can even scrape a little plastic off of the recessed portion of the arm to get it to sit properly over the magnet without any obstruction.

Next, mix a little modeling putty and press it into the magnet hole in the arm. Don't put in too much; the magnet still needs to be able to fit in the hole with the putty squicsing around it to fill in the empty space.

Press the arm in place, making sure that it still fits properly. If you can't get it all the way in place, you may have used too much putty; just scrape some out and try again. To ensure the magnets stay aligned, the arm needs to remain in position until the putty fully cures. If necessary, you can add a TINY drop of super glue on the flat part of the arm, close to the edge to help stick it in place. Once the putty is cured, you can crack apart the glue and scrape off the glue spots.

The cured putty will hold the magnet in position, but there will still be little gaps around it in the hole. Add a little more putty to fill in around the magnet.

Use this process for all four of the right arms, so they all sit perfectly in the shoulder socket.

The arms shouldn't have any noticeable gaps, and they shouldn't wobble at all. If they do, you can add some putty to sculpt fur on the top of the arm...


You can also add a bit of putty on the bottom of the arm and press it back in place so it forms to the shape of the socket and fills any gaps. Just make sure you ad Chapstick to the shoulder socket when pressing the arm in place so that the new putty doesn't stick in the shoulder.

That's all of the right arms finished, now on to the left arms!

These were problematic because the narrow V-shape of the arm doesn't really leave any room for a magnet. So, my solution was to pin them instead. First, trim the sharp tip of both arms to create a flat area that you can drill into.

Drill two holes for pins in one of the arms. Use a .85mm drill bit and pin vise (or something comparable so you can use a paper clip for the pins). To line up the holes in the shoulder, add a little blue tac (I don't have blue tac, so I used the blue half of some modeling putty) into the recess. Wet the arm to prevent it from sticking, and press the arm into place. The holes will make little bumps on the blue tac, showing you where the holes need to be drilled, for a perfect alignment.

Drill the holes in the shoulder and then put some blue tac on the second arm. Press the arm into the shoulder to get the impression of the holes on the arm and then drill them out. This ensures that both arms will be aligned with the same set of holes in shoulder.

Glue the pins into each arm, and check the fit. Each arm should sit snugly with no gaps.

Getting this far took me longer than anticipated and I hadn't even begun working out how I was going to re-position the doom glaive. My intention is to have each variant of the Verminlord standing on the masonry, with the glaive held vertically or behind him, which means cutting off the hand and repairing parts of the weapon.

So, I'm going to break this tutorial in half. In part two, I'll tackle the positioning of the doom glaive and figure out how I'm going to make sense of all those different combinations of heads and horns. Oh my god, what have I gotten myself into...?

'Til next time!


No comments:
Post a Comment
All comments are moderated. Any comments containing links will not be approved and will be marked as spam.