Project Log: Wild West Exodus Harbor, Part 6
This project log showcases a Wild West Exodus themed harbor that I am building for Warcradle Studios– The board is a harbor featuring a large ship pulled into its berth. This week, I'll show you how I began tackling the construction of the massive vessel...

The ship's underlying construction is made of four layers of 2-inch thick insulation foam, two for the bottom deck and hull, and two for the top deck. That's a 35mm Wild West Exodus model on board, to give you a sense of scale. The total length of the ship is over three feet long!

I cut a few pieces of foam coar board for some of the layers on the hull, and more insulation foam for the paddle wheels.

With the basic shapes blocked out, I started making the details for the top deck, which consist of the bridge, engine, and smoke stacks. I took a trip to the hardware store to pick up some various pieces of PVC piping for the larger cylindrical components and curved pipes and stacks.

I built the bridge's walls out of foam core board, with a large pipe forming a turret on the top. Layers of styrene card were used to cap the top.

Next, I added detail with various plastic strips, sheets, rods and tubes.

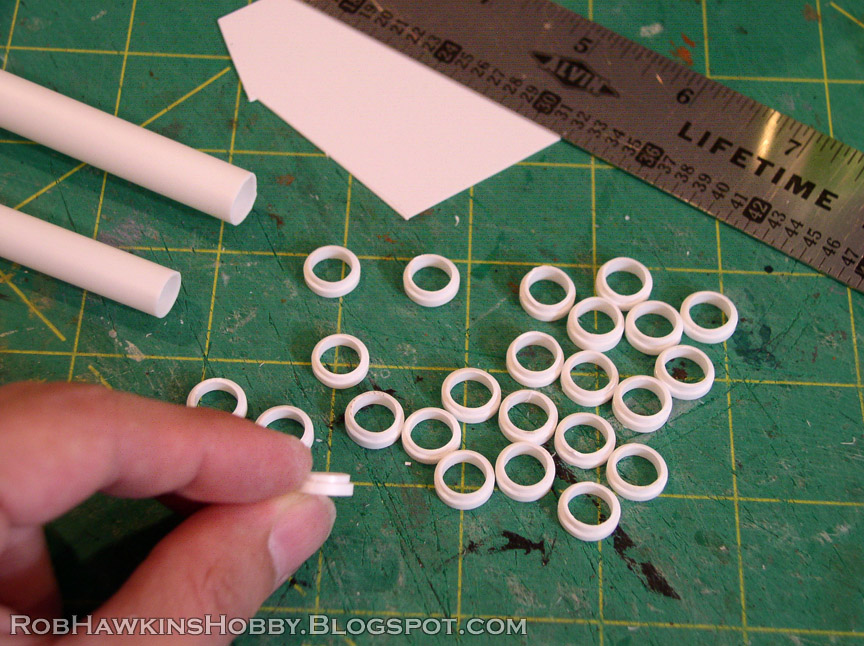
I made some portholes by cutting two sizes of styrene tube, using the larger tube to form a ring around the outside of the center tube.

These doors were cut from thicker card, with riveted strips glued along the sides and a porthole in the center. The handles were made from styrene U-strips, cut into pieces and fit around a block.

I added a door frame with some thick square rod. The ladders were made using thicker styrene strips; two long vertical strips, and a bunch of smaller strips for the steps.


The smokestack was made from PVC pipe, and a toy flute disguised with some decorative card.

For the large engine stacks, I used 90-degree corner pieces of PVC. The openings were elongated by trimming the tube and gluing half of the off-cut below the opening. The shape was smoothed out with putty, and a rivet-punched strip of styrene was added around the lip. The vents are sheets basswood siding.

The last bit was to add some half-round rod to cover the seams and vent plate.

To make the oval vents, I drew them out on a piece of plastic card. I measured and marked the ends and drilled those points with a pin vise and a 1/8-inch bit.

After the holes vre drilled, I carefully cut out a strip between each hole. (I use a steel ruler to cut straight lines; this shot is without the ruler so you can see the cuts.)

Finally, I pop out the center strips and tidy up the edges with my knife and a file.

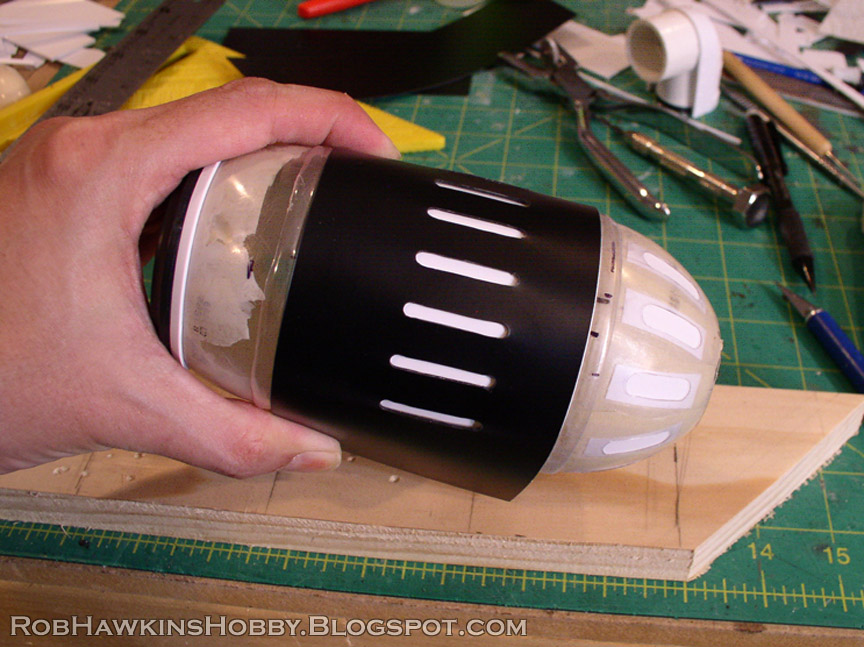
Then the sheet with the vents can be added to a flat surface or, in this case, wrapped around the cylindrical shape of the engine. The engine pod was made of plastic bottles that had the shape I was looking for.

The bottle was covered with all manner of strip and rod, with a large base on the back end and smaller PVC elbows for the pipes on the bottom.

Here are all of the components arranged on the top deck of the ship:

'Til next time!


Given we're now spoilt for choice with the amount of pre-made kits available to the wargamer, it's brilliant to still see such amazing and unique scratchbuilds being done, I'm inspired to try to use all the odds and ends I build up!
ReplyDeleteTop, TOP stuff!
ReplyDeleteThanks guys!
ReplyDeleteAmazing work. I love seeing stuff like this come together from piles of foam and plasticard. Honestly, in some regards, I think you have my dream job.
ReplyDeleteFantastic stuff! The scratch built boat is great. Can't wait to see the rest of the board completed, sure it will be as awesome as always.
ReplyDeleteBrilliant!
ReplyDeleteWow!!
ReplyDeleteThat looks amazing already!
ReplyDelete