Here's a look at how I sculpted the new relics for the Black Coach:
Skull Staff
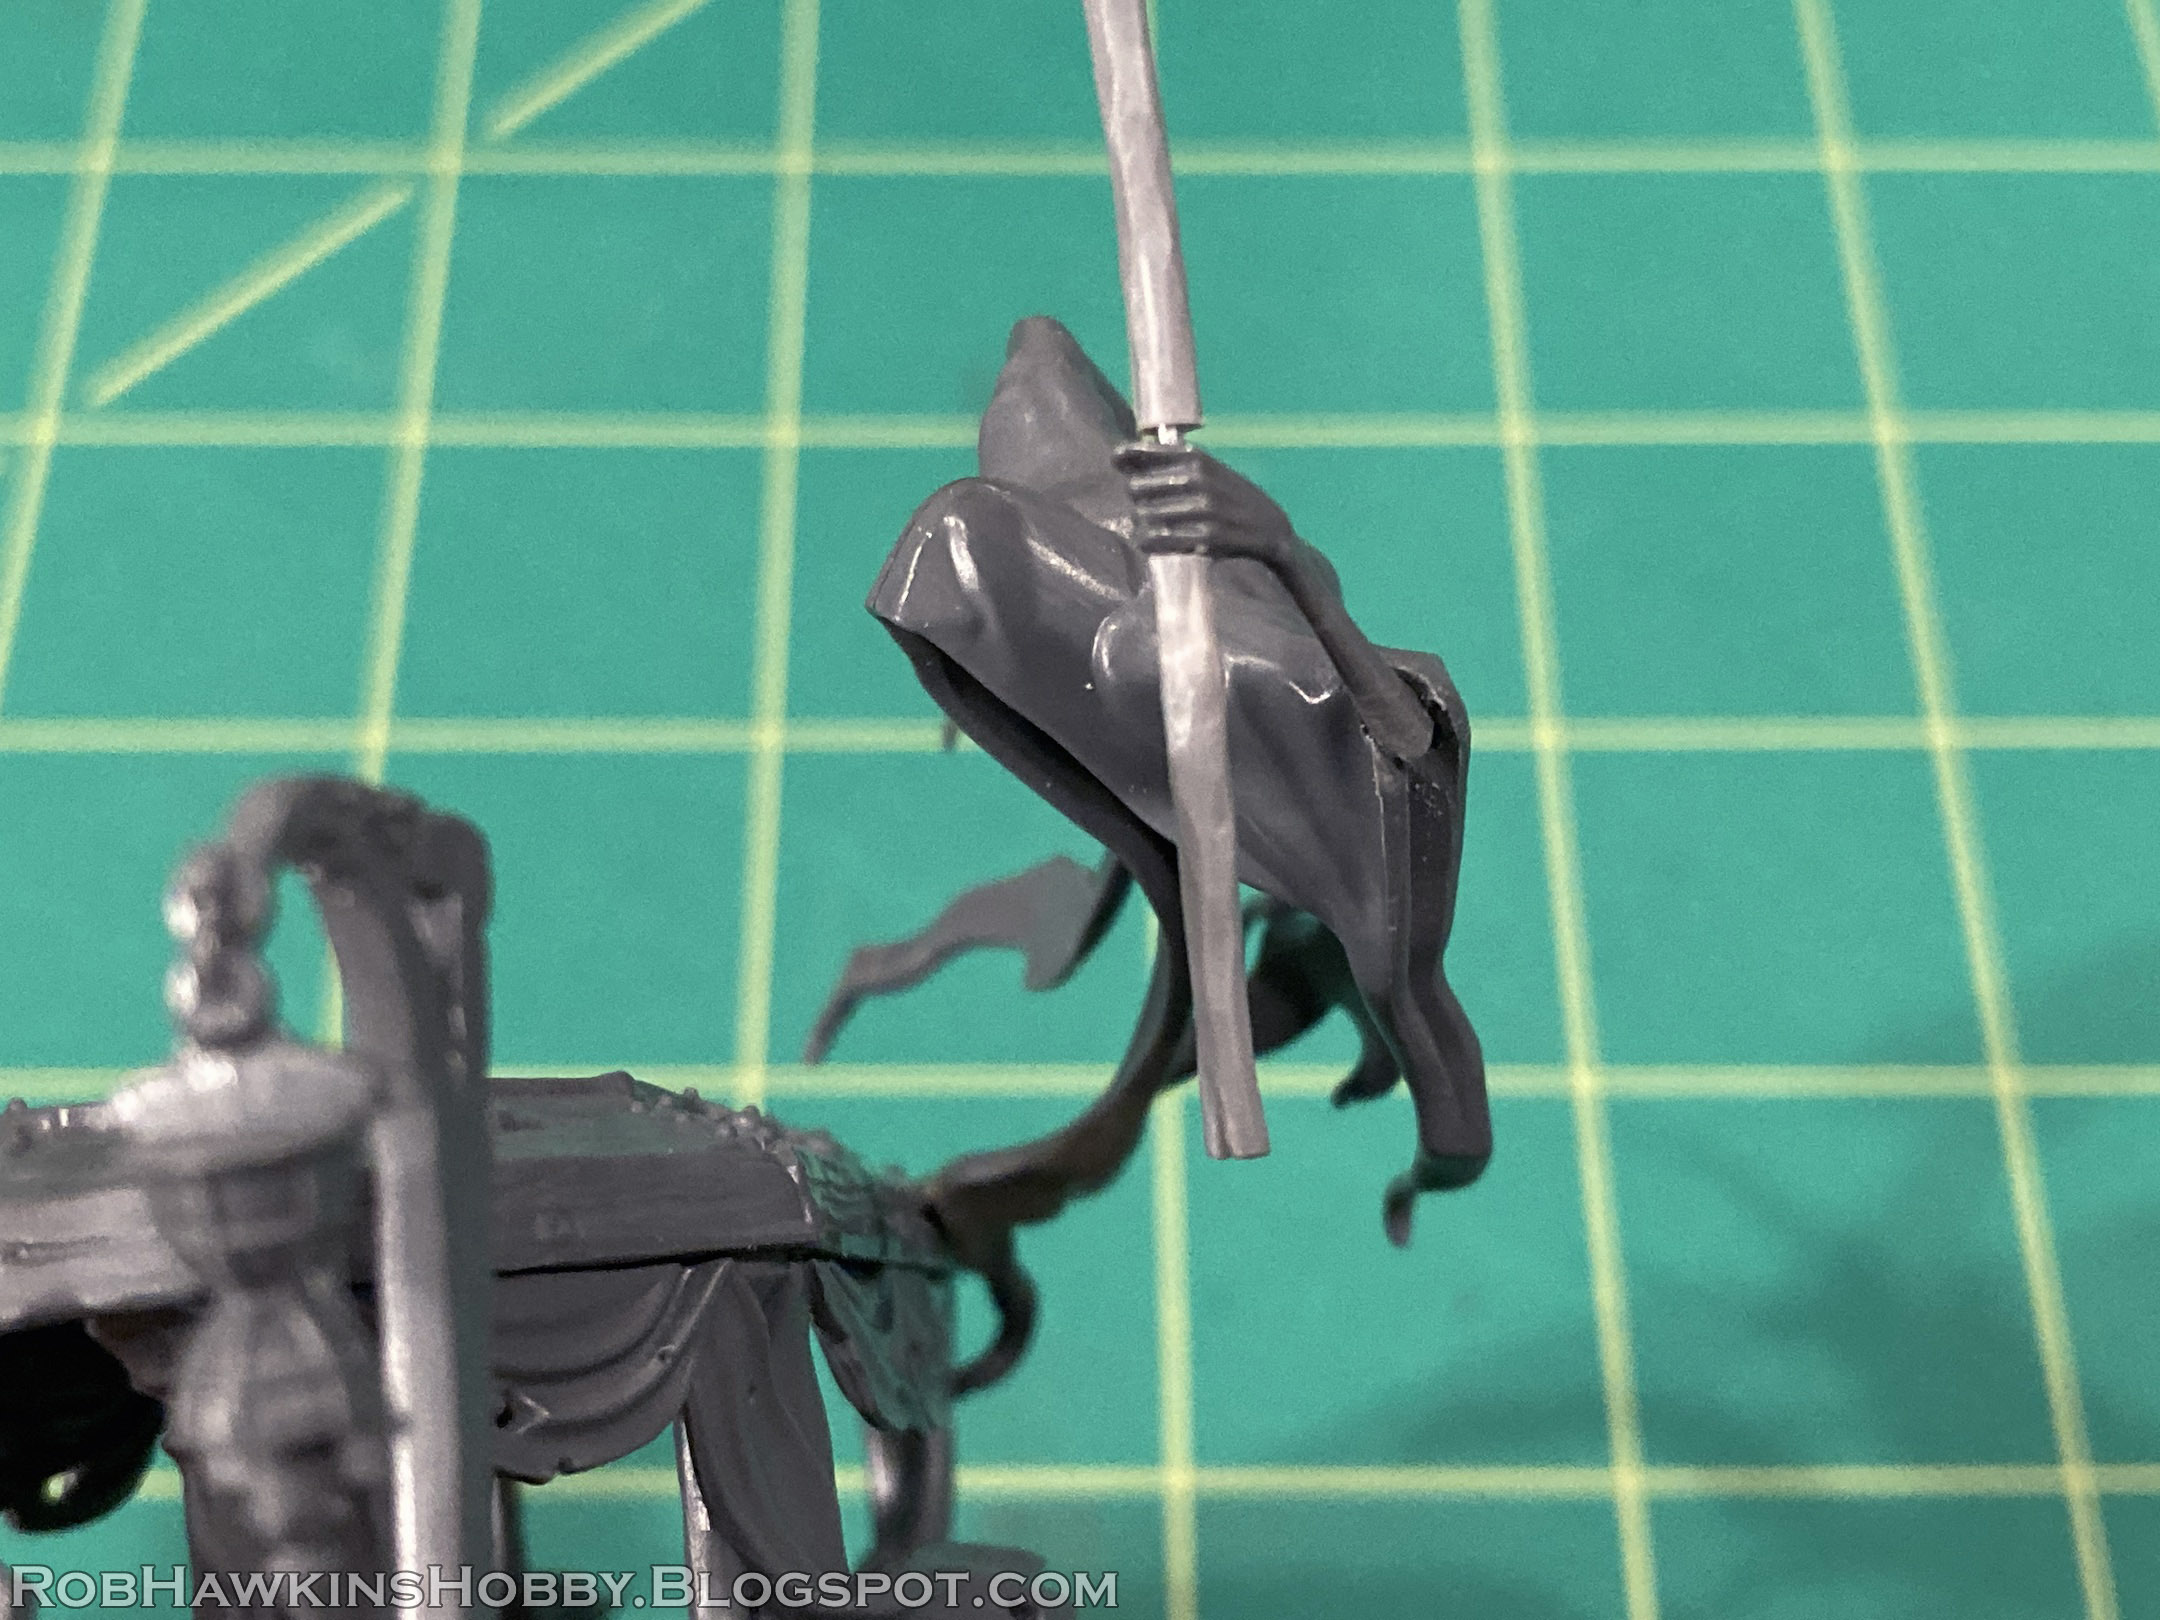
This was the easiest of the three, since it's mostly existing parts. The other two had to be sculpted from scratch. I needed a hand for the relic bearer that could hold a staff, and the Spirit Torment's arm was the best fit. I trimmed away the arm all the way up to the elbow, and shaved away the sleeve.
For the staff, I used a classic Skeleton Warrior spear. I originally planned to keep the crosspiece on the spear, but upon looking at my original model for Nieman Kimmel, I realized that I had replaced them with segments from some Chaos tank spikes. I drilled out the spear shaft so I could fit it over a paperclip pin placed through the hand.
The staff was topped with a classic Skeleton Warrior skull.
To fit the arm in place, I carved out a slot for it and glued the arm at the elbow. (I'll clean up the sleeve and arm later on.)
For the fire, I started with a bit of the ethereal smoke from the mounted Knight of Shrouds and glued this to the back of the skull.
I finished it all off by sculpting more flames to balance it out and connect it to the skull.
Cursed Book
I had a lot of experience sculpting open book pages when I converted Nagash, so building a new cursed book wouldn't exactly be my first rodeo. I began by drawing out the book cover on a piece of 1mm styrene card.
I sculpted the flaming skull icon on the front cover, and then cut out the book.
I made some shallow cuts so I could fold the spine a little, and then sculpted the rounded spine detail.
For the pages, I added a fair amount of putty and shaped it into a "block" of pages, then I used a sharp sculpting tool to press the pages into the outer edges. I was sure to leave an extra wide gap in the center to accommodate some sheet styrene top pages.
I added the corner protectors. These started as a lump of putty and, once it had cured, I sanded the edges square and trimmed the excess to create the "L" shape.
The top pages were made by cutting sheets of 0.15mm styrene card and rolling them a bit to create a curve that followed the contour of the book pages. I glued them in place, and back-filled underneath with a little putty.
Mitre Hat
Nieman Kimmel is converted from a classic Necromunda Arch Zealot, which wears a very distinct hat that's become the signature of my necromancer, and indeed, my entire army. To replicate the mitre hat, I started with a small "core piece" of Brown Stuff modeling putty, roughly shaped into the shape of the hat. Once that had fully hardened, I attached it to a brass rod, and sculpted over top with Aves Apoxie Sculpt.
Once the Aves had cured, I sanded the surface smooth and carved the edges to trim it into the appropriate size and shape. Then, I added a thin frame of brown putty around the perimeter.
I used Green Stuff putty to sculpt the flames; I chose green over brown so that I would be able to more easily differentiate between all the different shapes as I moved forward with the sculpt.
From there, I removed the hat from its stand, and replaced it with a vampire head from the Zombie Dragon kit to serve as a "mannequin head" for the hat fitting. I carved out an opening in the bottom of the hat that would fit over the head.
I used brown putty to build the rim of the hat. I didn't concern myself with the interior; I just made sure the outer edge was nicely shaped, and let it cure.
Then, I trimmed and sanded the bottom, and carved out the inside to make a band that fit over the mannequin head.
Believe it or not, the cloth top was one of the trickiest parts to sculpt because needed to keep it from being too tall, and have enough room underneath so I could fit it over the head without deforming it. I think it came out okay, and matches the style of the Arch Zealot's Mitre.
The final touch was to add the skull and some rivets around the bands. Normally, I'd use plastic rod, but I didn't have any thin enough, so I drilled small holes and sculpted the rivets with putty. The holes allow the sculpted rivets to hold more securely than if I sculpted them on a smooth surface.
With the relics sculpted, now I just need to get them in the hands of the relic bearers...
That miter is amazing! I think a lot of people would have bought a second arch zealot and broken out the saw, but this is much better, and really shows off your sculpting skill.
Thanks! I honestly think it would have been MORE work to track down an old metal Arch Zealot and saw his head apart. :D I had considered the newer plastic ones, but their hats just don't match.


That miter is amazing! I think a lot of people would have bought a second arch zealot and broken out the saw, but this is much better, and really shows off your sculpting skill.
ReplyDeleteThanks! I honestly think it would have been MORE work to track down an old metal Arch Zealot and saw his head apart. :D I had considered the newer plastic ones, but their hats just don't match.
DeleteWhat a masterclass :O Thank you!
ReplyDeleteI appreciate it! :)
Delete