Solo Campaign Battle Report: Lair of the Boneripper
I'm taking a break from working on scenery to try out the Troggoth Slayers solo Warhammer campaign that GW published on the Warhammer Community website– with a few modifications, of course...
You can download the rules for the campaign on the Warhammer Community page here:
The scenario revolves around a hunting party trying to slay a bunch of Troggoths. Since I don't have any Troggoth models, I decided to change them to Skaven monsters and modify the campaign as follows:
Replace the available Troggoth units in each scenario with the following–
1 Hell Pit Abomination
4 Rat Ogors (2 equipped with Warpfire Guns)
3 Stormfiends (Randomly roll the weapon option for each model, ignoring the normal unit limitations)
In the final scenario, replace the Troggoth King with The Boneripper, minus Thanquol. (Equip him with 2 Warpfire Projectors and 2 Warpfire Braziers. Ignore the abilities Staff of the Horned Rat, Warpstone Addiction, Magic, and the Command Ability, but keep the Warp Amulet ability to use whenever "Regeneration" occurs for this model in the action phase.
All of the action tables and results remain as published, but wherever the rules refer to the Troggoths using their Throwin' Boulders or Noxious Vomit attacks, swap those for the relevant shooting attacks of the Skaven unit instead, including the Boneripper's warpfire projectors. Normally, the Troggoths have regeneration, but the fact that the Rat Ogor and Stormfiend units collectively have more wounds than the Troggoths makes up for their lack of regeneration. The Hell Pit Abomination can regenerate (and come back to life!) and the Boneripper has more wounds and its own limited regeneration ability from its warp amulet.
The Story
The Skaven have set up a lair on the outskirts of the Land of the Dead. The catacombs below the cemeteries have been crawling with the foul rat-men, and the sinister agents of Clan Moulder have been performing their grisly experiments, creating one warpsone-fueled monstrosity after another. But their lack of care has resulted in catastrophe! The creatures have slaughtered their masters, and now run amok. The vampire lord Seth von Koss has dispatched his agents to hunt down the beasts and eliminate them once and for all. What horrors await them in the lair of the Boneripper?
My hunting party consists of Tomb King Selketta for the general, a "horde unit" of 20 Skeleton Archers, and a "regular unit" of 10 Horse Archers. The army's allegiance is Tomb Kings, so I'll get to use the Death Grand Alliance tables to select an artefact and command trait (if Selketta lives that long). I'll be playing this on "hard mode" which means using three Skaven units in the battles (one of each selection).
It will be a nice change of pace to use the Tomb Kings units. These particular skeleton horsemen are some of my oldest Warhammer models, and haven't seen the battlefield in ages. I chose them because they can run and charge, so they should be able to get anywhere on the battlefield in the first turn. They can also restore D3 models to their unit in the hero phase, and that will come in handy because I won't be able to use any allegiance abilities, which means no Deathless Minions roll to keep my troops from dying!
Battle 1: The Treasure of Strangleweed Swamp (aka: The Treasure of the Soggy Cemetery)
In the center of the battlefield is an open grave containing an ancient relic that will help Selketta in the fight to come. I'm using the same rules for the Troggoth campaign, but assuming that the graveyard is flooded, and that the Murky Swampland rule represents the restless dead grasping at my hunting party through the soggy earth if the models are not on the center hill or the mausoleum bases.
My warband is deployed with the archers poised to get onto the mausoleum and Selketta close behind. The Skaven are only 15" away, so this is going to get ugly real fast.
Round 1
The roll to see which side gets the first turn goes to the Skaven. I make rolls on the action table for all of the Skaven units– They stormfiends and hell pit abomination hold, and the rat ogors advance and shoot at the skeleton horsemen, inflicting a single wound. In my turn, The tomb king spends his command point to use his command ability Thy Will Be Done on the archers to grant them +1 to their hit rolls. The archers take aim at the stormfiends, but inflicting a whopping 10 wounds. However, the stormfiends roll six 6s for their armor saves, so only 4 wounds get through!
The skeleton horsemen charge the rat ogors, inflicting 2 wounds, but both save rolls are 6s again! The rat ogors kill 7 knights in return, and 2 more fall to the battleshock roll, leaving only the standard bearer still standing.
Round 2
Luckily, I win the roll to go first. In my hero phase, 3 models are regenerated by the horsemen standard bearer. This battle is going to be a 6-round grind, so I need to pull back and whittle down the rat ogors before they get too close. Selketta commands Thy Will Be Done for the archers' shooting again. I have every unit fall back to corner, keeping the tomb king on the scenery. Unfortunately, the 20 archers won't fit, and two are pulled down by the soggy cenetery, which cuts their shooting in half (they can fire twice if the unit has at least 20 models). The archers shoot at the rat ogors and kill one of them.
In the Skaven turn, the stormfiends advance and burn 7 archers with their warpfire projectors. I remove the closest models to reduce the number that will be in range in case the stormfiends shoot again next round. The hell pit abomination holds and the rat ogors stand dumbfounded. In the battleshock phase, 3 more archers fall.
Round 3
The Skaven go first, both the rat ogors and stormfiends hold and shoot, burning only 1 more archer. I roll "dumbfounded" for the abomination (thankfully). In my turn, the horsemen banner regenerates 3 models bringing its unit back up to 7, and 4 archers also return. This time, I have the king use his command ability on the horsemen, the archers' shooting brings the injured stormfiend down to 1 remaining wound.
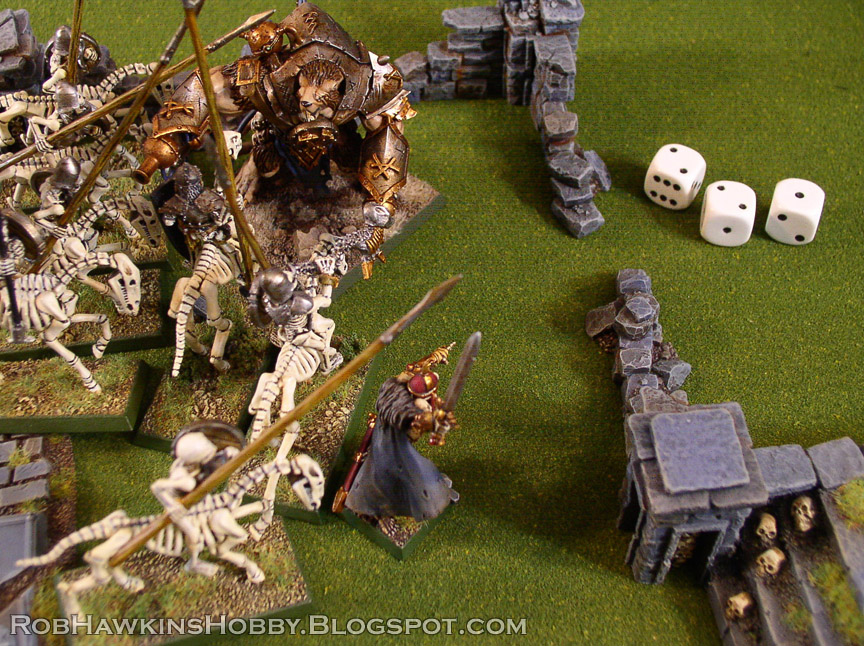
The skeleton horsemen only roll a 2 for their charge, but their hornblower allows them to always charge at least 6", so they make it, and Selketta follows them in, positioning himself so the stormfiends will have to pile-in and attack the horsemen. This time the horsemen fare much better and finish off 2 of the stormfiends, leaving the one with the warpfire projectors. He attacks back and hits three times but fails to wound at all. Selketta swings his great blade, but misses every attack!
Round 4
I get to go first and regenerate the horsemen back to full strength, and add 2 models to the archers. Selketta commands the skeleton horsemenagain so they can finish off the remaining stormfiend. The archers shoot and kill one of the rat ogors, bringing its unit down to 2 models. In the Skaven turn, I roll "hold" for both units. The rat ogors fail to hit anything with their warpfire guns.
Round 5
I need to control the objective in the center of the board at the end of the game, so I need to make a move this round or next. The Skaven, however get to go first, and I roll 6s for both of their actions– they move forward and charge the horsemen! I select the ogors to attack first and they kill 3 horsemen. The horsemen are still under the effects of Selketta's command ability, and inflict 5 wounds on the hell pit abomination, which then proceeds to wipe out the unit! Selketta inflicts 3 wounds, bringing the abomination to 8 wounds suffered. The archers are also within 3" so I have them pile-in and attack the ogors, but they only inflict 1 wound.
In my turn, the archers only regenerate 1 model. Selketta uses his command point to make his run roll a 6 so he can retreat up onto the hill near the objective. The archers do enough damage with their shooting to kill one rat ogor, and in combat they inflict 2 more wounds and lose 1 archer in return. At the end of my turn, I have more models in range of the objective, so I control the artefact!
Round6
In the final round, the Tomb Kings get to go first. The archers regenerate 5 models and Selketta commands them for +1 to their hit rolls, which allows them to shoot the last rat ogor to death. In the charge phase, since they are free, they charge the hell pit abomination, which was a hugh mistake because it makes all of its save rolls and then obliterates every last model in the unit.
The Hell pit abomination regenerates 2 wounds (bringing it back up to 6) and charges Selketta! Its "avalance of flesh" attack is less effective against a single model, and does nothing. Only one of its flailing fist attacks gets through, but the Tomb king's armor protects him, although he suffers 2 wounds from the abomination's gnashing teeth. Selketta strikes and scores two successful attacks for 3 damage each, enough to slay the beast! But wait-- after rolling on the monster's Too Horrible to Die chart, it's still alive! The Skaven do not have more models in range of the objective, however, so the tomb king retains control of it. Victory!
Selketta commanded his troops to sacrifice themselves as he wrested the artefact from the ancient crypt. As hell pit abomination tore through the skeletons and lumbered onto the barrow mound, Selketta drew his blade to parry its attacks, and dealt a fatal blow to the behemoth. As the creature writhed on the ground refusing to die, the Tomb King grabbed his treasure and escaped!
Post Battle
Since I scored a major victory –on hard mode no less– I get to choose an artefact from the Death Grand Alliance table. I select the Cursed Book, its -1 to hit will come en handy, I think. Selketta reconstitutes his units, the Casualty rolls, however, result in 4 archers and 1 horseman staying permanently dead. The Events roll results in "All is silent." So Selketta can proceed to the next battle having gained an artefact and only having lost a total of 5 troops. Unfortunately, being down even 1 model means that the skeleton archers have lost their ability to shoot twice.
Battle 2: Clash at Blackrock Pass (aka: Clash Amongst the Crypts)
I've set up another cemetery board, keeping in theme with the story. The entrance to the catacombs is at the far end. But more Skaven monstrosities stand between Selketta's band and their goal. The Skaven beasts are tougher than I thought, and I barely succeded in the previous fight. Hopefully I'll be able to get my hunting party across the field quickly and avoid taking too much damage.
Round1
The Skaven go first, but the stormfiends are dumbfounded and the hell pit abomination and rat ogors both hold. I have Selketta use his command ability on the skeleton horsemen, and then run with all three units, aiming for the left side of the battlefield. The archers shoot to little effect, and the horsemen charge the stormfiends, inflicting only 3 wounds on them. The stormfiends kill three horsemen in return.
Round2
I get to go first, and Selketta holds onto his command point rather than commanding any units (I'll need it to increase my run roll and escape). The horsemen regenerate 1 model, and then retreat and run to the edge of the battlefield and escape. The other units run up as well, and the archers inflict 2 wounds on the stormfiends.
In the Skaven turn, I roll a charge result on the action table for both the Stormfiends AND the hell pit abomination! The stormfiends move up 3" from my archers... but fail their charge roll with a 2! The abomination moves 9" and then rolls a 4 for its charge, so it can't get into combat either. Even tough they couldn't get to me, the Skaven units are trying their best to cut of my slowly advancing skeletons. The rat ogors, meanwhile, just sit dumbfounded over in their corner.
Round3
If the Skaven go first, I don't think Selketta is getting out of here alive. But I roll a 4 for turn order, so the tomb kings get to take the first turn. I make a high enough run roll for the archers to reach the opposite side of the battlefield, but there wasn't enough room to fit them all within 3" of the edge, so instead, they form a line to allow their king to sneak by. Selketta again sacrifices his archers to escape and claim a major victory. The archers shoot at the hell pit abomination and wound it 4 times.
In the Skaven turn, the abomination holds! but the stormfiends charge the archers successfully this time and massacre 8 of them. I pull the casualties farthest from the table edge, leaving only 2 in melee range, which don't inflict any damage. Then those 2 archers fall to battleshock.
Round4
I win the roll for first turn. The archers' banner returns 3 models to the unit, and they all retreat from combat and high-tail it off of the battlefield!
Post Battle
All three units made it through the battle this time, but 2 more archers become permanent casualties. The Events roll is a 1, "Deadly Rockslide," so 3 more archers are killed in a cave-in as the hunting party enters the catacombs. This leaves my units at 11 Skeleton Archers and 9 Skeleton Horsemen. For having scored a major victory, I gain a command trait for Selketta. The Death command traits aren't that useful (two cannot be used at all in this campaign). I select Red Fury, so Selketta might be able to fight a second time in each combat phase. Since my archery is greatly reduced, I'll have to rely on the horsemen and the Tomb King to slay the Boneripper.
Battle 3: Wrath of the Troggoth King (aka: Wrath of the Boneripper)
To represent the catacombs, I put out my large graveyard hill, with entrance walls near the stairs and a single large crypt.
My hunting party deploys in the center and the Skaven units are set up in the corners. Each round after the first, I'll have to roll to see if any more Skaven units or the Boneripper emerge to join the fight. My party will need to survive and have enough fighting power left to deal with the Boneripper when he arrives.
Round1
The tomb kings go first, and Selketta commands the horsemen. All the units run over toward the side to concentrate on the stormfiends and keep the other two units more than 12" away. The archers inflict 3 wounds with their shooting, but the horsemen only inflict 2 wounds on their charge. The stormfiends strike back, inflicting 11 wounds, which kills 5 horsemen!
In the Skaven turn, the rat ogors sit dumbfounded in their corner and the hell pit abomination advances 8" toward the archers. The stormfields hold, and proceed to eliminate the remaining horsemen in the combat phase.
Round2
The roll for emerging Skaven is a 1, so nothing happens. I get to go first, so it's time for some damage control. Selketta uses his command ability on the archers, and they both run back toward the corner. The archers shoot, but only inflict 1 wound on the stormfiends. The hell pit abomination holds, and the rat ogors advance and run toward the tomb king. The stormfiends move and make a 5" charge to get in combat with Selketta. They pile-in, but only two of them can get close enough to attack him. Even without the -1 to hit from the cursed book, they miss most of their attacks and only inflict 1 wound on Selketta. He retaliates, but fails to inflict any damage or to fight again with his Red Fury command trait. The archers are close enough, so they pile-in and (thanks to the king's command ability still in effect) score enough hits and wounds to finish off the badly wounded stormfiend.
Round3
The emerging Skaven roll is a 2– still no sign of the Boneripper. The Skaven go first and the rat ogors and stormfiends each hold. The abomination gets a charge result on the action table, so it rolls a 7 for its random movement, a 6 for it's charge roll, which isn't close enough to make it in. Phew! In the combat phase, the king and the archers are equally close to the stormfiends, so I choose the archers as their quarry. The cursed book prevents the stormfiends from doing too much damage– only 3 dead archers. Selketta then attacks, and gets to fight again with Red Fury, inflicting a total of 9 wounds, which kills one stormfiend and damages the last one. In my turn, the archers regenerate all 3 casualties and the Selketta uses his command ability on them, but they only inflict one wound on the enemy, leaving it to their king to finish it off.
Round4
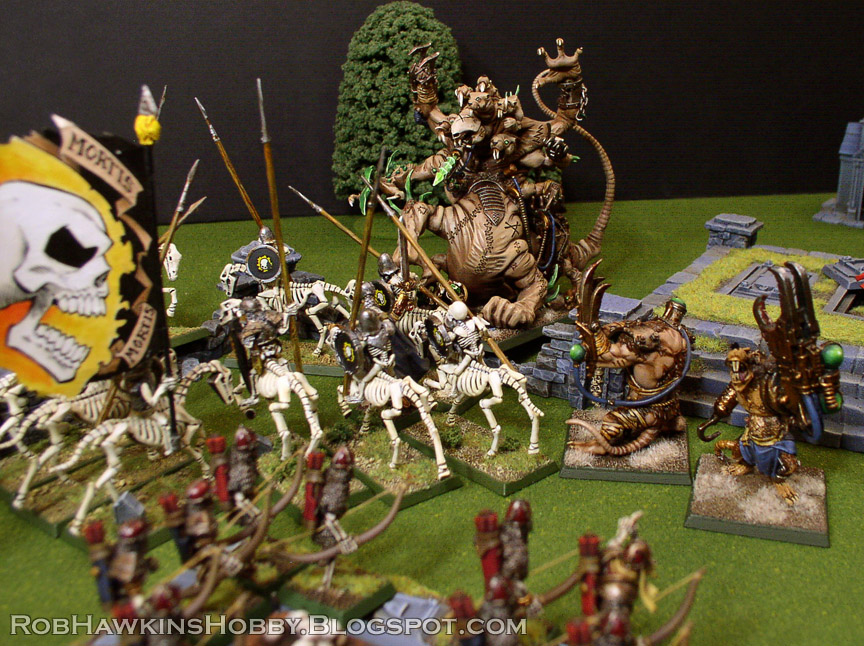
The Boneripper emerges from his lair! Since I can set him up in any corner of the battlefield, I place him closest to my party, so I might be able to fight him before I get bogged down by the hell pit abomination.
Unfortunately, the Skaven get to go first– The rat ogors hold, but both the abomination and the Boneripper charge the archers! I select the Boneripper to attack first, and he kills 5 archers. Because of the positioning, Selketta is stuck attacking the hell pit abomination. He only succeeds with one attack, and doesn't get to attack with Red Fury. Only one attack gets through, and no Red Fury. The abomination has to attack the archers and, as is par for the course, obliterates them all, leaving Selketta on his own.
Selketta uses his command point to make his run roll a 6, and retreats 10 inches away. My only hope is that the abomination can't reach him before he can get into combat and fight the Boneripper.
Round 5
In the fifth battle round, the Skaven got to go first, and it was all over...
The Boneripper charged Selketta as the other monstrosities maintained their positions. The tomb king held his cursed book aloft, bracing for the attack. Under the dreadful aura of the cursed artefact, the Boneripper's clubbing blows went astray, but the beast landed two successful attacks with its warpfire braziers, penetrating the king's armor and crushing him to the floor. Selketta's quest had come to an end, lost in Boneripper's lair.
This campaign was a lot of fun, and provided a nice distraction for an afternoon. I think my alternate Skaven rules are pretty balanced– I barely squeaked by in each scenario on "hard mode." Normal mode (with only 2 units in the battles) might be a little easier. I'll have to give it another go with a new hunting party. Maybe one of my vampires can succeed in defeating the Boneripper (and recover Selketta's corpse from the catacombs).


No comments:
Post a Comment
All comments are moderated. Any comments containing links will not be approved and will be marked as spam.