I've had my eye on the Immortal/ Deathmark kit for a while, and the imminent update to the Necron range seemed like the perfect opportunity to pick it up. Here's a look at how I was able to get both units out of the same kit (with some added spare parts, of course).
I already have five classic Immortals armed with gauss blasters, and I wanted the new Immortals to match the aesthetic of the classic models so I could add them into the same unit. That involved making a few tweaks to the weapon and the body of the figure.
For the gauss blaster, I cut off the barrels and replaced them with the classic green rods. The rails along the top and bottom were reconstructed with styrene rod. The gun muzzle fits over the end, and I attached the bayonet, which I trimmed to be closer in size to the bayonets on the old Immortals. I even trimmed the handle into a more squared-off shape.
To match the style of the attachment cables, I cut off the plastic cables and replaced them with guitar string and thick floral wire. The central wire in the guitar string was used to pin the wire at each end into the spine and back of the gun. I added some styrene tubing and U-strip to make the attachment points on the butt of the gun.
To get the Immortal's anatomy to match better, I swapped out the spine for a Necron Destroyer's spine, and I trimmed the collar and shoulder pads to match the shape of the classic model.
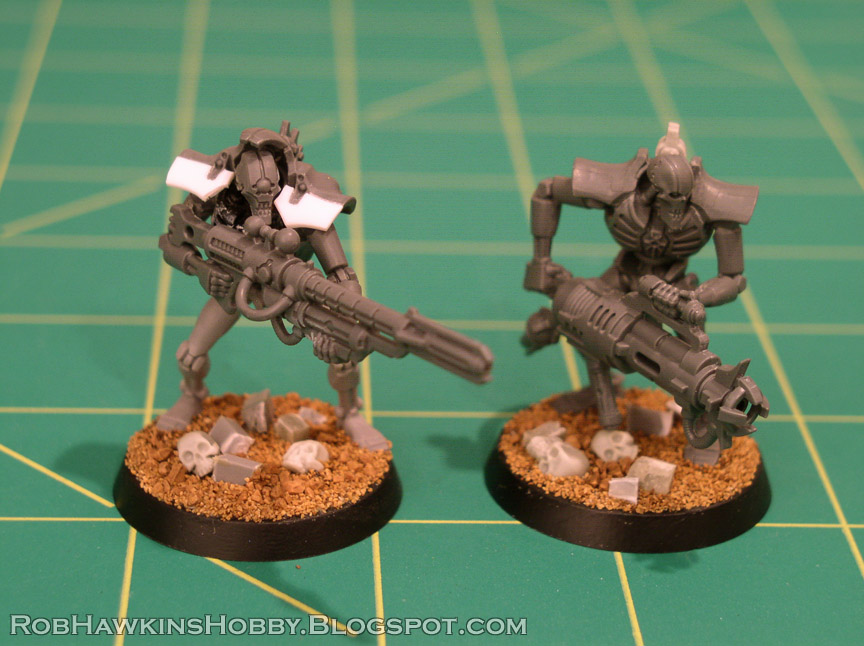
In order to swap out the gauss blaster and tesla carbine, I pinned the left arm at the wrist so it plugs into the hand on the gun. The cables pin into the bottom of the spine, and the right arm fits snugly in the shoulder socket.
With the Immortals finished, I was left with the spare heads, backs, spines, and weapons from the Deathmarks. I only needed to fill in the front half of the torsos and the legs, which I got from my left over Necron Warrior parts.
Since the warrior torsos are a little smaller, and don't line up exactly, I trimmed the parts so they would sit flush and match up at the neck, and then filled the gaps on the sides with modeling putty.
To build the front half of the shoulder pads, I used a 7/16-inch styrene tube, which I cut into quarters. Then, I carefully trimmed one edge to fit along the shoulder and collar, and glued them in place.
Once the glue had set, I trimmed the ends and front edge, leaving me with a complete shoulder pad that matched the curve of the model. To cover the seams, I applied a little super glue into the gap and sanded the surface until it was smooth.
After that, it was simply a matter of attaching the weapon arms, then the legs to set the model's pose, and finally, the head. I needed to trim the neck pistons a bit to allow the head to turn and look in the direction of the rifle. In the end, I'm pretty happy with how it turned out!
The last step was to base the units with ballast, sprue rubble, and skulls.
I bumped up my old Immortals to 32mm bases by trimming away the sides leaving the top level as a flat disc, which I glued on top of the new base and added some sand around the perimeter. Now, on to the painting!


Oooh, I have a spare Necron Warrior Sprue, this is an excellent idea for them…
ReplyDeleteGo for it! Such a simple conversion, no need to let those Deathmark parts go to waste. :)
Delete